Troubleshooting
- 07 Aug 2025
- 5 Minutes to read
-
Contributors


-
Print
-
DarkLight
Troubleshooting
- Updated on 07 Aug 2025
- 5 Minutes to read
-
Contributors
-
Print
-
DarkLight
Article summary
Did you find this summary helpful?
Thank you for your feedback!
Section 7: Troubleshooting
This section describes how to correct common issues that may occur.
Section 7.1: Vive Trackers Not Recognized or Tracking
This section describes how to correct the Vive Trackers if they are not working,
USBDeview
If the Vive Trackers are not tracking or if the ARFX Launcher is not able to automatically pull in the tracker serial numbers, double check the serial numbers. Use the following procedure:
- Connect the USB-A to Micro USB (for Tracker 2.0) or USB-A to USB-C (for Tracker 3.0) cable from the computer to the Vive Tracker.
- Open the USBDeview on your desktop.
- In the USBDeview, under the Serial Number column, look for something that starts with LHR. It will be listed with a serial number. If it displays as green, this means it is active and connected to the machine.
- To differentiate between the two trackers, connect only one tracker at a time and see what shows up in USBDeview.

- To differentiate between the two trackers, connect only one tracker at a time and see what shows up in USBDeview.
BEST PRACTICE: It is recommended to label your trackers with their unique Serial Number for ease of identification on set. It is also recommended to label which wireless USB Dongle belongs to which tracker by identifying them as A, B, etc. for ease of future identification and troubleshooting.
A two-Vive Tracker system is generally recommended, with a Calibration Vive Tracker and a Hero Vive Tracker, but if only one tracker is available, please be sure to use the same Serial Number of your one Vive Tracker for both Calibration Tracker and Hero Tracker fields.
SteamVR
If the Vive Trackers serial numbers are input correctly but are still not tracking, use SteamVR to help troubleshoot.
- If the ARFX Launcher is still open, close it by pressing ESC or Backslash (\) and choosing Quit to Desktop on the bottom left.
- Navigate to the SteamVR window or launch it if it is not on.
- If SteamVR asks for a head-mounted display (HMD), launch the ARFX Launcher and click on Patch SteamVR button and relaunch SteamVR. This should remove the requirement for the HMD and show you any connected Vive Trackers and Base Stations.
- If there are any missing Vive Trackers and/or Base Stations:
- Double check USB cables and USB extension cables for Vive Trackers are fully connected into the Trackersand the computer.
- If there is a lot of wireless/mobile interference in a space, it’s best to keep Vive Trackers wired instead of relying purely on the wireless dongle.
- Asking nearby cast/crew members to turn off their mobile devices may also help improve tracking in general.
- Make sure to position the trackers and base stations so they can see each other. Give it a few moments as it usually takes a few seconds before SteamVR will recognize a previously unconnected device.
- Double check that the trackers have a green (active) or amber (active and charging) light showing on their LED light.
- If a tracker LED light is showing blue or white instead, be sure to press the Vive Tracker button. This should turn it green or amber.
- If using more than two Base Stations, make sure that all base stations are on their own unique channels.
- Double check USB cables and USB extension cables for Vive Trackers are fully connected into the Trackersand the computer.
- If none of the above work, restart the computer and start up SteamVR and ARFX Launcher again.
Section 7.2: Tracking and Jittering Issues
If you are having jitters with the tracking,
- Make sure there isn’t any IR being reflected towards the puck
- This can cause the puck to jitter and lose tracking, but the tracking will come back.
- If you are losing tracking, make sure the puck isn’t being blocked, and it is being seen by the Base Stations.
- It is possible someone may have accidently bumped one of the Base Stations while setting up. In this case you will just need to recalibrate.
- If these solutions haven’t worked out, you can hardwire the puck using a USB-A to Micro-USB or USB-A to USB-C cable. This will stop the jitteriness.
BEST PRACTICE: If tracking is jerky for a slow-moving hero camera shot, lower the Positional and Angular values down by 0.01 or 0.001 increments at a time until the tracking is smooth. If the hero tracker is sitting still but there is perceived jitter on the ARFX background, increase the Positional and Angular values up by 0.01 or 0.001 increments until the jitter no longer shows.
Section 7.3: Recommended Wires
All wires used with ARwall should be the most up-to-date versions for best performance:
- HDMI should be minimum of 2.0.
- DisplayPort should be minimum 1.4.
- If converters are used, be sure to match the minimum versions listed above.
- USB-A Extension Cables should be a minimum of 2.0 or 3.0. If this cable needs to extend longer than 50 feet, fiber optic USB extension cables are recommended.
Section 7.4: Project File Issues
If ARFX Launcher keeps closing/crashing after hitting launch, or not opening the login window, try the following:
- If the login window does not appear, make sure to download and install .NET6 Runtime.
- This is required for the login window to communicate with our software. You can download your appropriate .NET6 Runtime here: https://dotnet.microsoft.com/en-us/download/dotnet/6.0/runtime
- If you entered an incorrect Activation Code with your login and password, follow these steps:
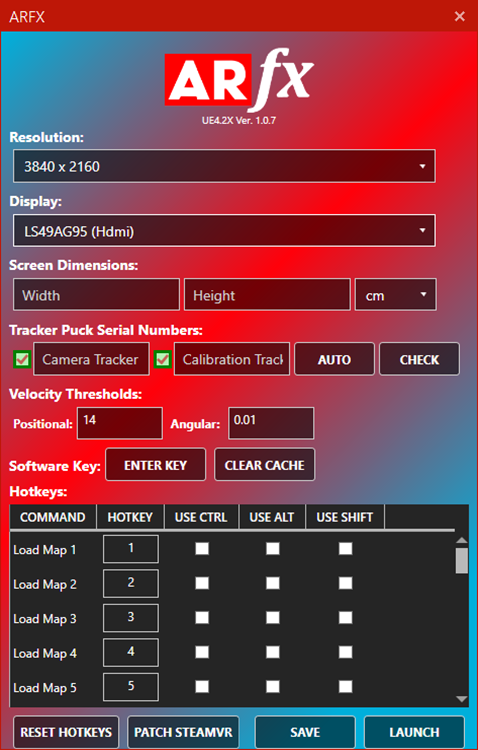
- Open the Launcher and locate the ‘Software Key’ section
- Click CLEAR CACHE, click ENTER KEY and enter your Activation Code once more.

Section 7.5: ARFX Launcher Loading on Wrong Display
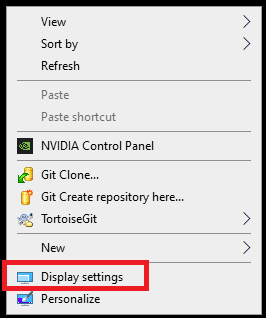
- If the ARFX Launcher does not load on the display you selected, please set the selected display as your “main display.” To do so, right click on the desktop and select “Display Settings.”
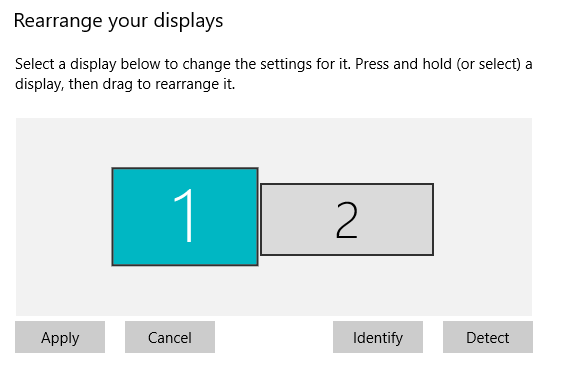
- Select the display that you want to load the ARFX Launcher on under the “Rearrange your displays” section. (Screen 1 is selected below)
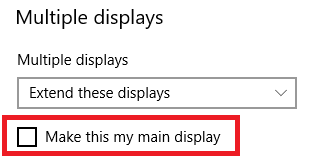
- Scroll down to “Multiple displays” section and click on “Make this my main display”
- Close out Display Settings and launch ARFX Launcher. It should now load on your intended display.
Section 7.6: ARFX Launcher Loading Grey or Black Screen after Successful Login
- If the ARFX Launcher does loads a grey or black screen after a successful login, this is likely due to the server not recognizing your VIVE trackers. Make sure your VIVE tracker(s) are connected to your server using SteamVR or checking if the Tracker Puck Serial Numbers have a green check mark on the ARFX Launcher user interface (clicking "AUTO" or "CHECK" can help the server find any connected trackers).
- If the VIVE tracker(s) do not show up in SteamVR or on the ARFX Launcher user interface, make sure that your VIVE trackers are connected to your server via wired USB cable or USB extension cable.
- The physical VIVE tracker puck LED light should be amber or green to show that it is successfully connected to your server.
- If the LED light is white, then quickly press the center button on the VIVE tracker to wake up the tracker. The LED light should then turn amber or green.
- Plugging in the wireless dongle for each VIVE tracker (in addition to it being hard wired to the server) can help with connectivity as well.
- Once the VIVE tracker is being recognized by your server, return to ARFX Launcher and proceed to calibrate. This should resolve the grey/black screen issue.
Was this article helpful?