General Computer Set Up
- 07 Aug 2025
- 2 Minutes to read
- Contributors


- Print
- DarkLight
General Computer Set Up
- Updated on 07 Aug 2025
- 2 Minutes to read
- Contributors
- Print
- DarkLight
Article summary
Did you find this summary helpful?
Thank you for your feedback!
Section 3: General Computer Set Up
This section describes how to set up your computer for use with the ARwall ARFX Pro Plugin.
Section 3.1 Computer and Hardware Requirements
Before you get started, ensure that you have the hardware components listed in Table 1 below for the most optimal performance for the ARwall ARFX Pro Plugin.
Table 1: Main Components and Accessories
Main Component | Accessories |
Windows PC machine with recommended Nvidia GeForce RTX 2080 graphics card or better (minimum GTX 1080) |
|
Vive Pro Tracking Hardware (see Section 5: HTC Vive Motion Tracking Hardware Set Up for further information) |
|
Optional Peripherals |
|
License |
|
Section 3.2 Boot Up Computer
If you are using your own computer
To boot up the computer, do the following:
Plug in all accessories, including:
- Mouse
- Keyboard
- Monitor/Screen/Projector/LED wall
- USB Hub
- Any additional cables
Please refer to Section 2.1, Hardware Requirements, for more details on hardware requirements.
- Turn on the computer
Section 3.3 Password Protection
ARwall should have provided you with an Activation Code to access the ARFX Pro Plugin. We will discuss where to enter this activation code in section Section 4.1: Installing ARwall ARFX Pro Plugin. This product is for a SINGLE seat license on a single machine. If you would like to purchase additional seats, move to another machine, or misplace your activation code, please get in touch with your ARwall representative or email support@arwall.co, and we will provide it to you.
Important
According to the Terms of Sale, it is the responsibility of the purchaser to secure all ARwall IP to the best of their ability. This includes, but is not limited to, keeping your passwords secure, system password protection, and physical security locks when appropriate.
Section 3.4 Prerequisite Software Installation
Please refer to Section 2.2 Software Requirements for detailed instructions on the required software installations and instructions on how to install them.
Important
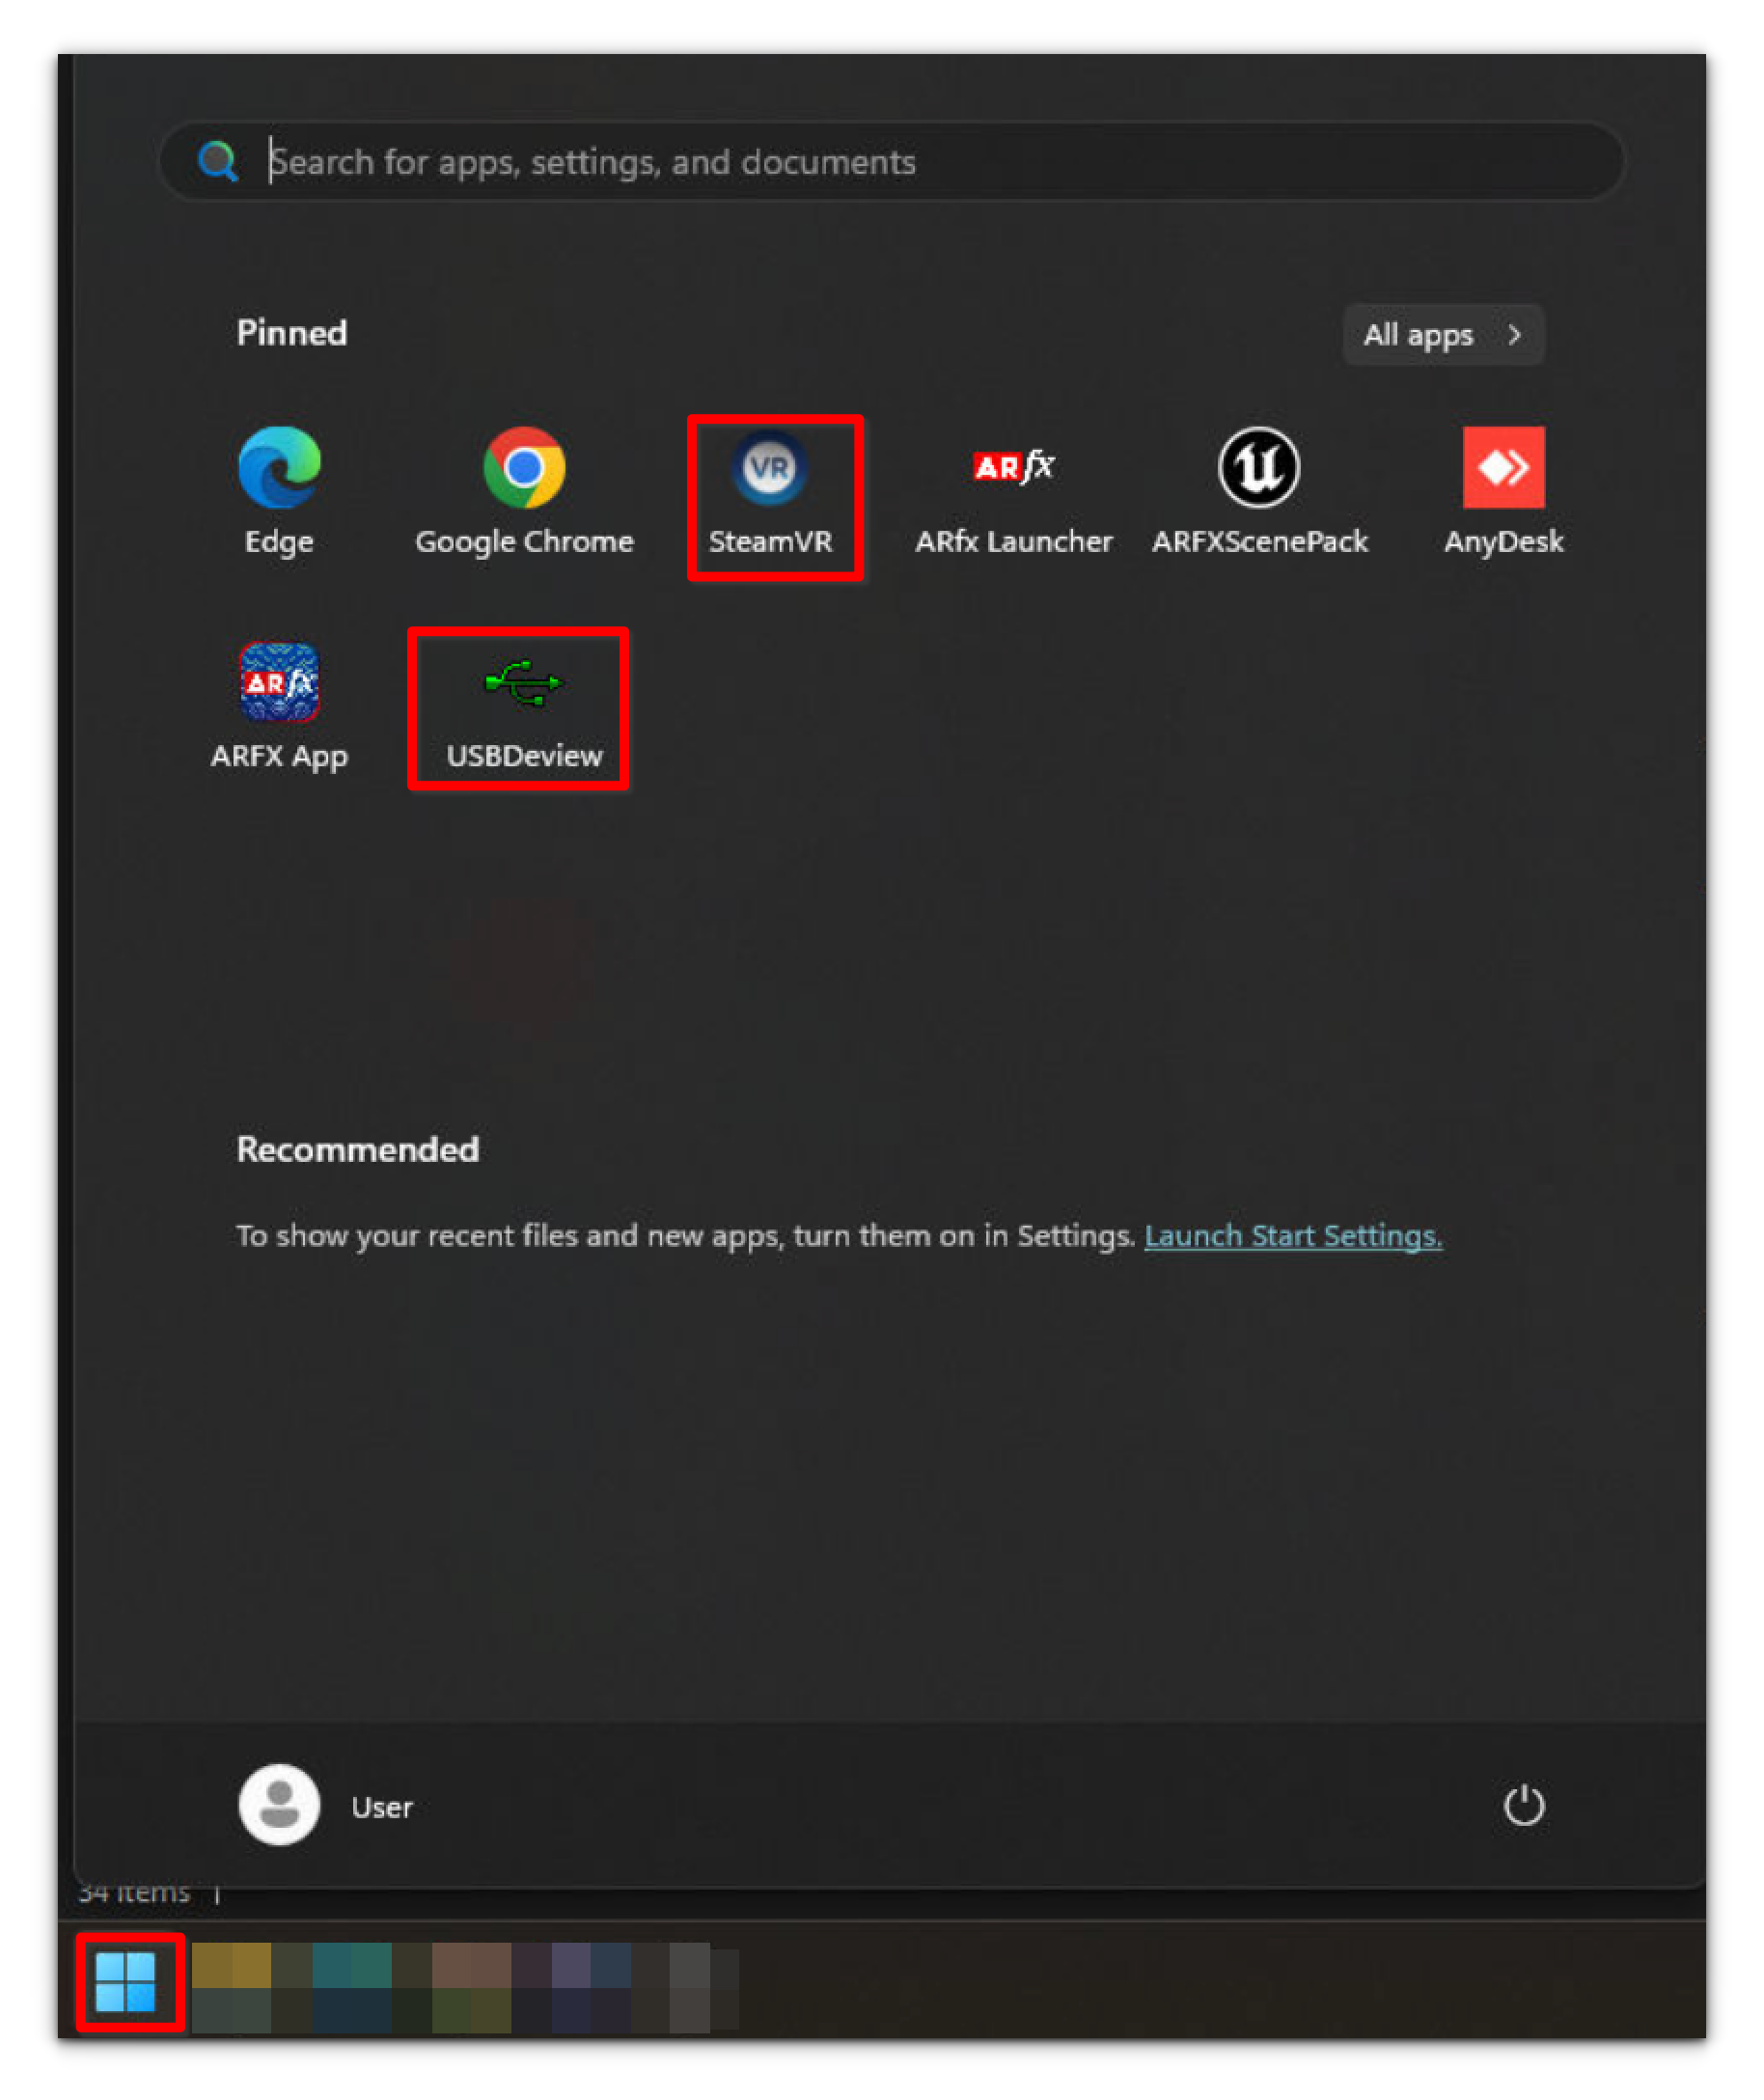
It is recommended to pin SteamVR and USB Deview to the Windows Start Menu for ease of opening the software when needed later. To do so, right click on the EXE file and select “Pin to Start.”

Alternatively, you can add SteamVR by clicking the Windows button, searching for “SteamVR” in the Microsoft Search bar, and selecting “Pin to Start.” Once both applications are pinned, they will be easily accessible from the Start menu when you press the Windows icon.
Section 3.5 SteamVR Software Set Up
After starting up SteamVR, if it asks you to plugin in your VR headset or HMD and does not let you see the attached Vive Trackers or Base Stations without a headset attached, do the following:
- Navigate to the drive that SteamVR is installed in on Windows and locate the default.vrsettings file. It is usually located on the C Drive at C:\Program Files (x86)\SteamVR\resources\settings\default.vrsettings or C:\Program Files (x86)\Steam\config\default.vrsettings
- Open the default.vrsettings file with Notepad or equivalent software.
- Locate the line “requireHMD”: true
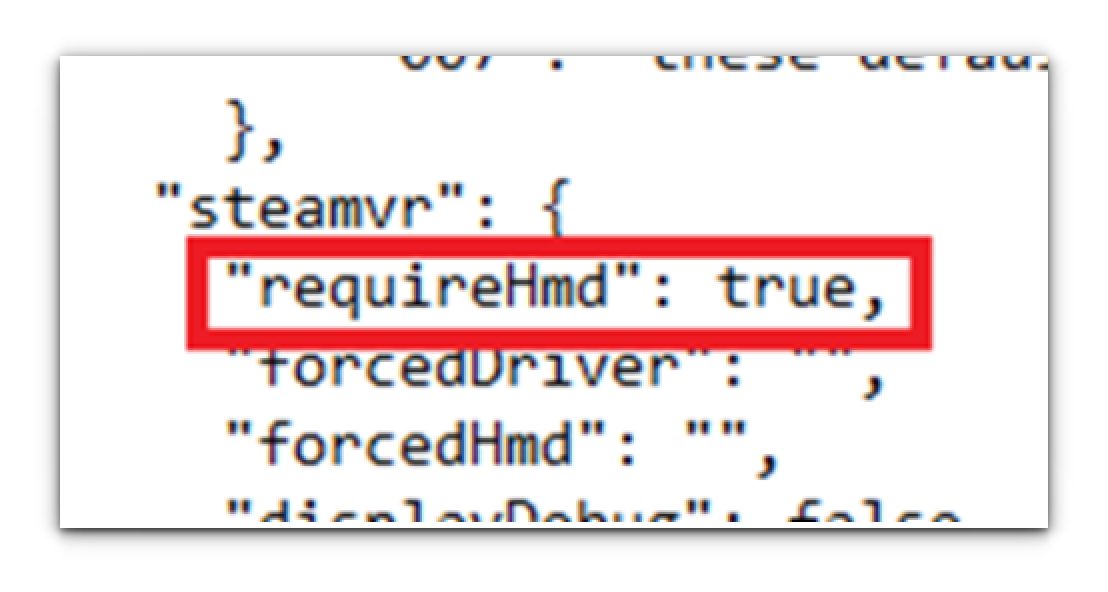
4. Change the word “true” to “false”, and make sure the comma after the word is still present.

5. Save the file and close.
Important
If SteamVR updates, these steps may need to be repeated as SteamVR may ask for the VR headset/HMD again.
Was this article helpful?