ARwall Quick Setup, Adding Your First Camera Actor and Tracking Component
- 07 Aug 2025
- 4 Minutes to read
- Contributors


- Print
- DarkLight
ARwall Quick Setup, Adding Your First Camera Actor and Tracking Component
- Updated on 07 Aug 2025
- 4 Minutes to read
- Contributors
- Print
- DarkLight
Article summary
Did you find this summary helpful?
Thank you for your feedback!
Section 5: ARwall Quick Setup
If you are reading this text then you have successfully installed ARwall's ARFX Pro Plugin! In this section, we will detail some quick steps to get started with our virtual production cameras without tracking. If you want to know more about how to setup your tracking hardware, please refer to the ARFX Pro Plugin Tracking Components section.
This Knowledge Base assumes that you have some experience using the Unreal Editor. It is highly recommended that you at least complete some of the official UnrealCourses before you attempt to do anything with this plugin
Section 5.1 ARwall ARFX Pro Plugin Quick Setup
To set up the ARwall ARFX Pro Plugin, do the following:
- Open the Unreal Engine 5.3 or 5.4 project in UE 5.3 or UE 5.4. Be sure to match the version of the plugin to the version of the UE project file.
- To check that the Unreal Engine project file opens in the right version or to change the version of the Unreal Engine project, do the following:
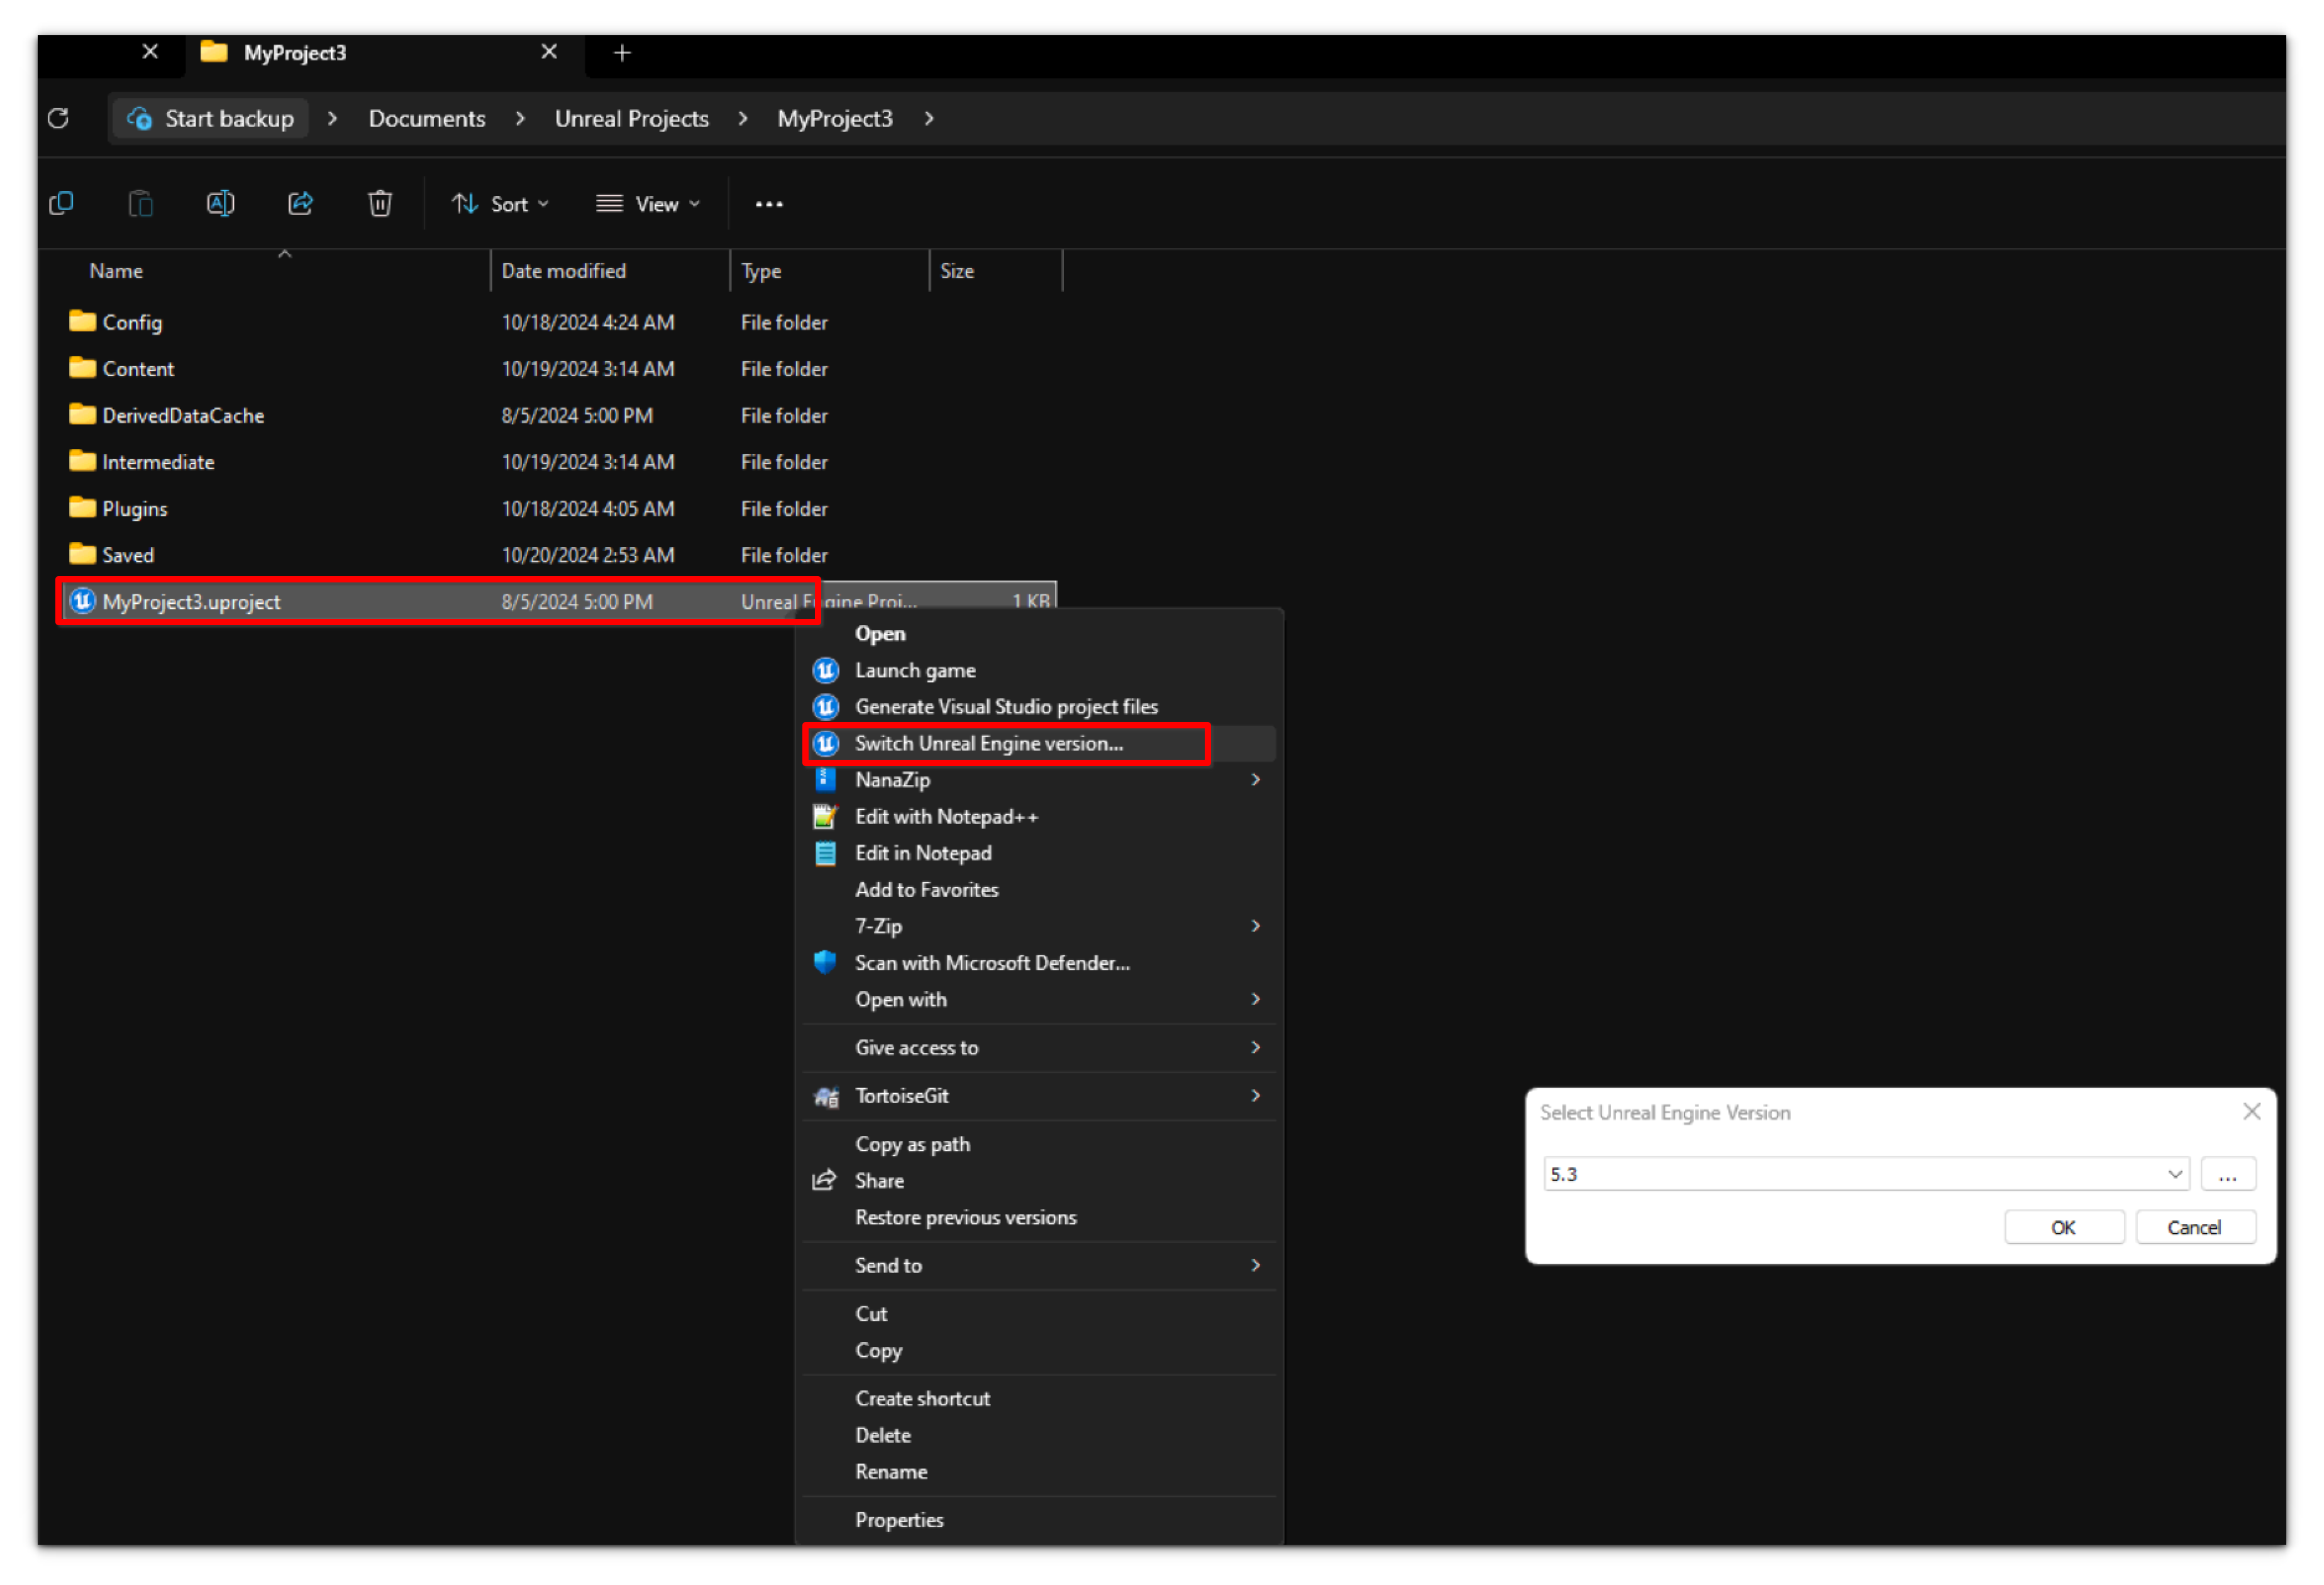
- Right-click on the .uproject file and select Switch Unreal Engine version.
- Select the right version and click OK to set the version.
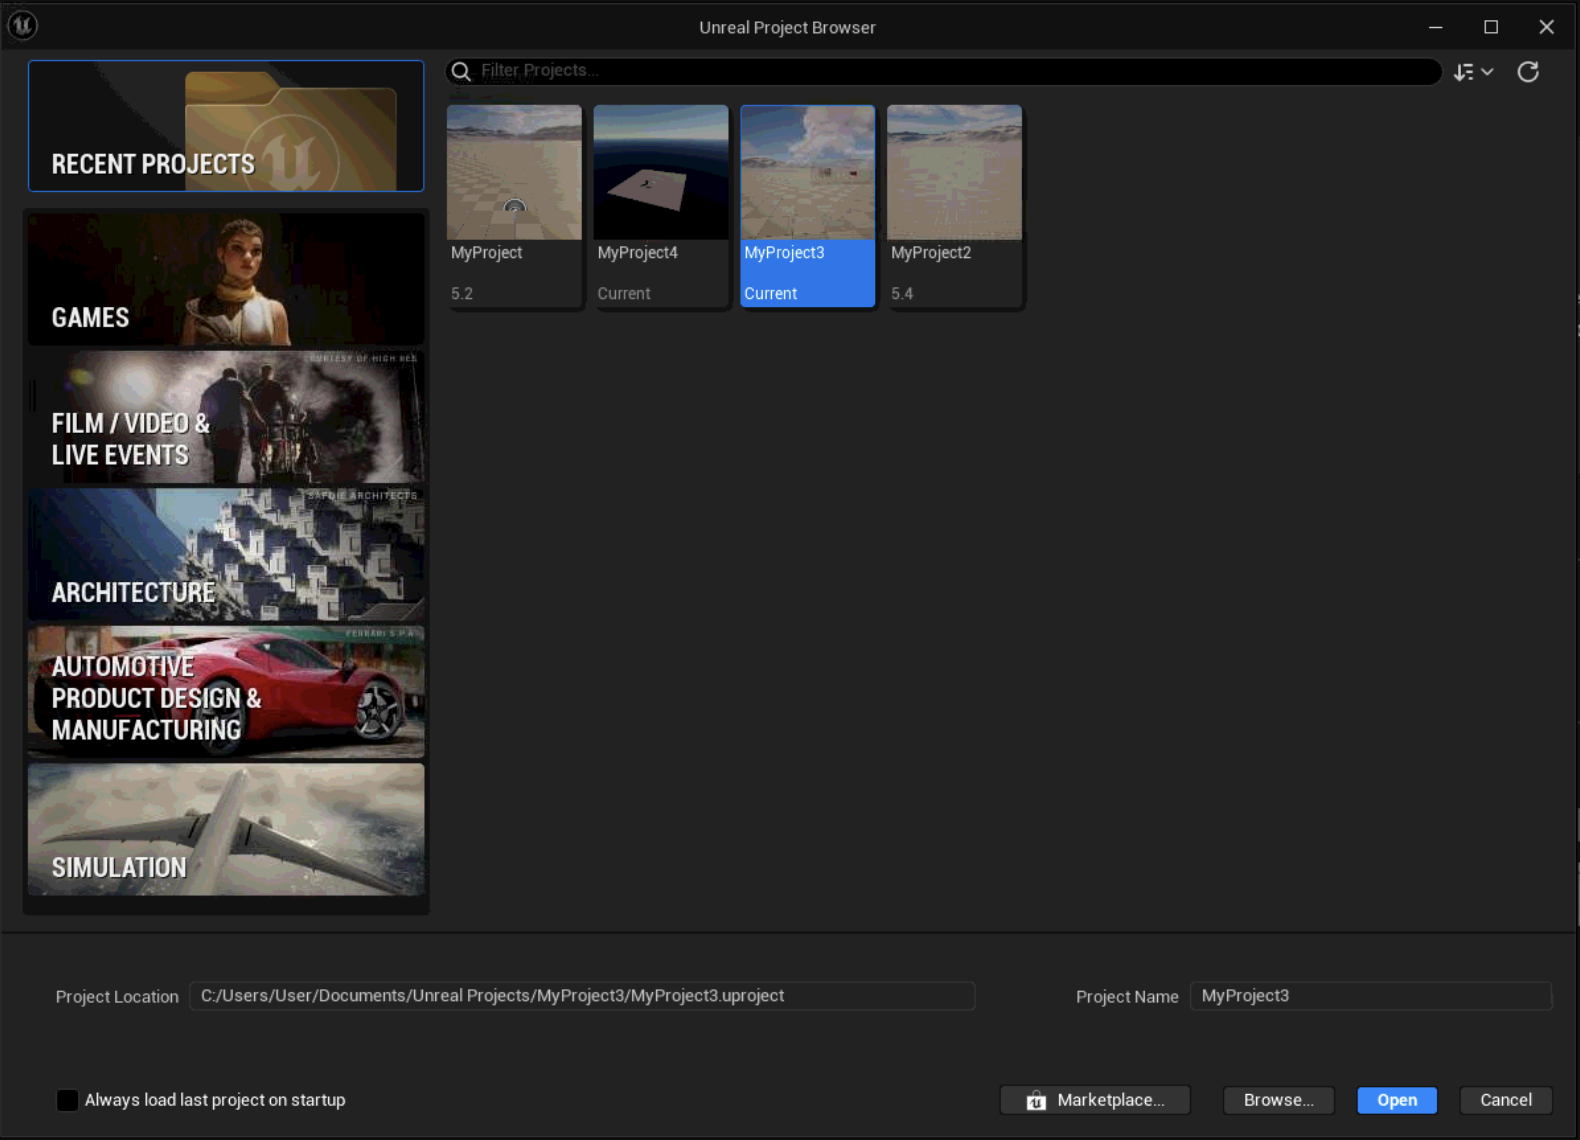
5. Launch the unreal engine and open your project.
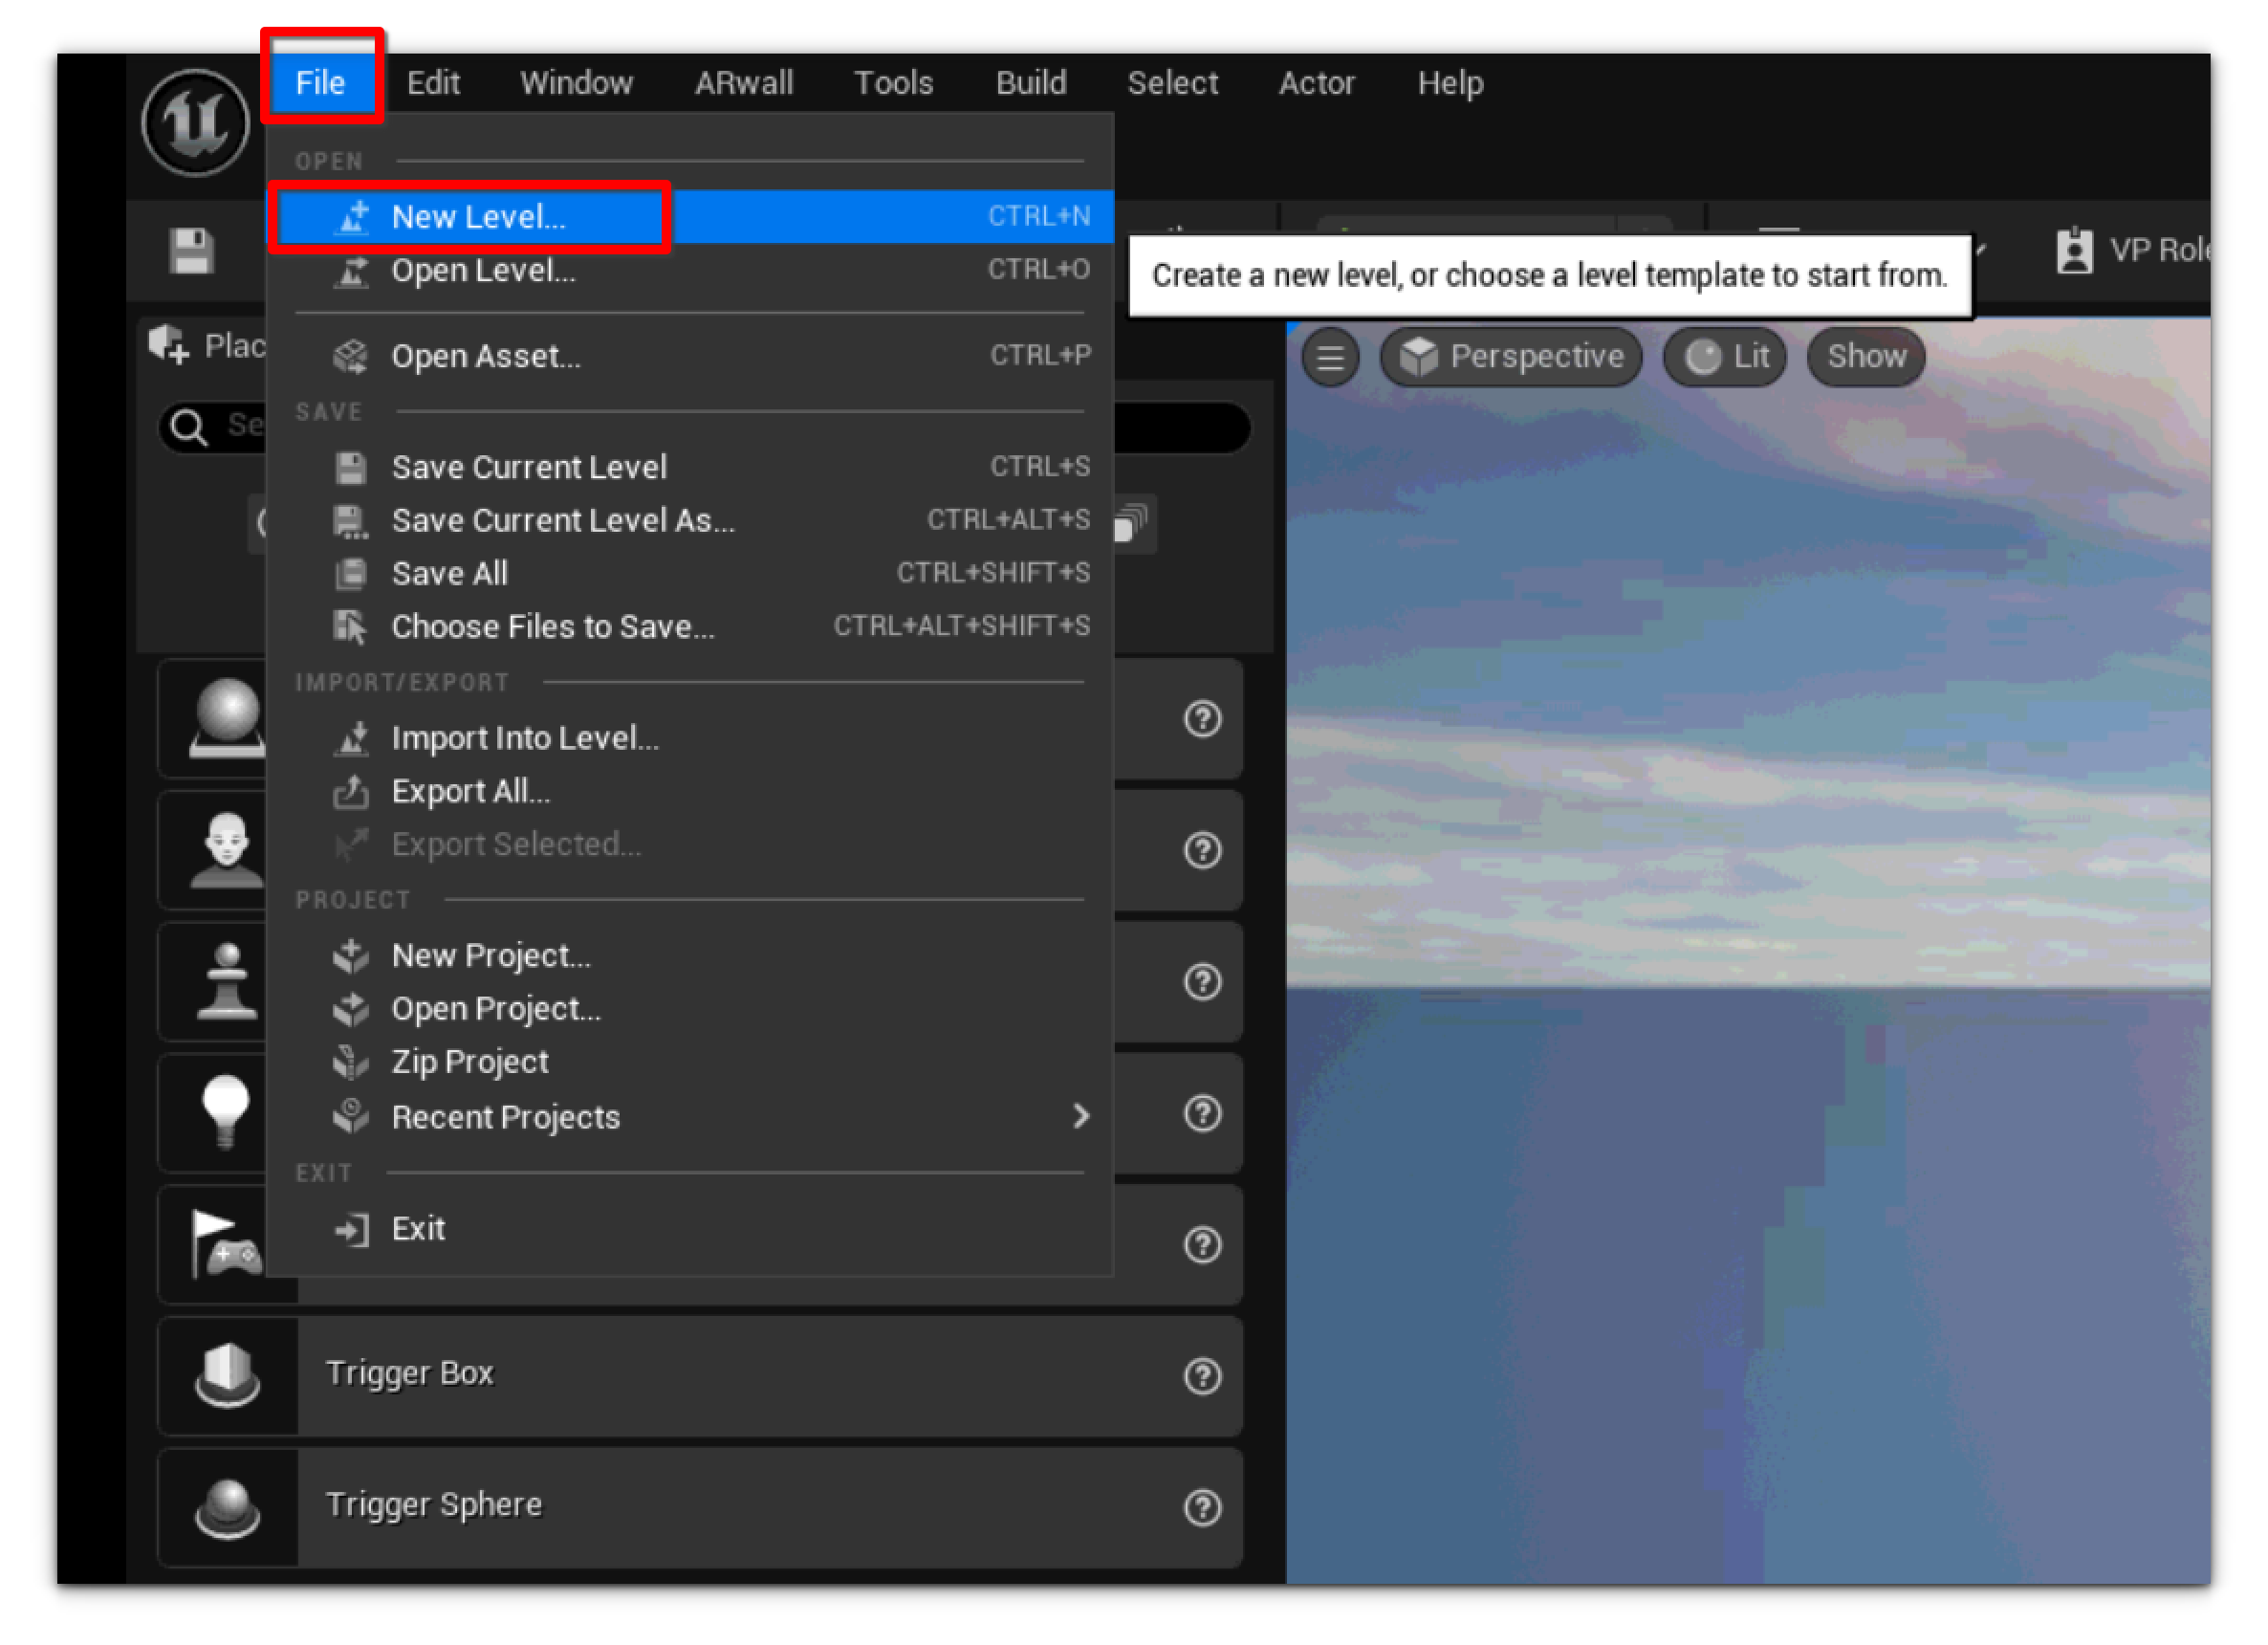
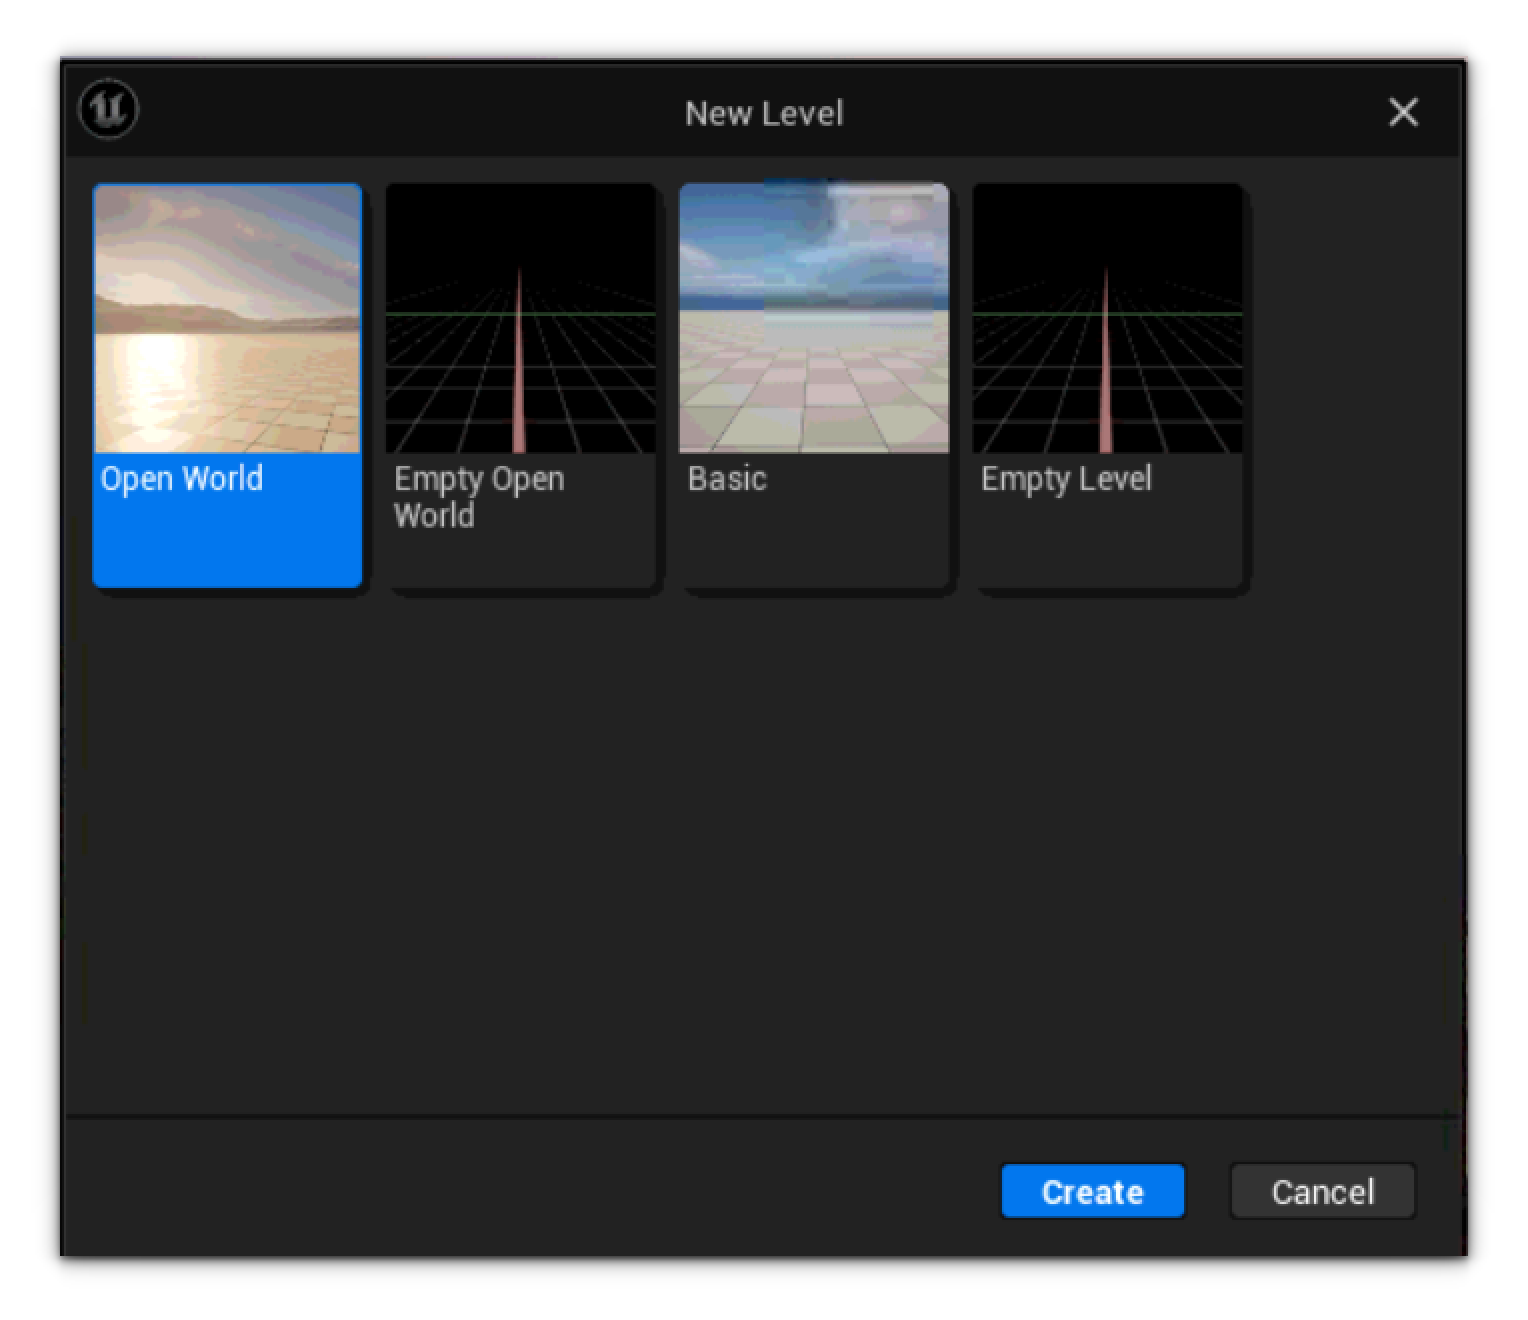
6. To start, you may want to use an empty or example map built into Unreal, such as Basic or Open World (File > New Level).
7. Once the project opens, let us see how you can place your ARFX Camera actors. Using this menu, you can place ARFX Pro's actors. For this quick start, we'll be placing down the ARFX Pro Camera Actor.
Section 5.2 Adding an ARFX Camera Actor
The ARFX Pro Camera Actor is our primary tool that makes our method of virtual production do its magic. It acts as our all-in-one package that handles inputs, UI, and of course, the image warp effect given a valid tracking component. Without this, nothing can get done!
Important
Only one ARFX Camera can be in a scene/level at any given time!
1. In this section, we'll detail what the camera is, a tiny bit of what it can do, and how you can customize it to your needs.
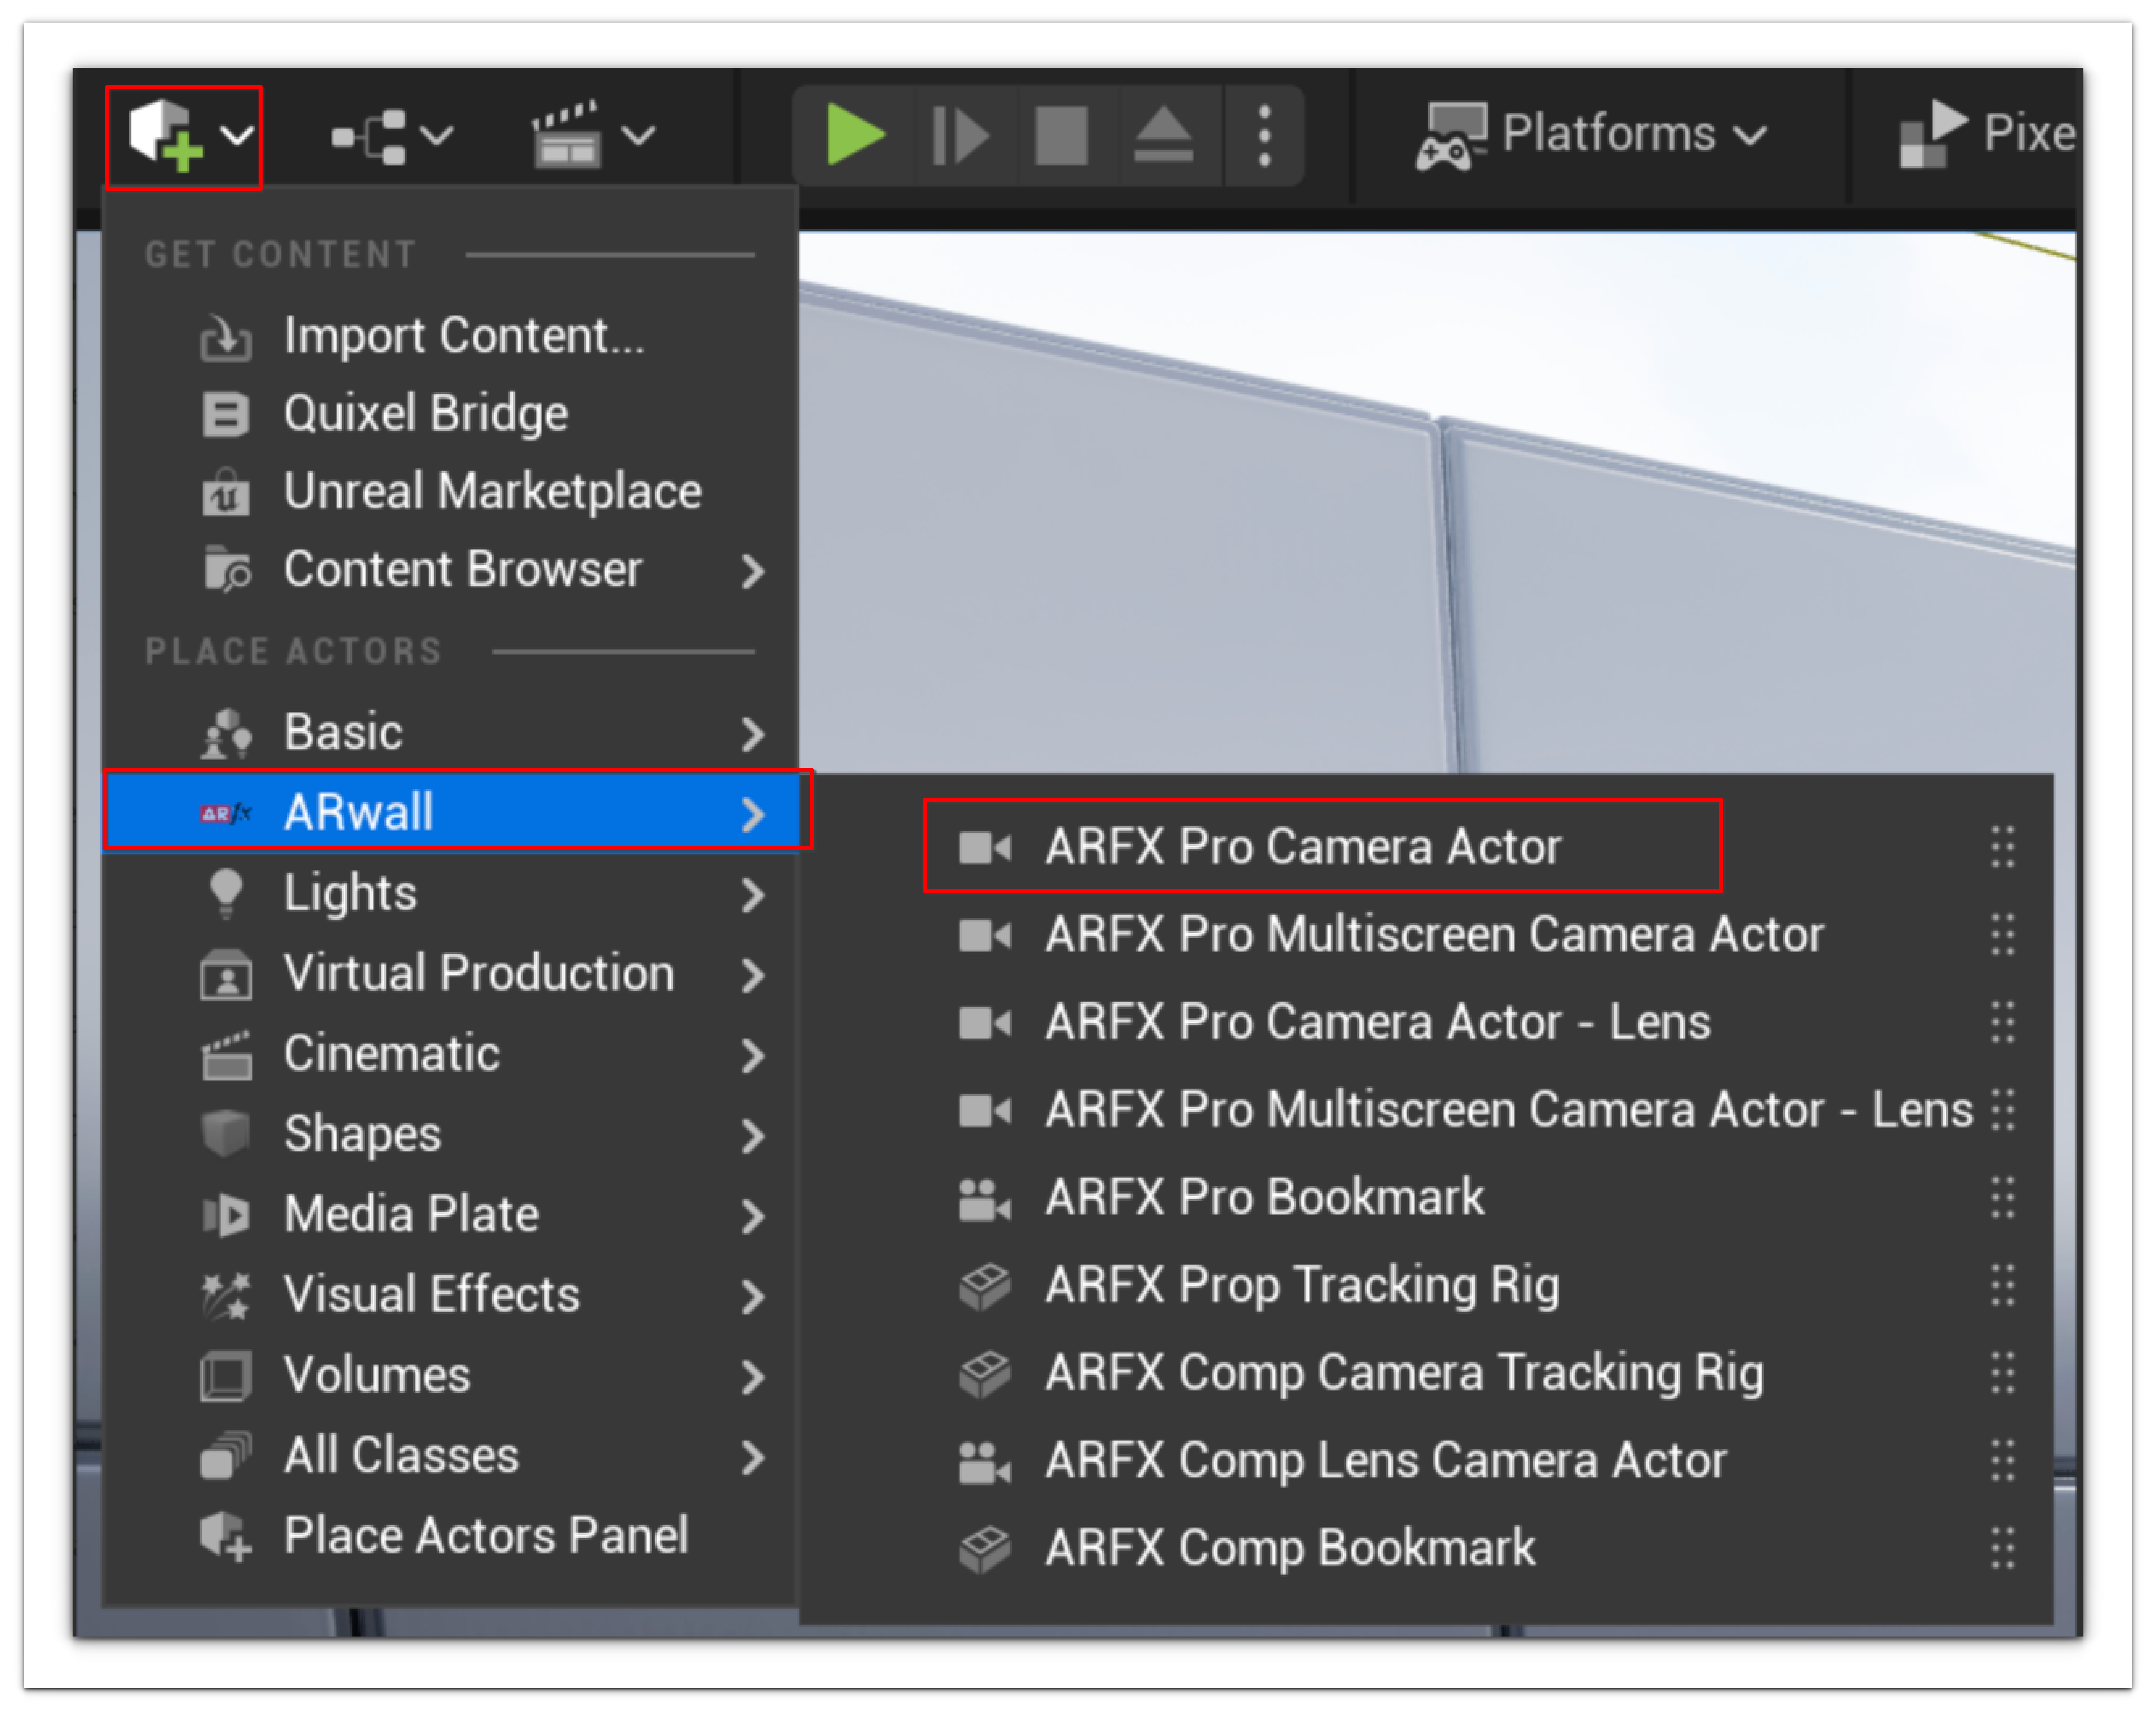
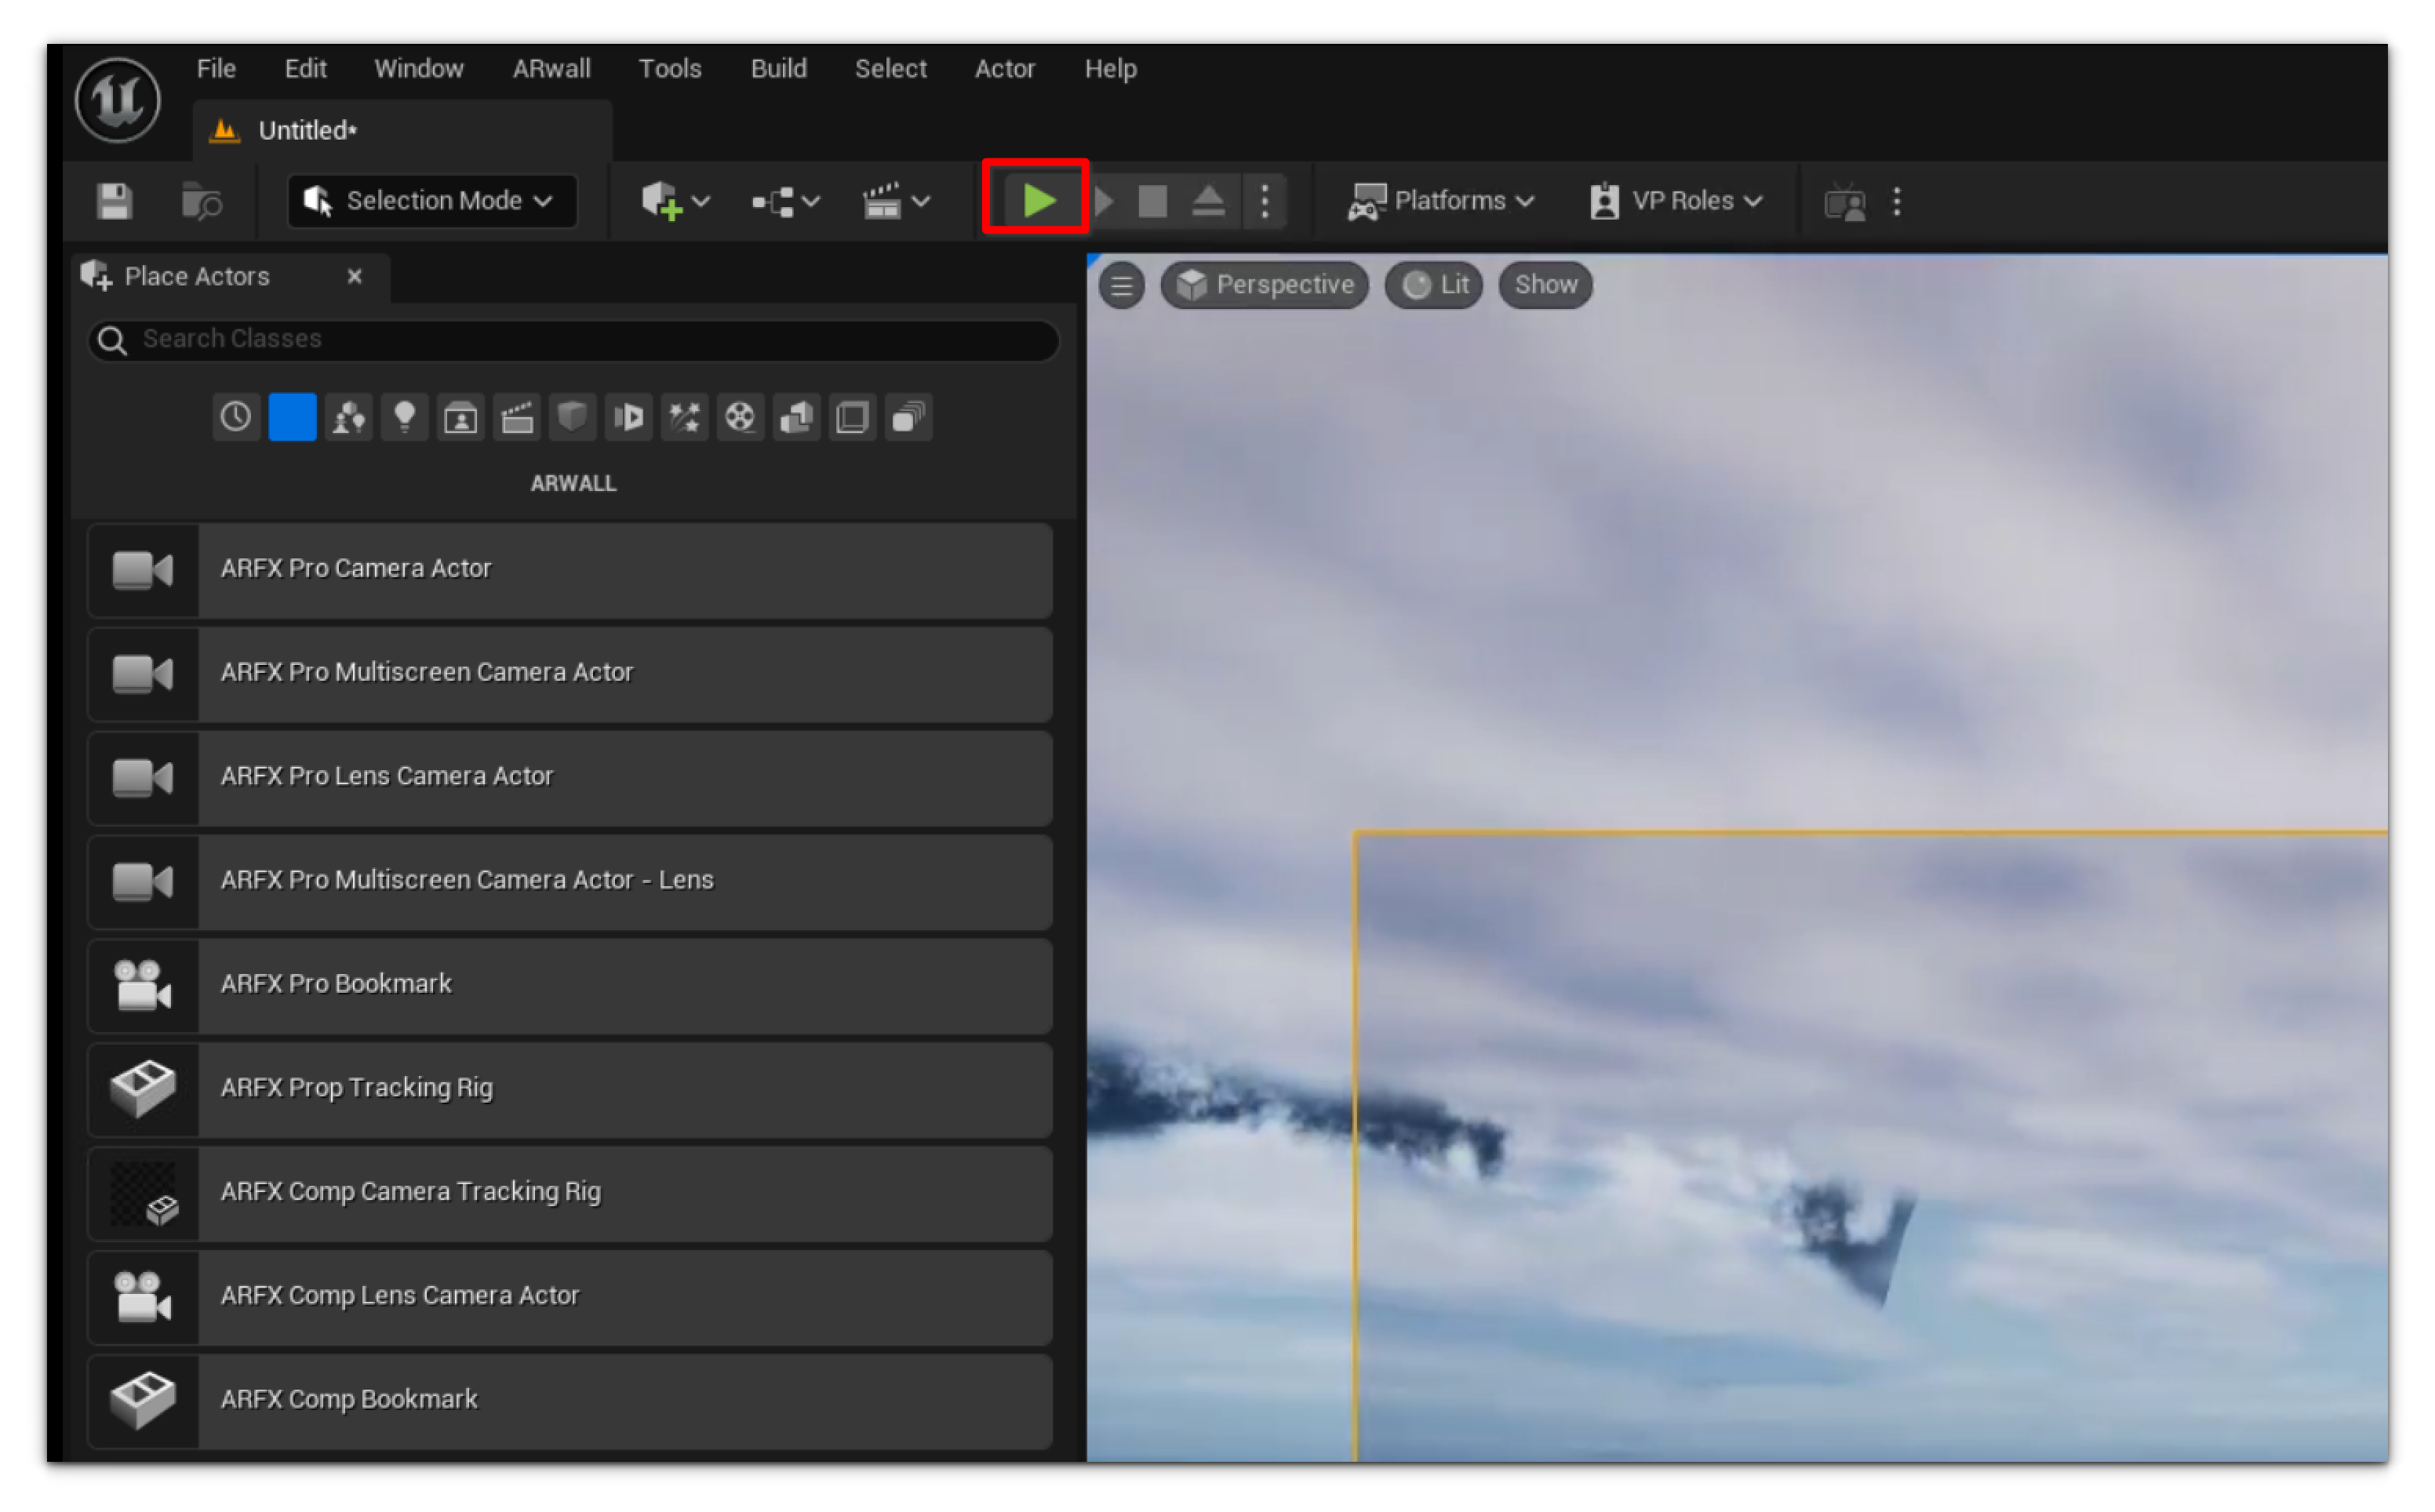
2. Start by clicking the green + icon, as highlighted in the image below.
3. From the dropdown menu, hover over the ARwall option and click the ARFX Pro Camera Actor option from the menu on the side.
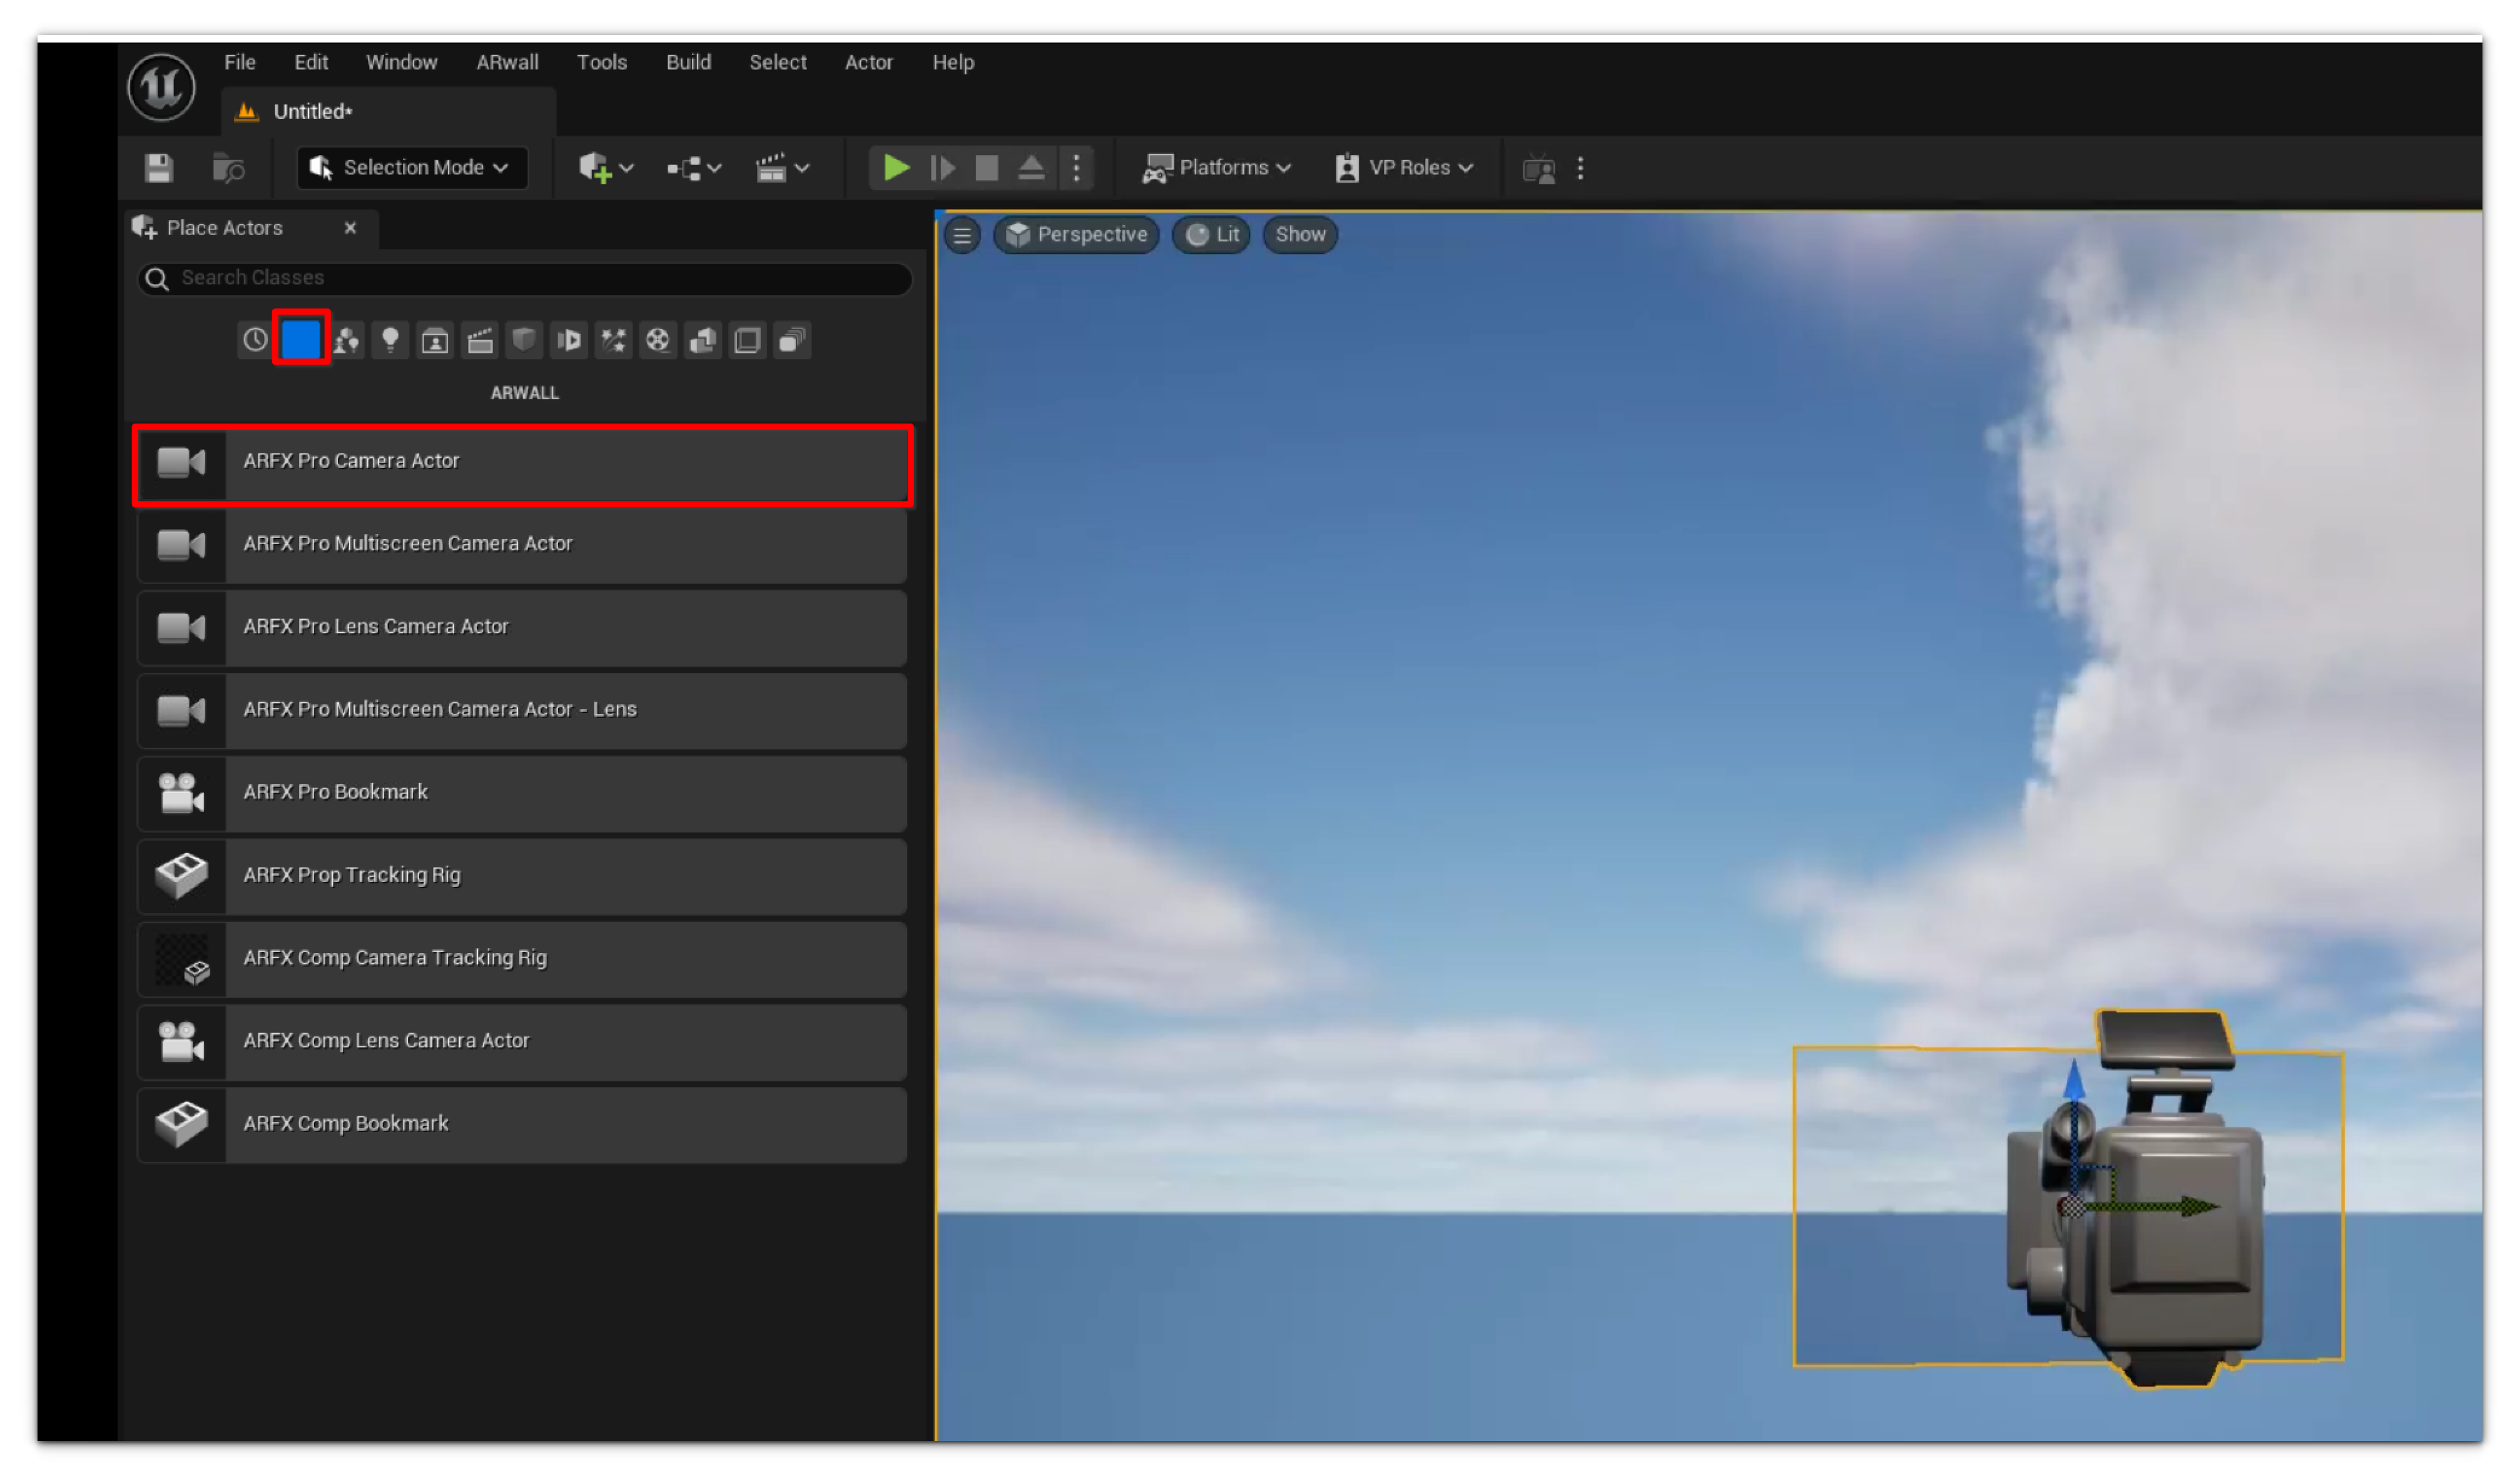
4. You can also add the ARwallCameraActor to the scene by dragging it from the Place Actors tab window (you can open this tab by clicking Window > Place Actors) into the viewport window.
5. It does not matter too much where you drop the ARwallCameraActor in the viewport window, but this will be where the scene starts when you launch the scene. Feel free to move/adjust it to your preferred starting location in your scene.
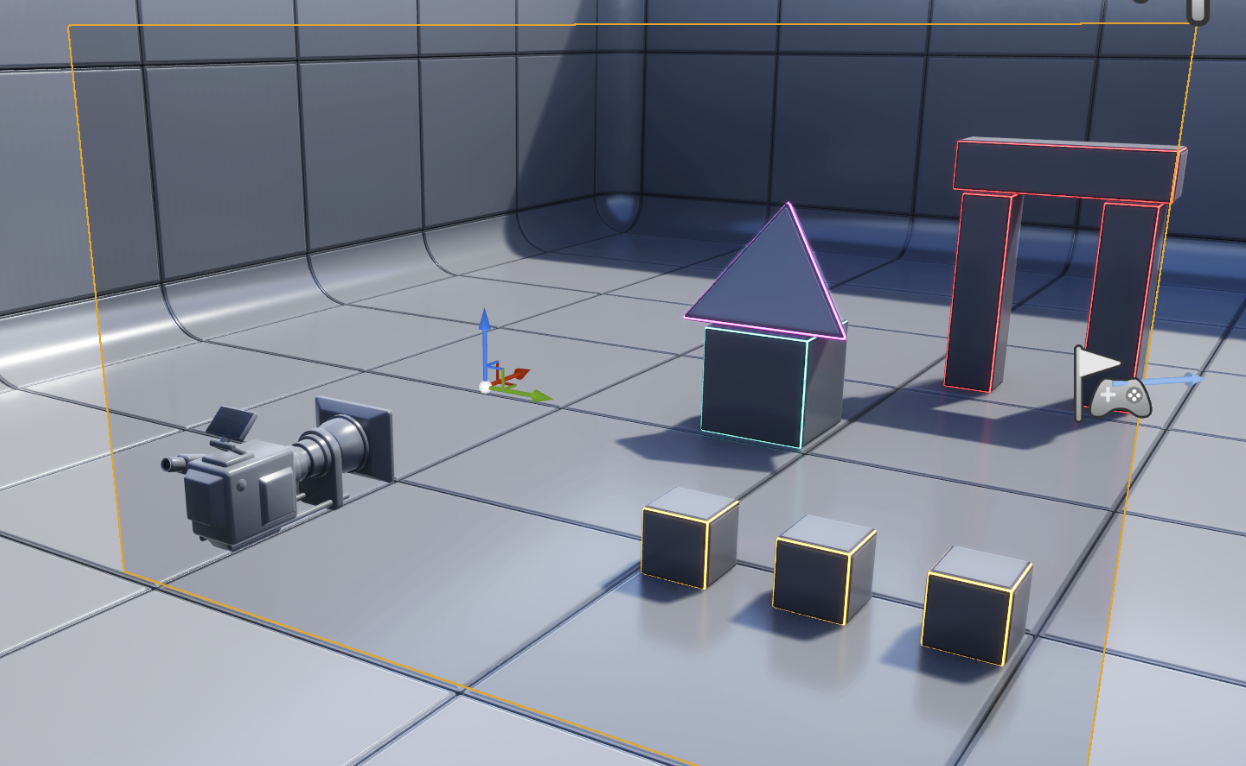
6. Here is what a freshly placed ARFX Pro Camera looks like in the Viewport !
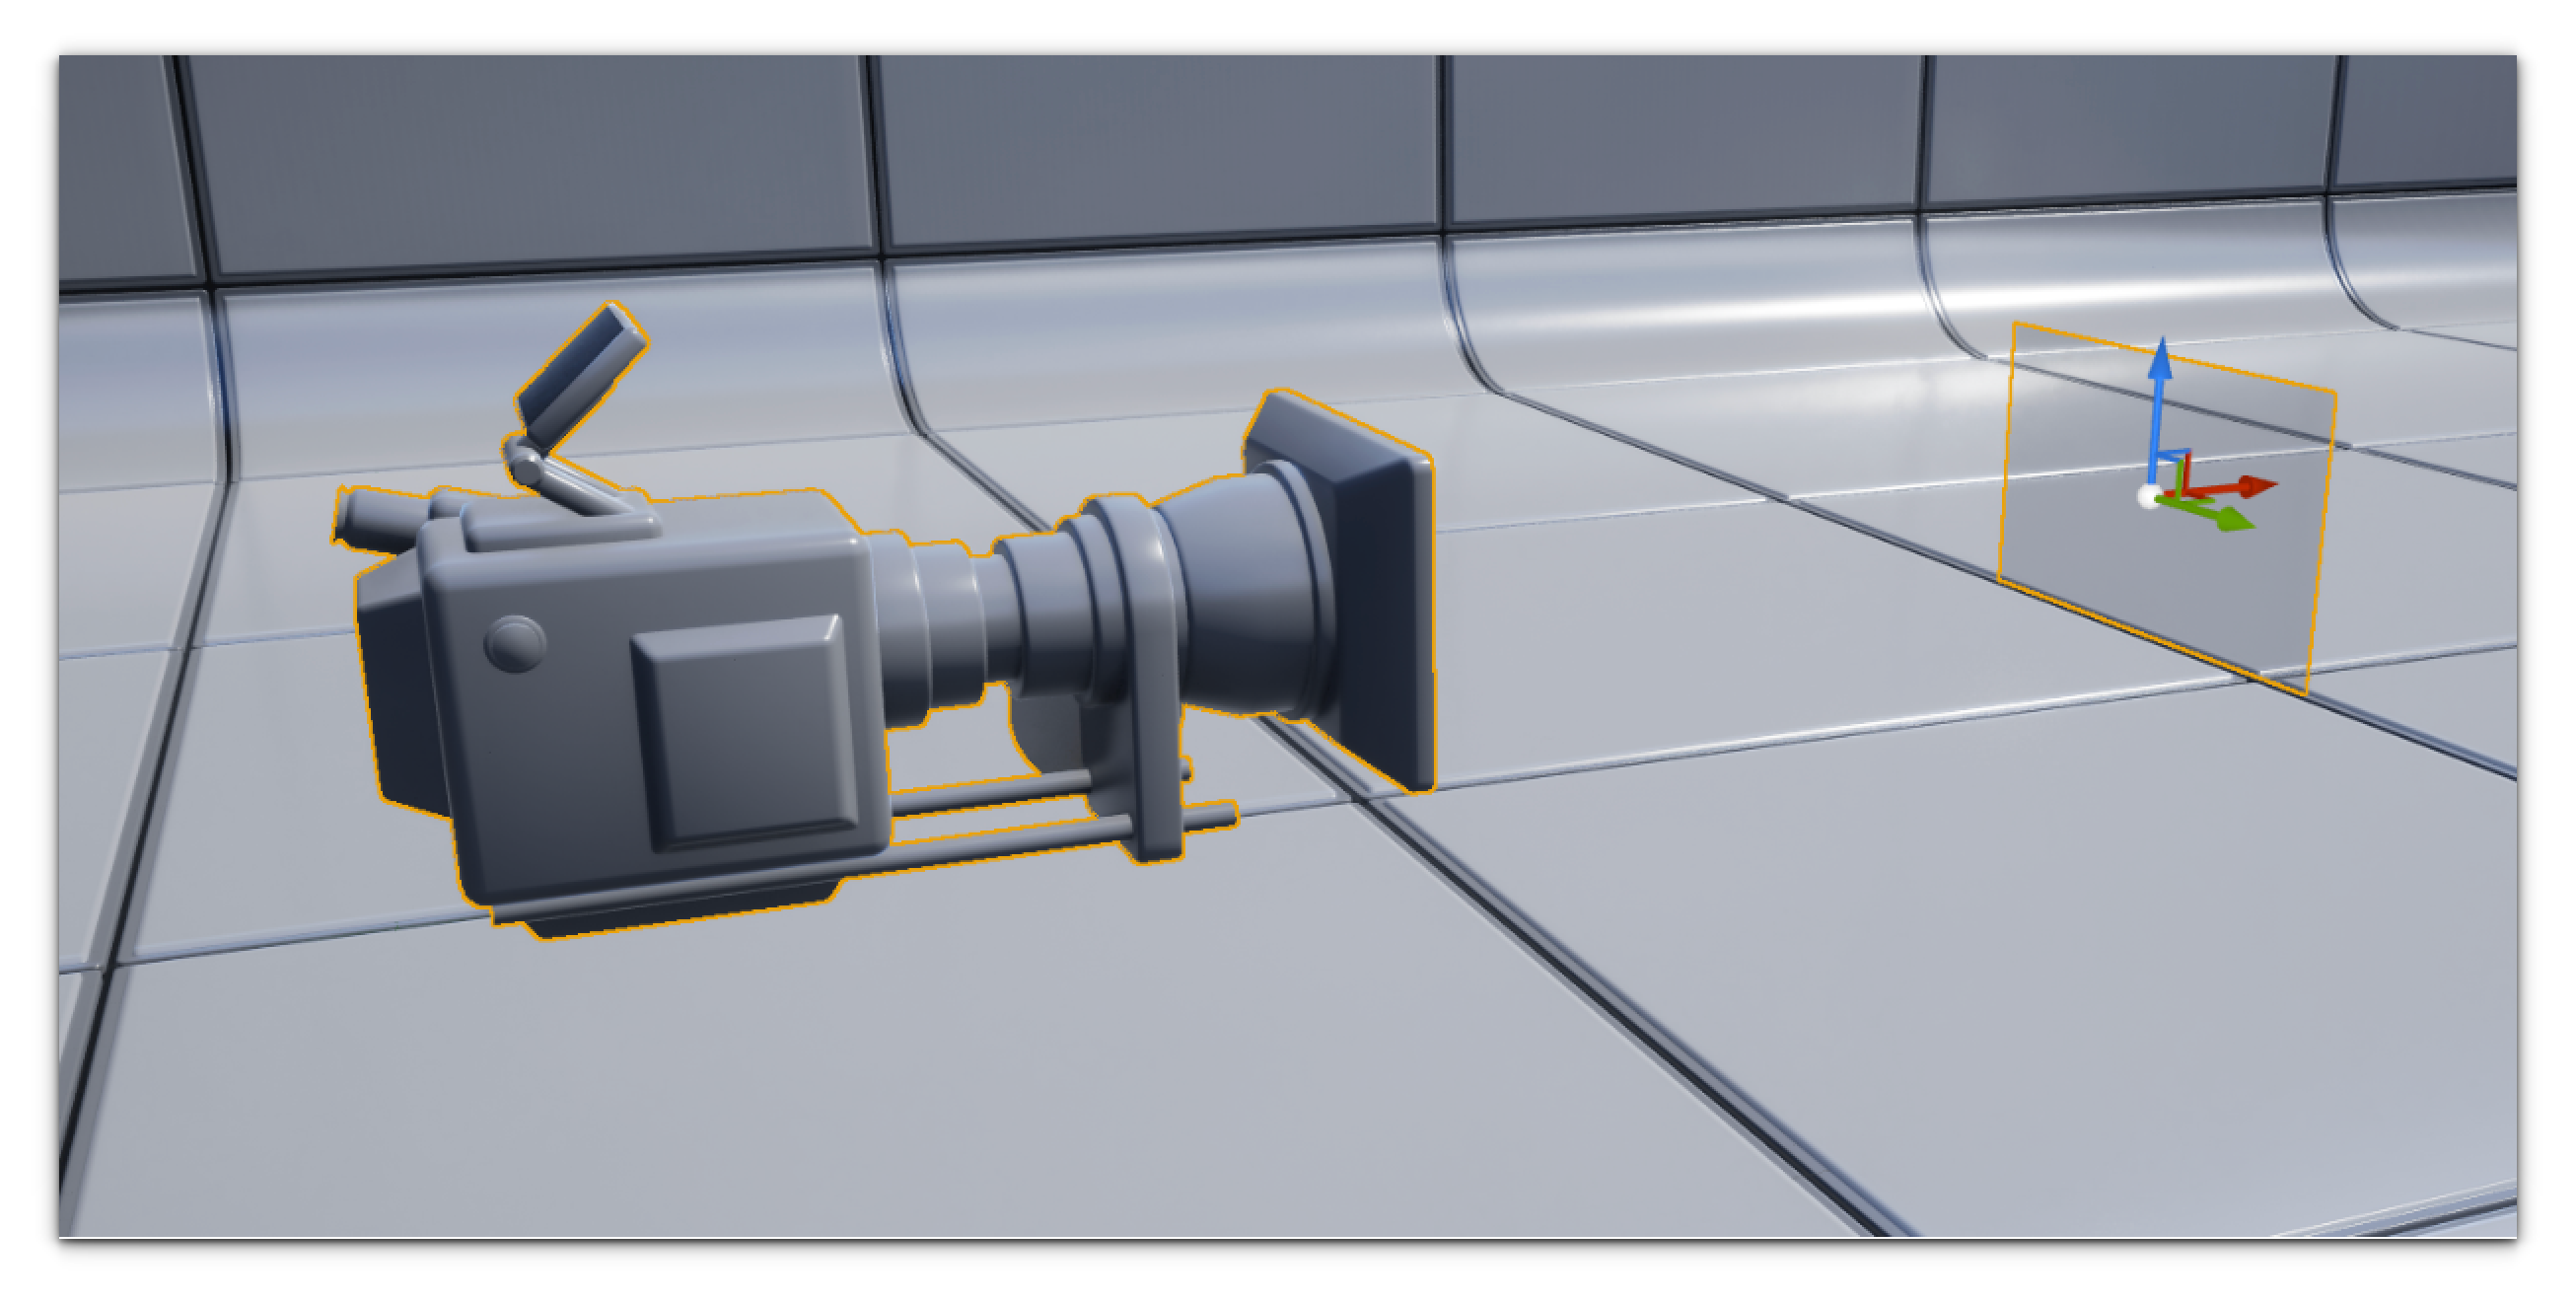
7. With the camera placed, feel free to move it to point at something in your world.
8. With the camera selected, you should now be able to access the Details panel(on the right-hand side) in your editor and get more information about this camera. Scroll down to the ARwall section to find something like the following.
9. These settings are available for you to further customize the behavior and operation of the camera.
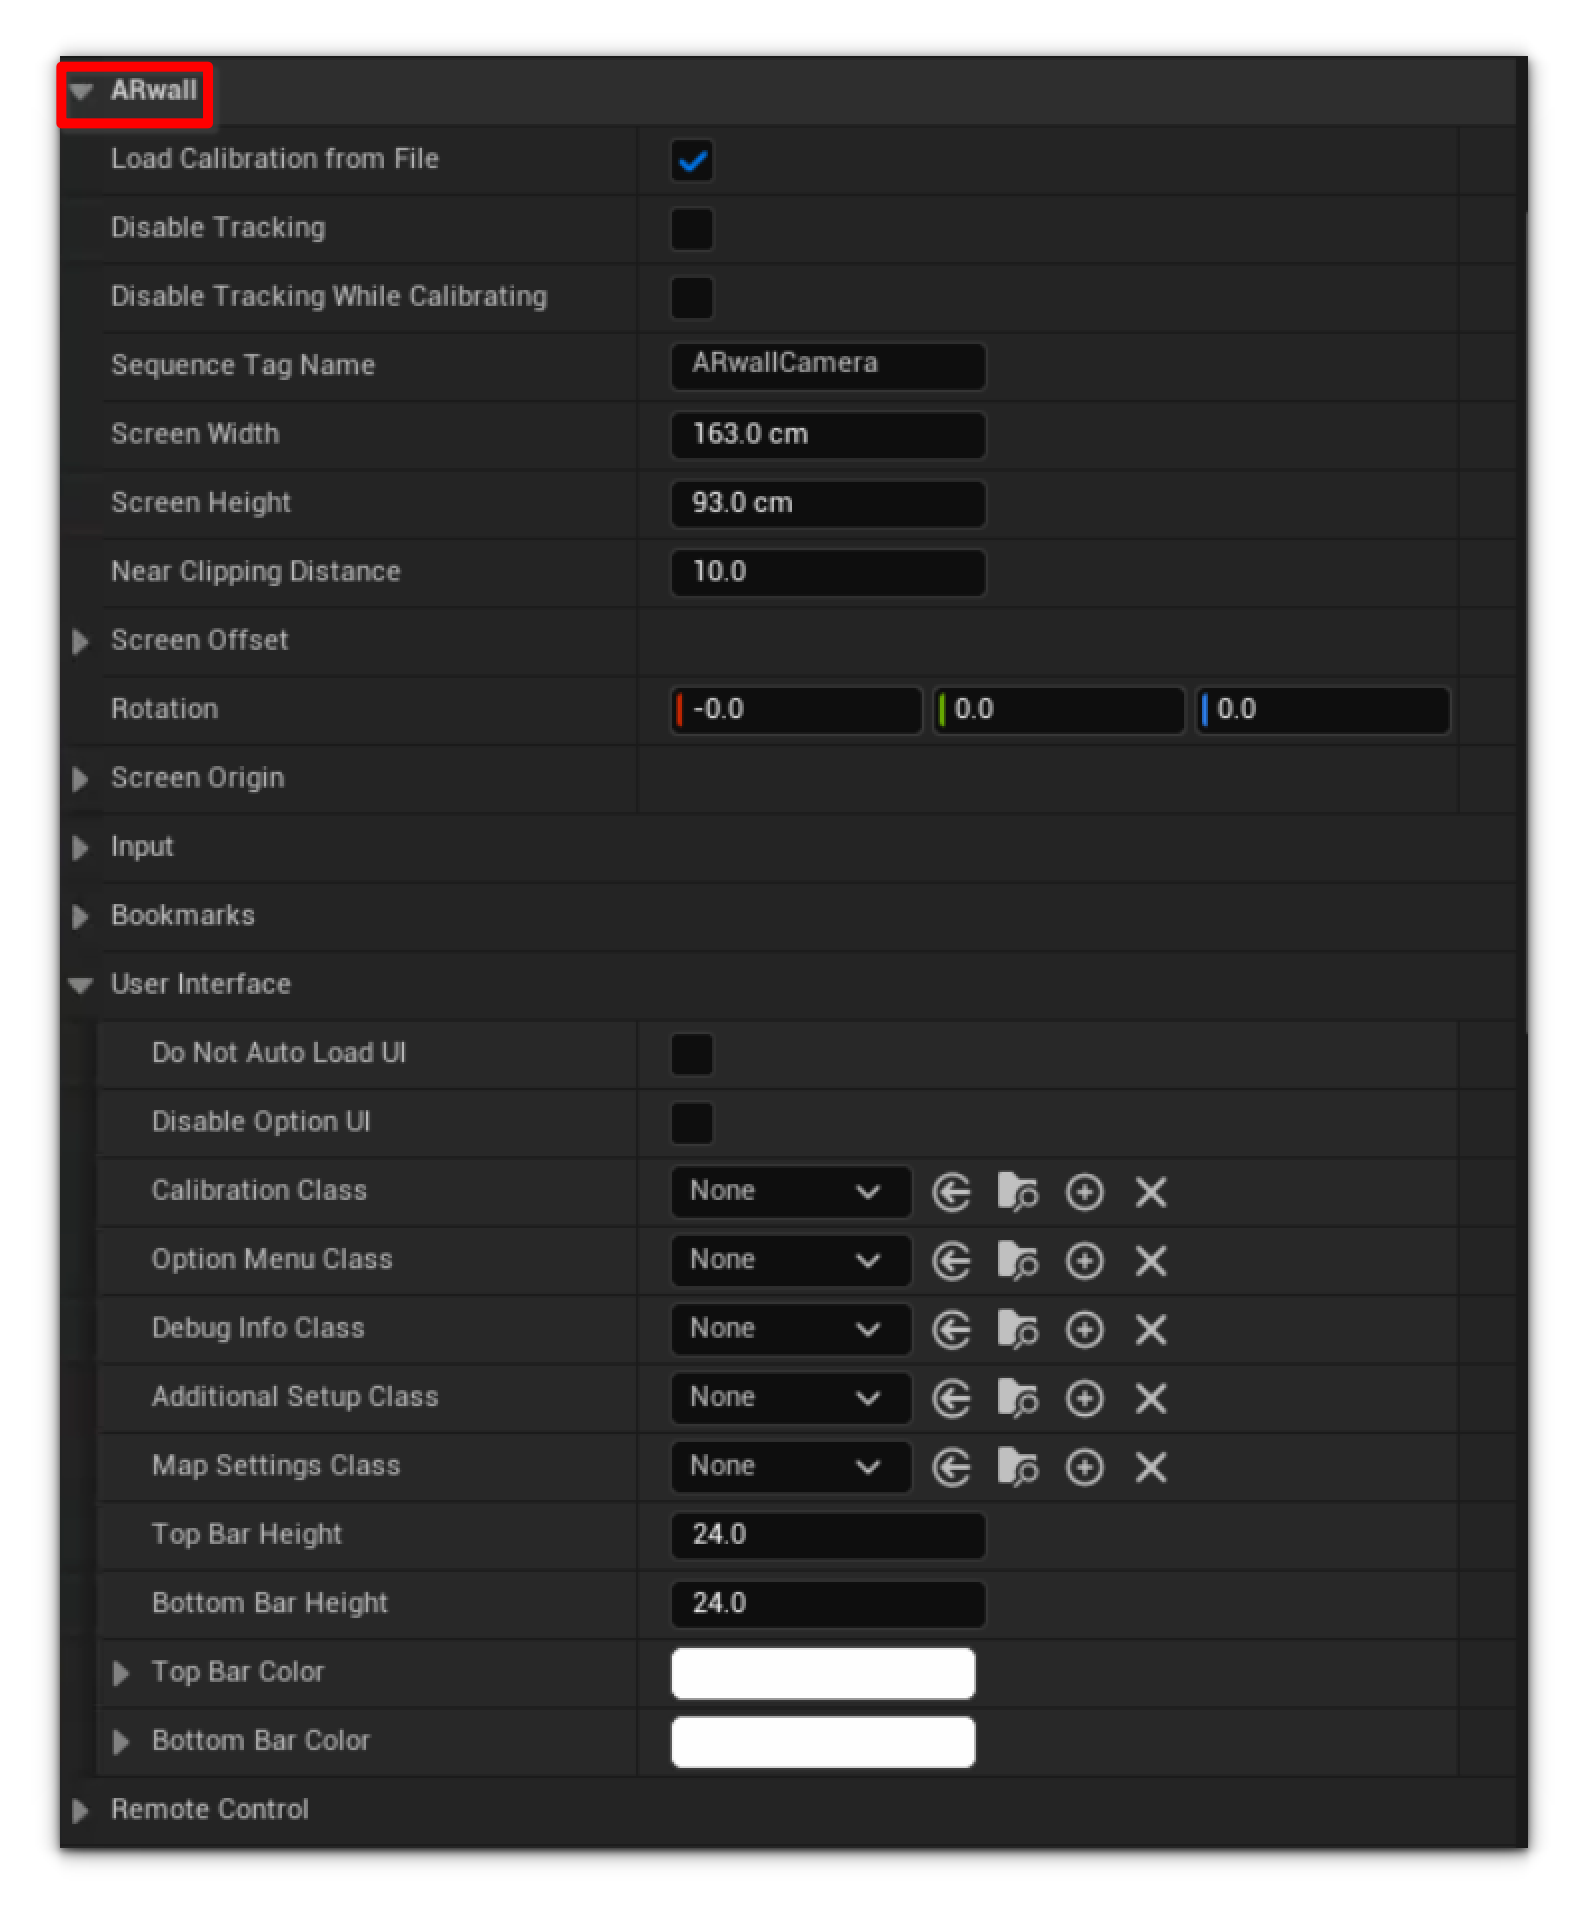
10. We can start by specifying our physical screen's dimensions in centimeters. Keep in mind we want only what is visible and not any margins!
11. As an example, we shall specify a large LED wall that is 600cm wide and 350cm high.
12. At the top of the Details Panel, find the green + Add button. This allows you to add any number of components to your camera, in this case, ARwall's various Tracking Components.
13. Our full list of Tracking Components. You will only ever use one of these. 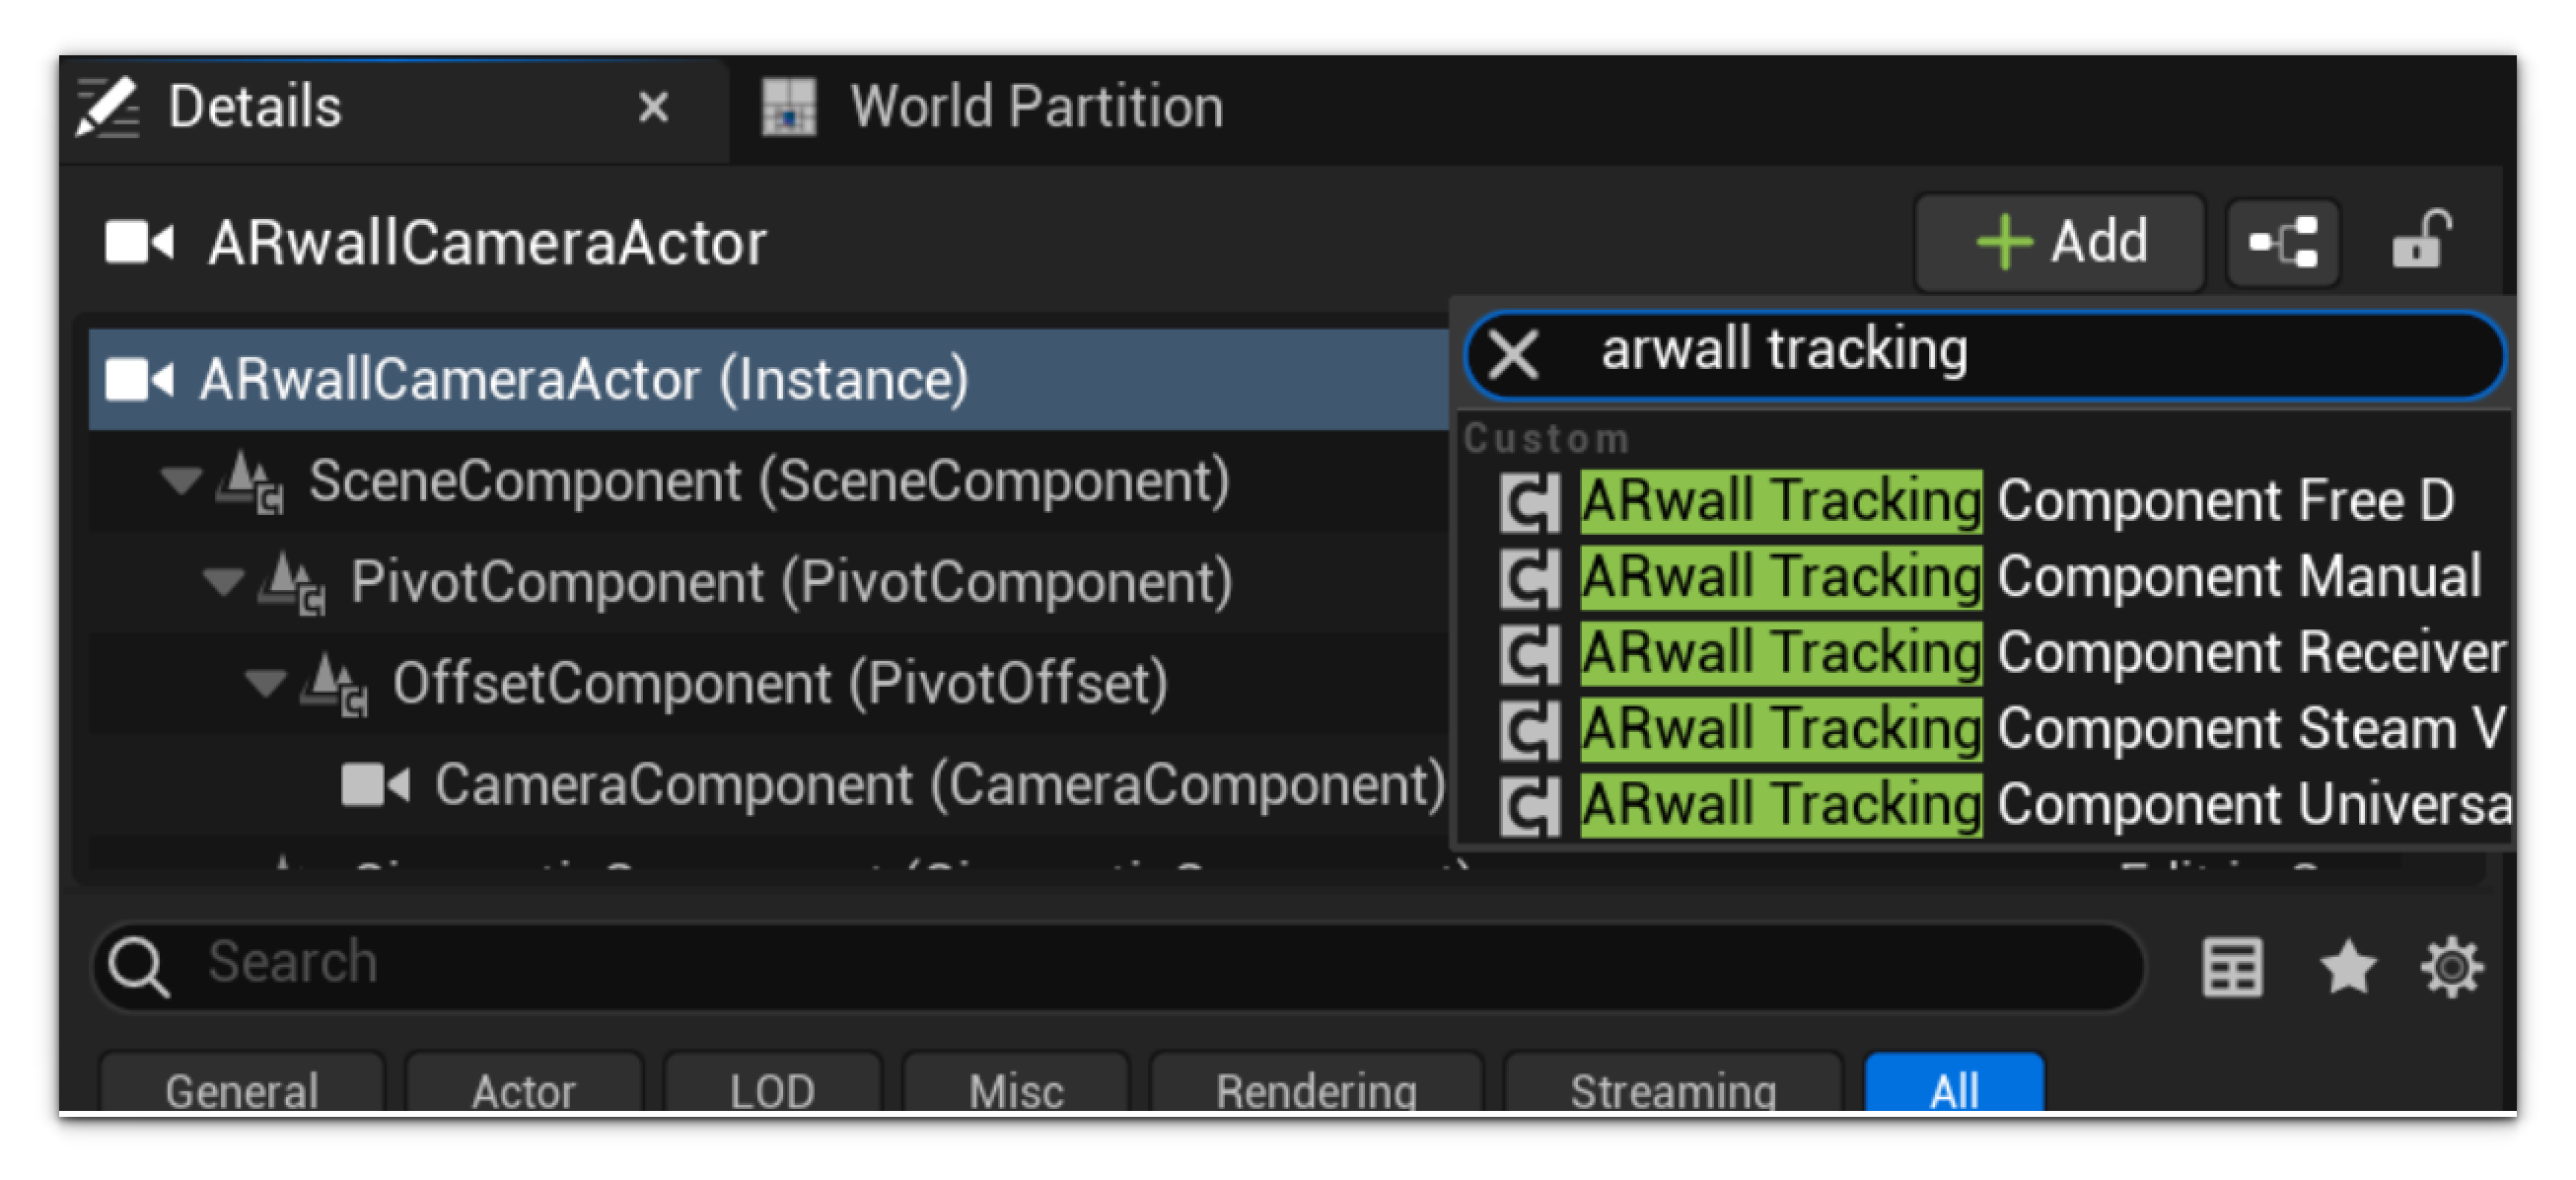
14. The scene should run even without tracking. Press the green play button (also known as PlayInEditor or PIE), and the Viewport]should change to the ARFX Camera's perspective. Press F11 to fullscreen this Viewport, and you are good to go!
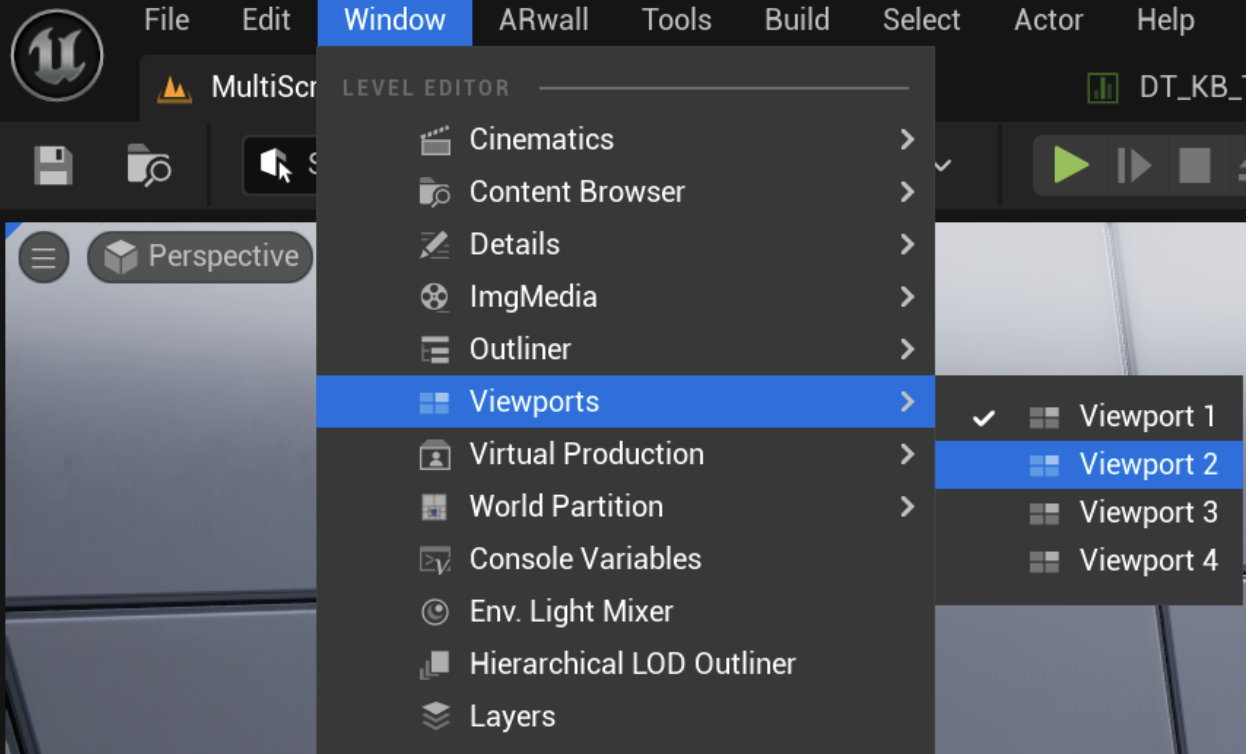
15. If you are running multiple displays, you can open a new Viewport window and drag it to the display you wish to use. We will use PIE to open this newly opened Viewport.
16. Where to open another Viewport if you are using multiple screens.
Section 5.3 Adding Tracking Component
Important
Make sure to delete any other existing cameras or “Player Start” objects in the scene.
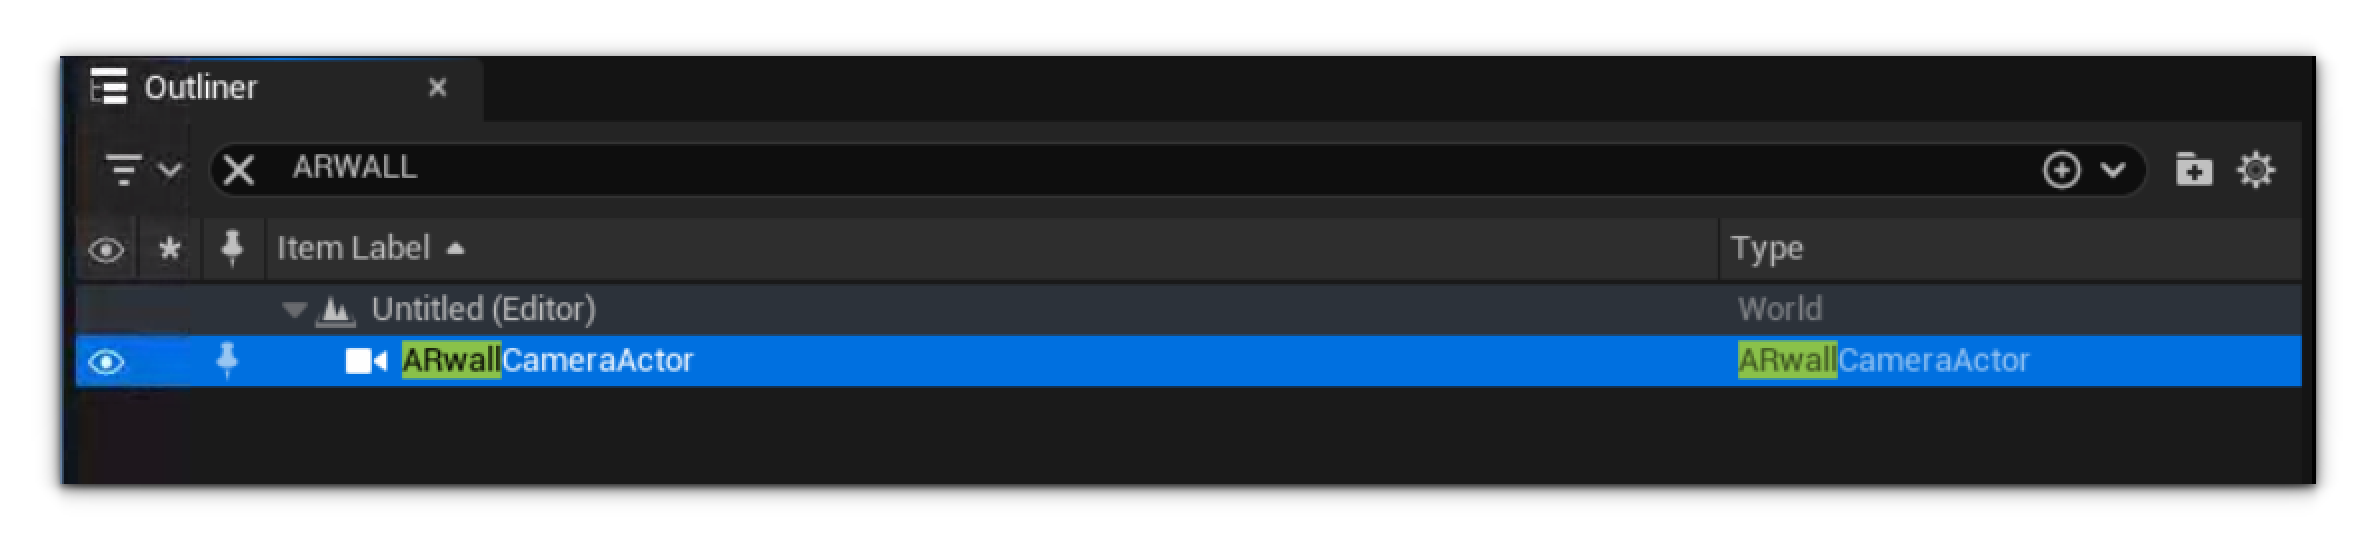
Navigate to the Details panel for the newly added ARwallCameraActor. If this panel is not active, please enable it by going to the Windows menu and selecting Details.
- Select the ARwallCameraActor within the Outliner
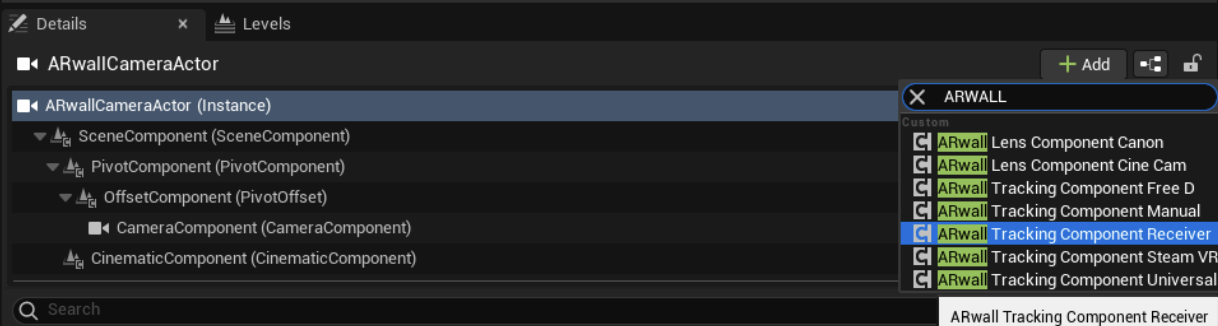
2. Navigate to the Details panel and click the big green button ‘+Add Component’ in UE4 or the ‘+Add’ in UE5 dropdown. 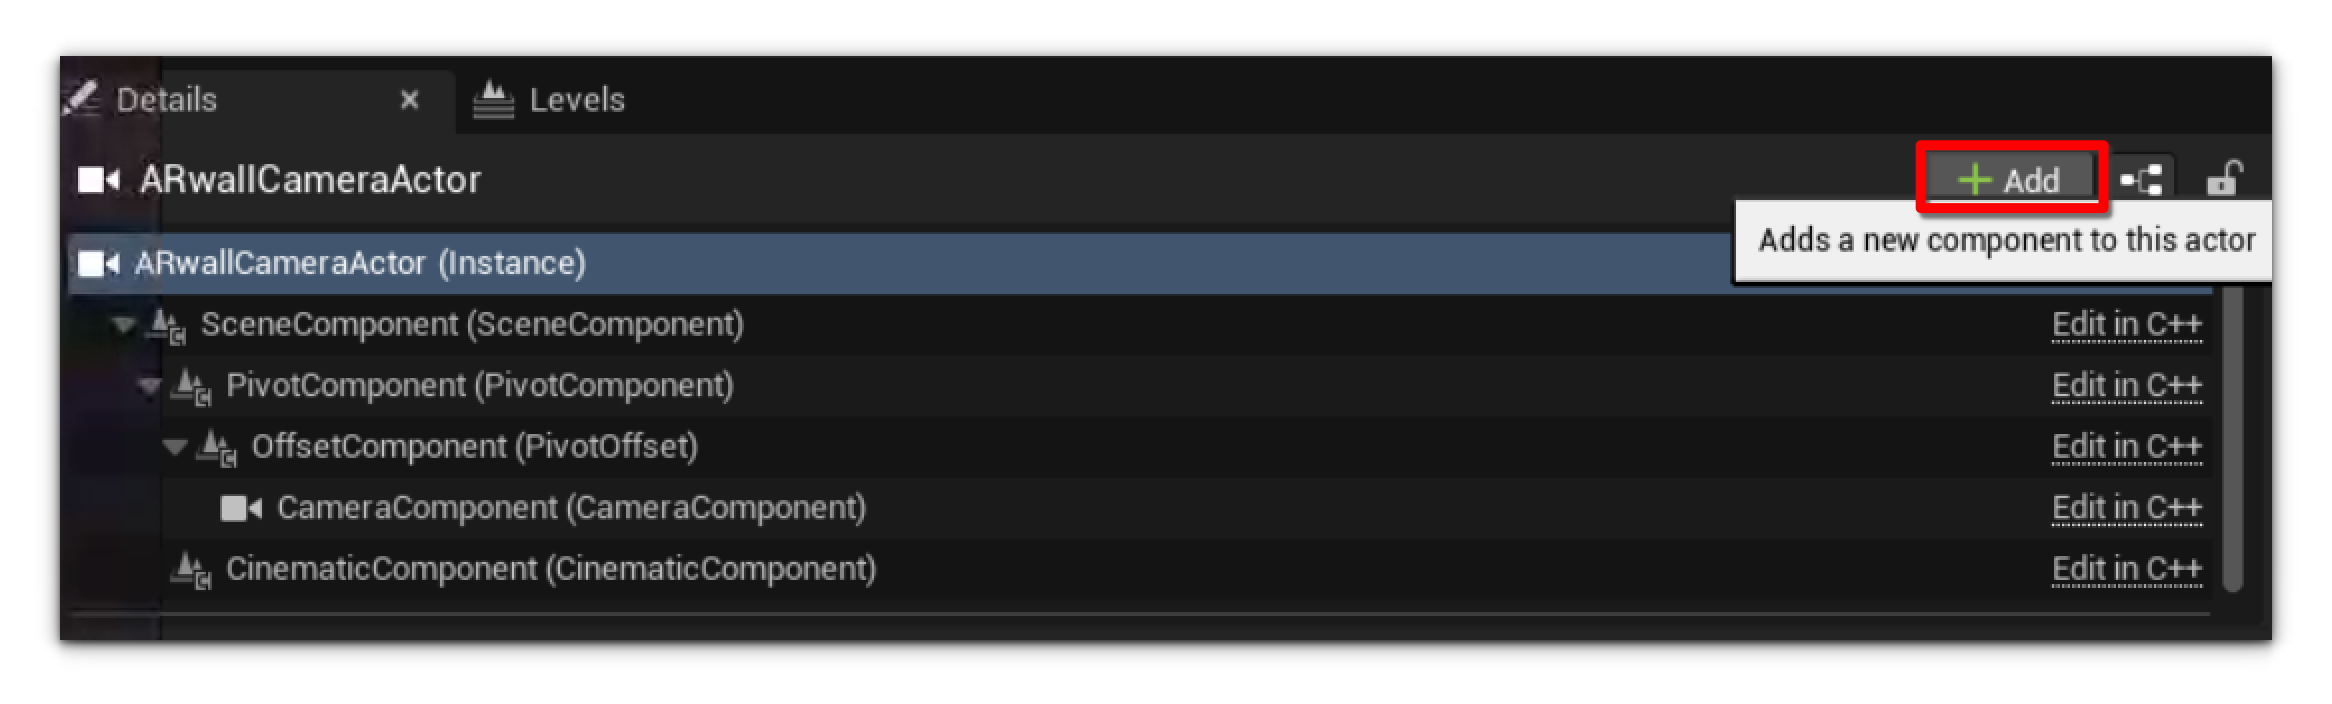 3. Type in ARwall; you should already see suggestions for the names of the tracking components, as shown in the image below. Select the name of the tracking component that you want to add.
There is more that is left to detail, but if you got this far, you are practically almost done. For more details, please refer to individual sections in the knowledge base.
For instance, you can refer to the ARFX Pro Plugin Tracking Components Section for more details about setting up your tracking volume for the most common tracking solutions in use with our ARFX Cameras.
Was this article helpful?