ARwall Setup and Settings within Unreal Engine 4/5 with HTC Vive Tracking Hardware
  • 18 Oct 2023
  • 11 Minutes to read
  • Contributors
  • Dark
    Light

ARwall Setup and Settings within Unreal Engine 4/5 with HTC Vive Tracking Hardware

  • Dark
    Light

Article summary

Section 5: ARwall Setup and Settings within Unreal Engine 4/5 with HTC Vive Tracking Hardware

This section describes how to set up ARwall ARFX Pro Plugin, use the ARwall ARFX Pro Plugin UI menu system, adjust the ARwall camera settings, set calibration, and use bookmarked cameras.

Section 5.1: ARwall ARFX Pro Plugin Setup

To set up ARwall ARFX Pro Plugin, do the following:

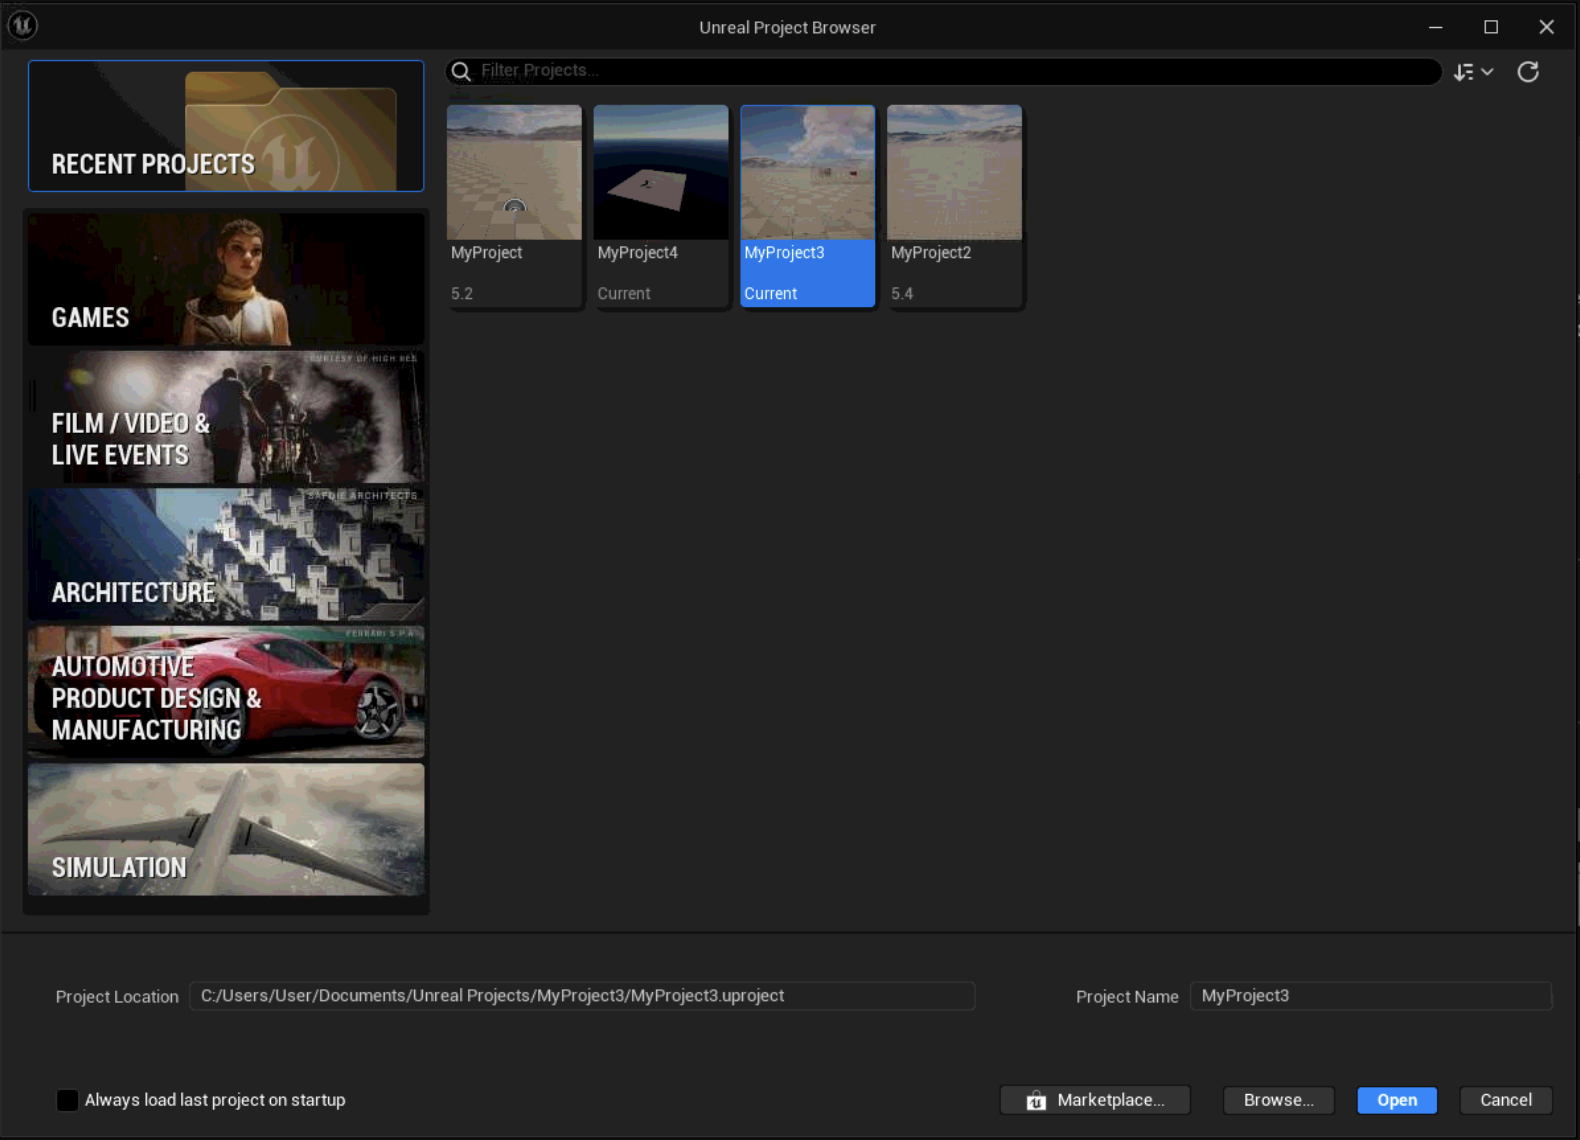
  1. Open the Unreal Engine 4/5 project in UE 4.27 or UE 5. Be sure to match the version of the plugin to the version of the UE project file.
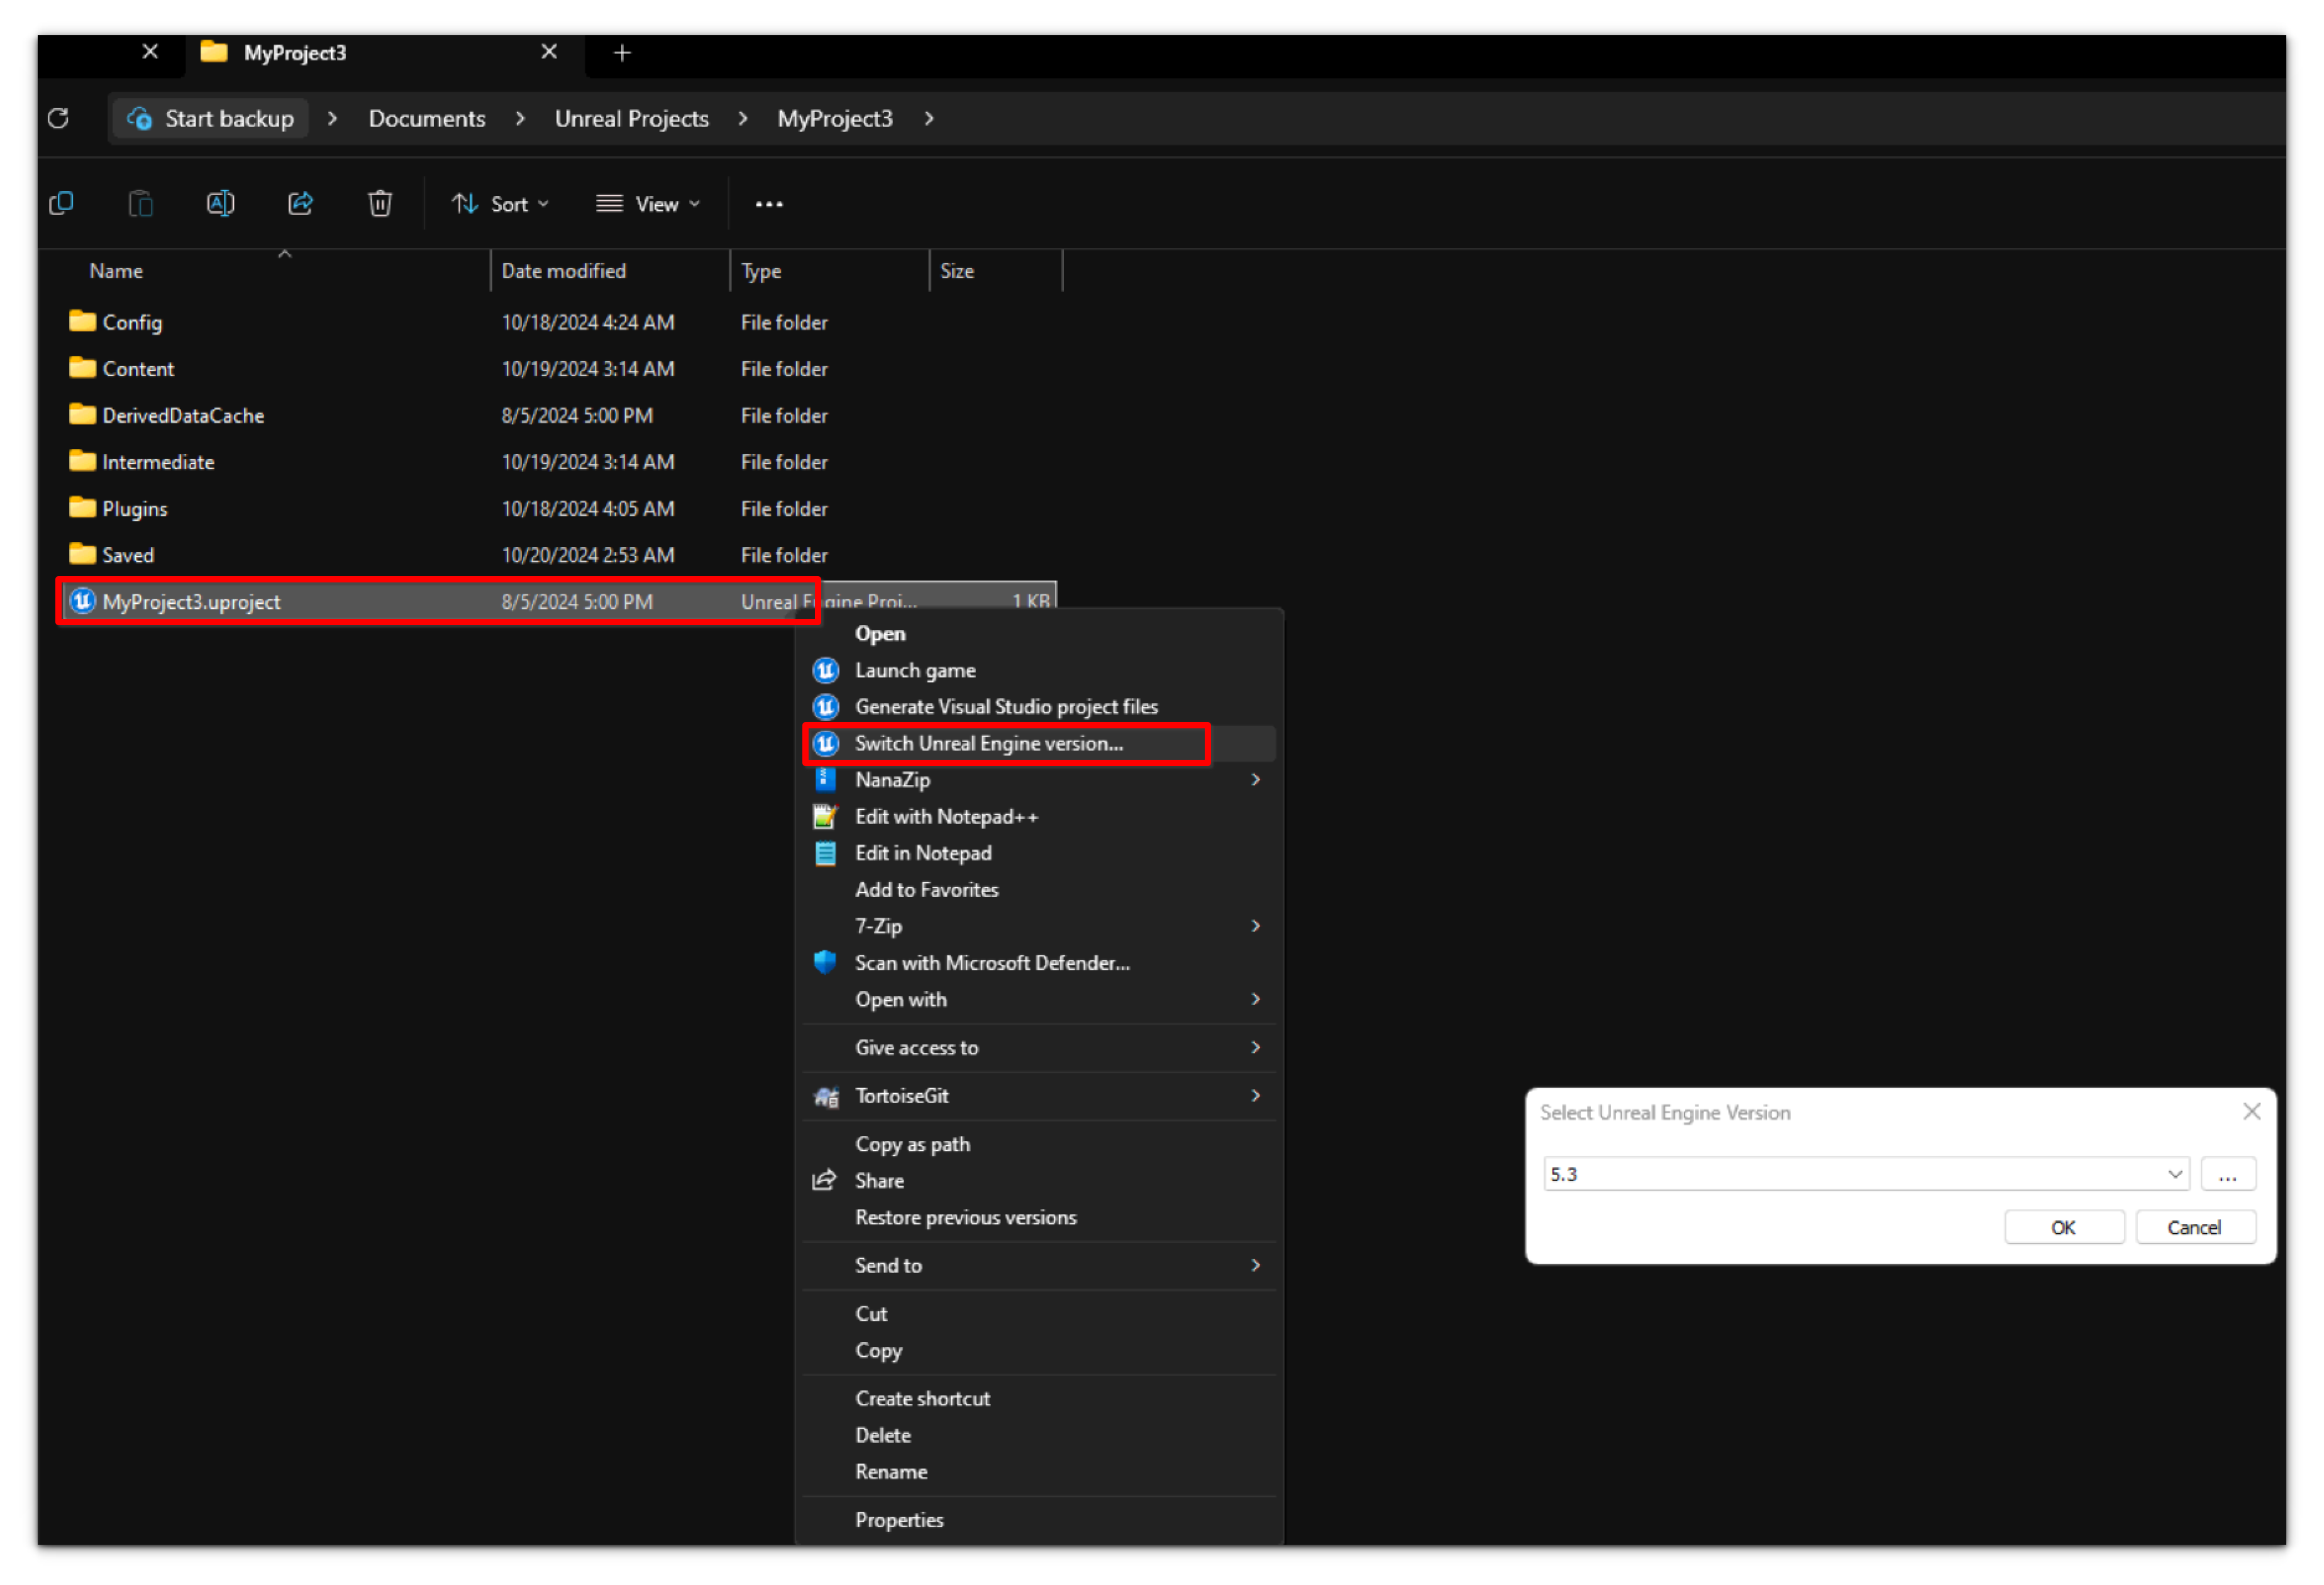
  2. To check that the Unreal Engine project file opens in the right version or to change the version of the Unreal Engine project, do the following:
    1. Right-click on the .uproject file and select Switch Unreal Engine version.
      image-1674157345067
    2. Select 4.27 or 5 and click OK to set the version.image-1674157372545image-1674157383265
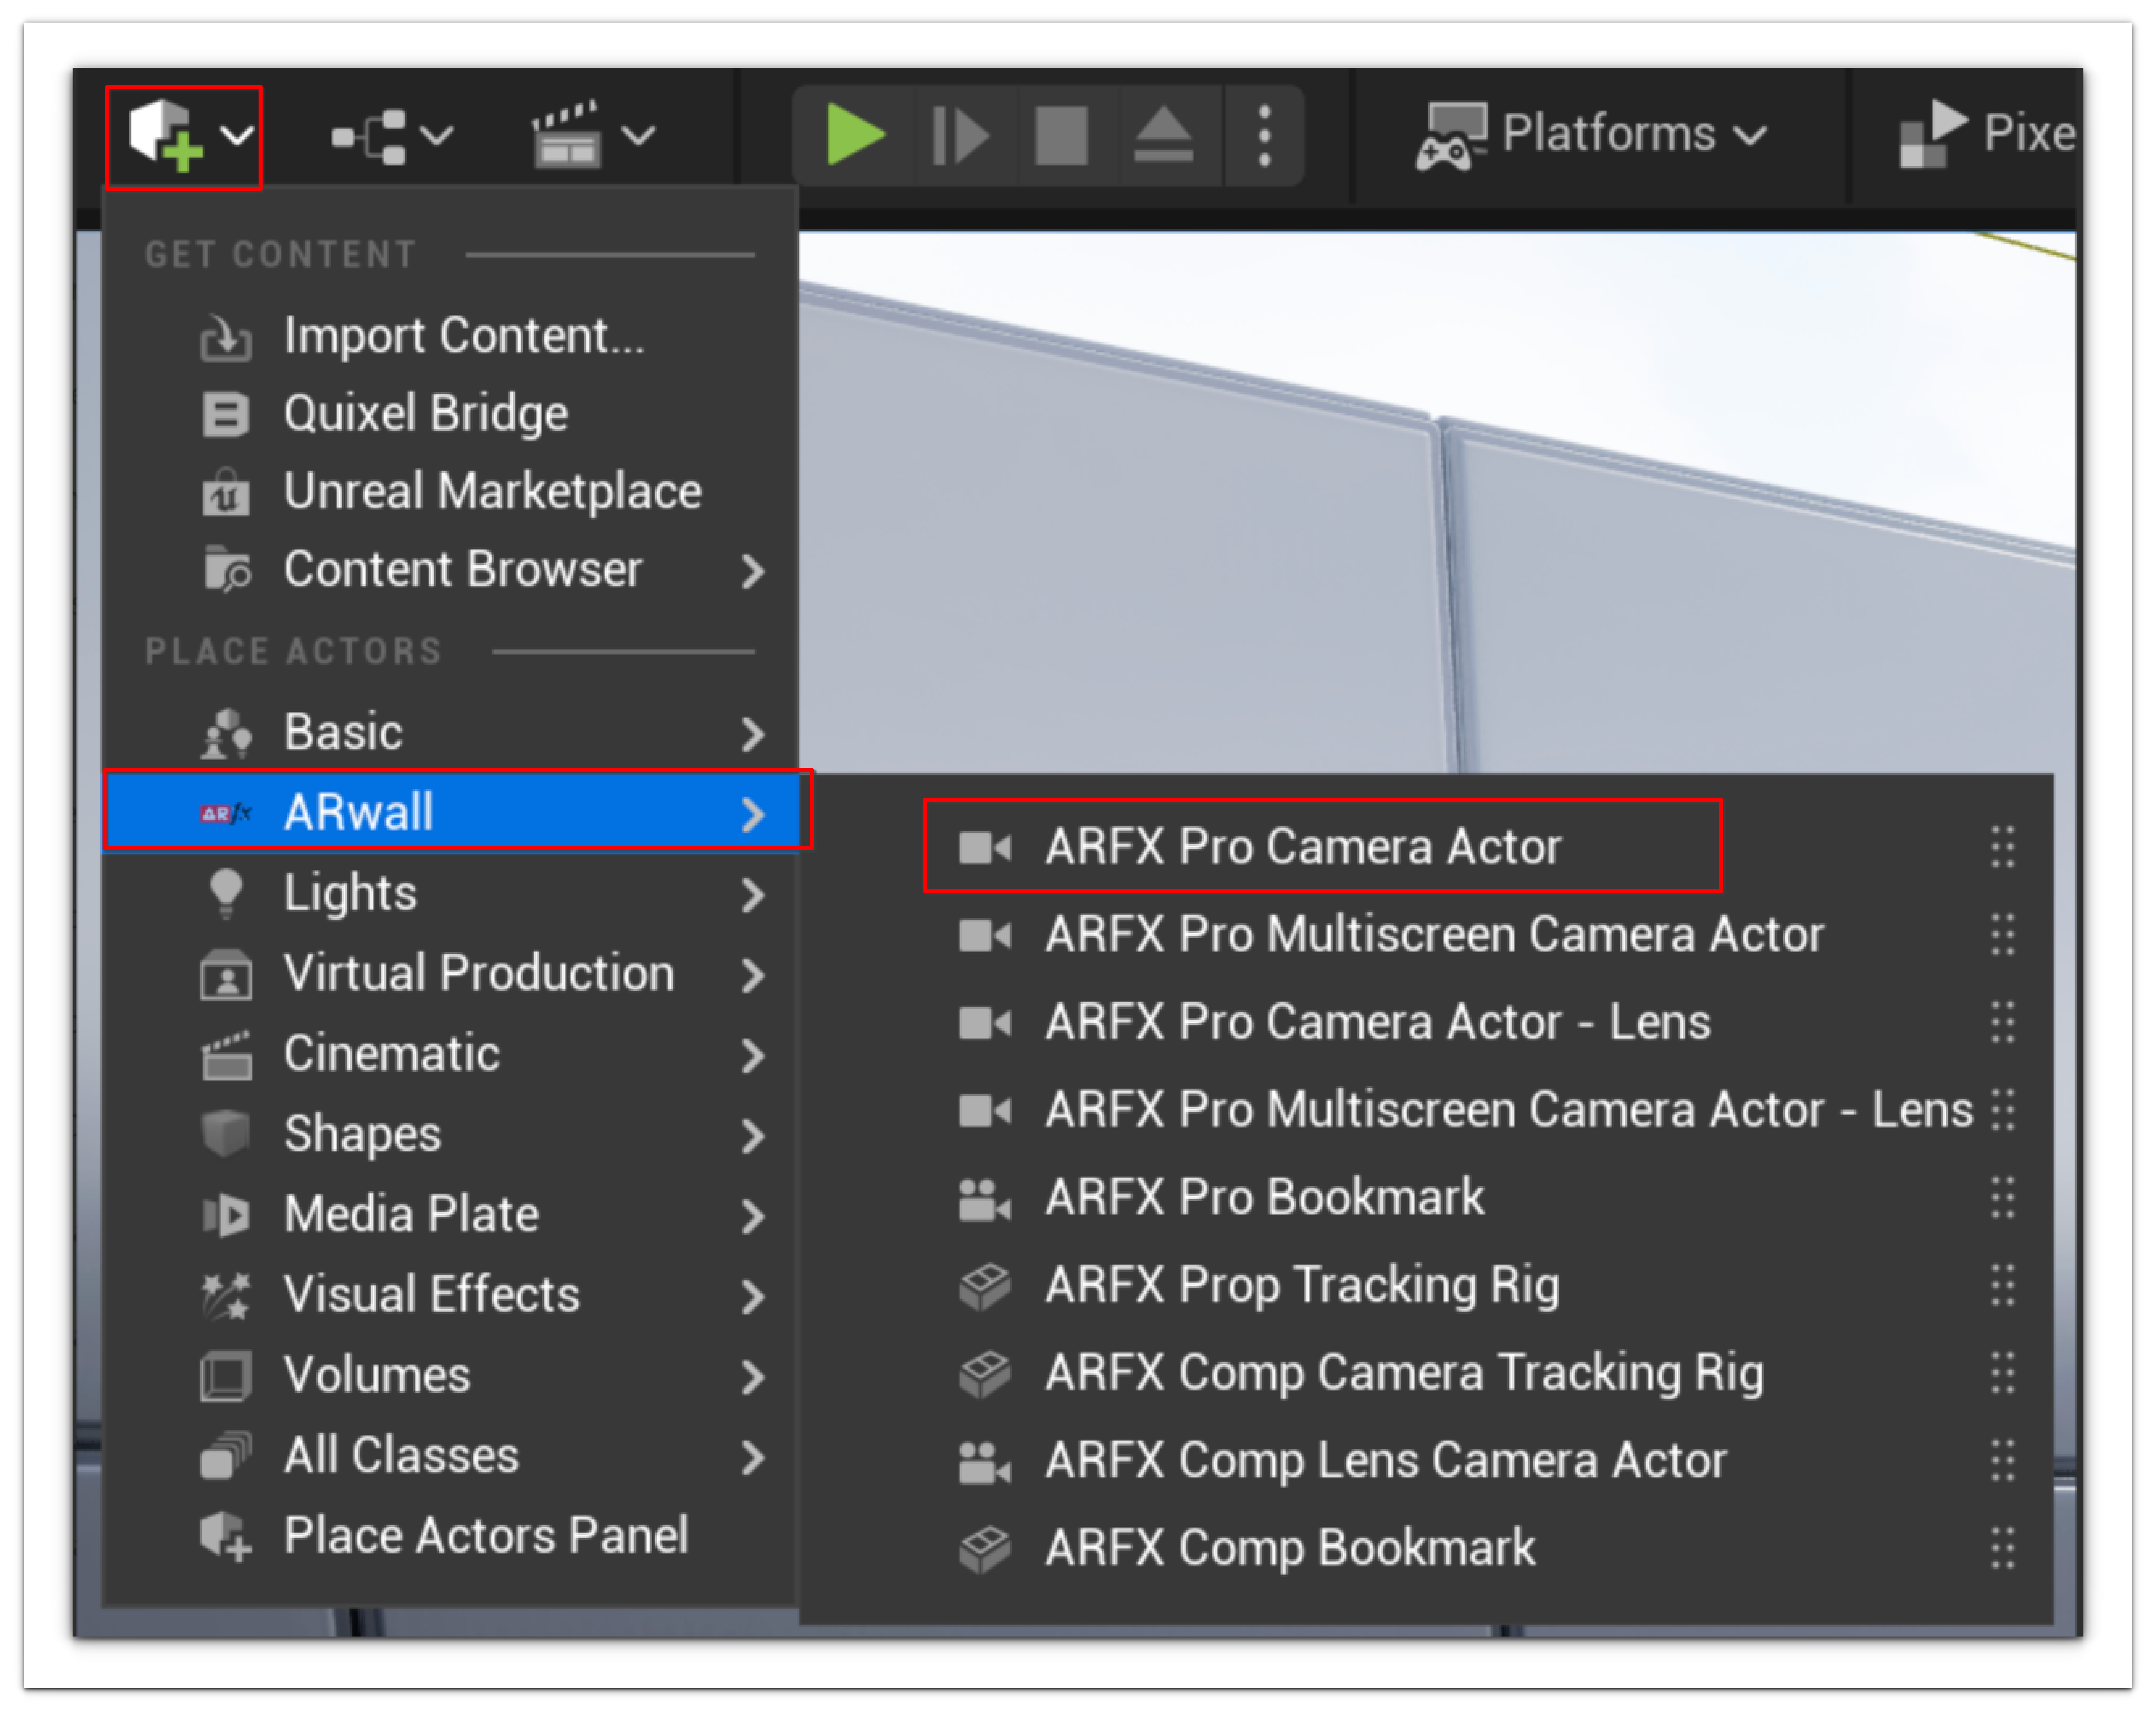
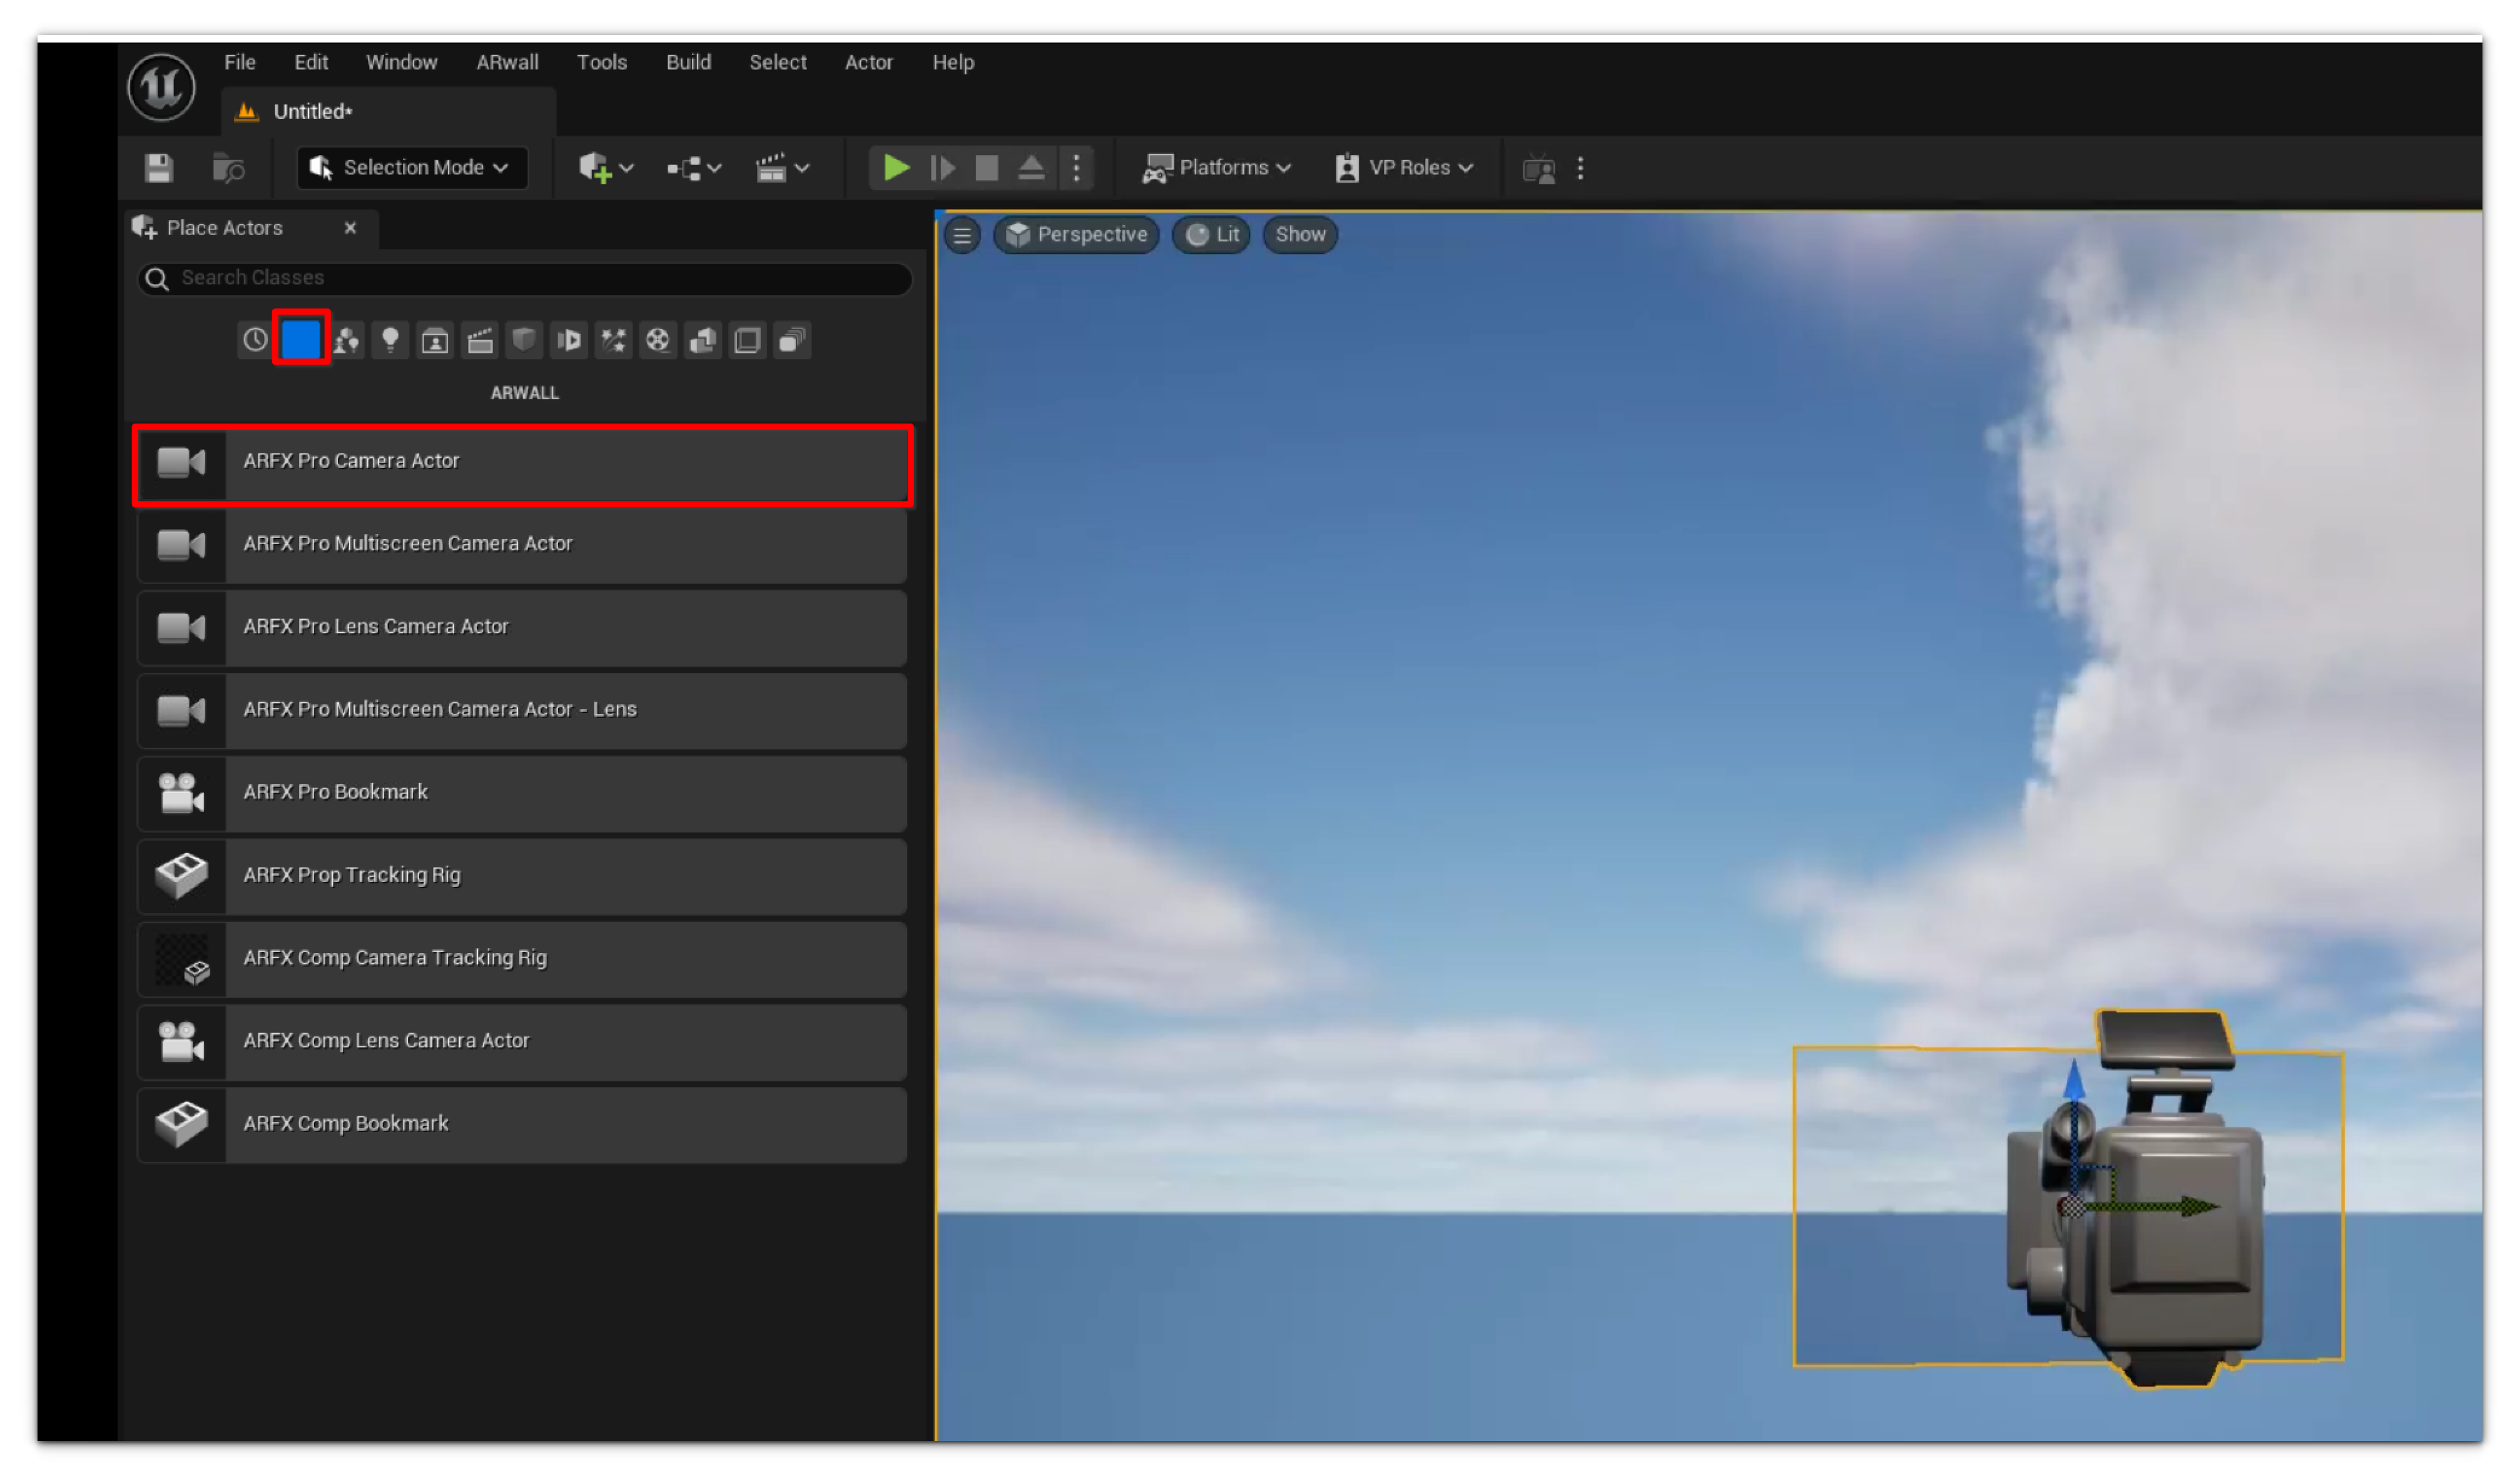
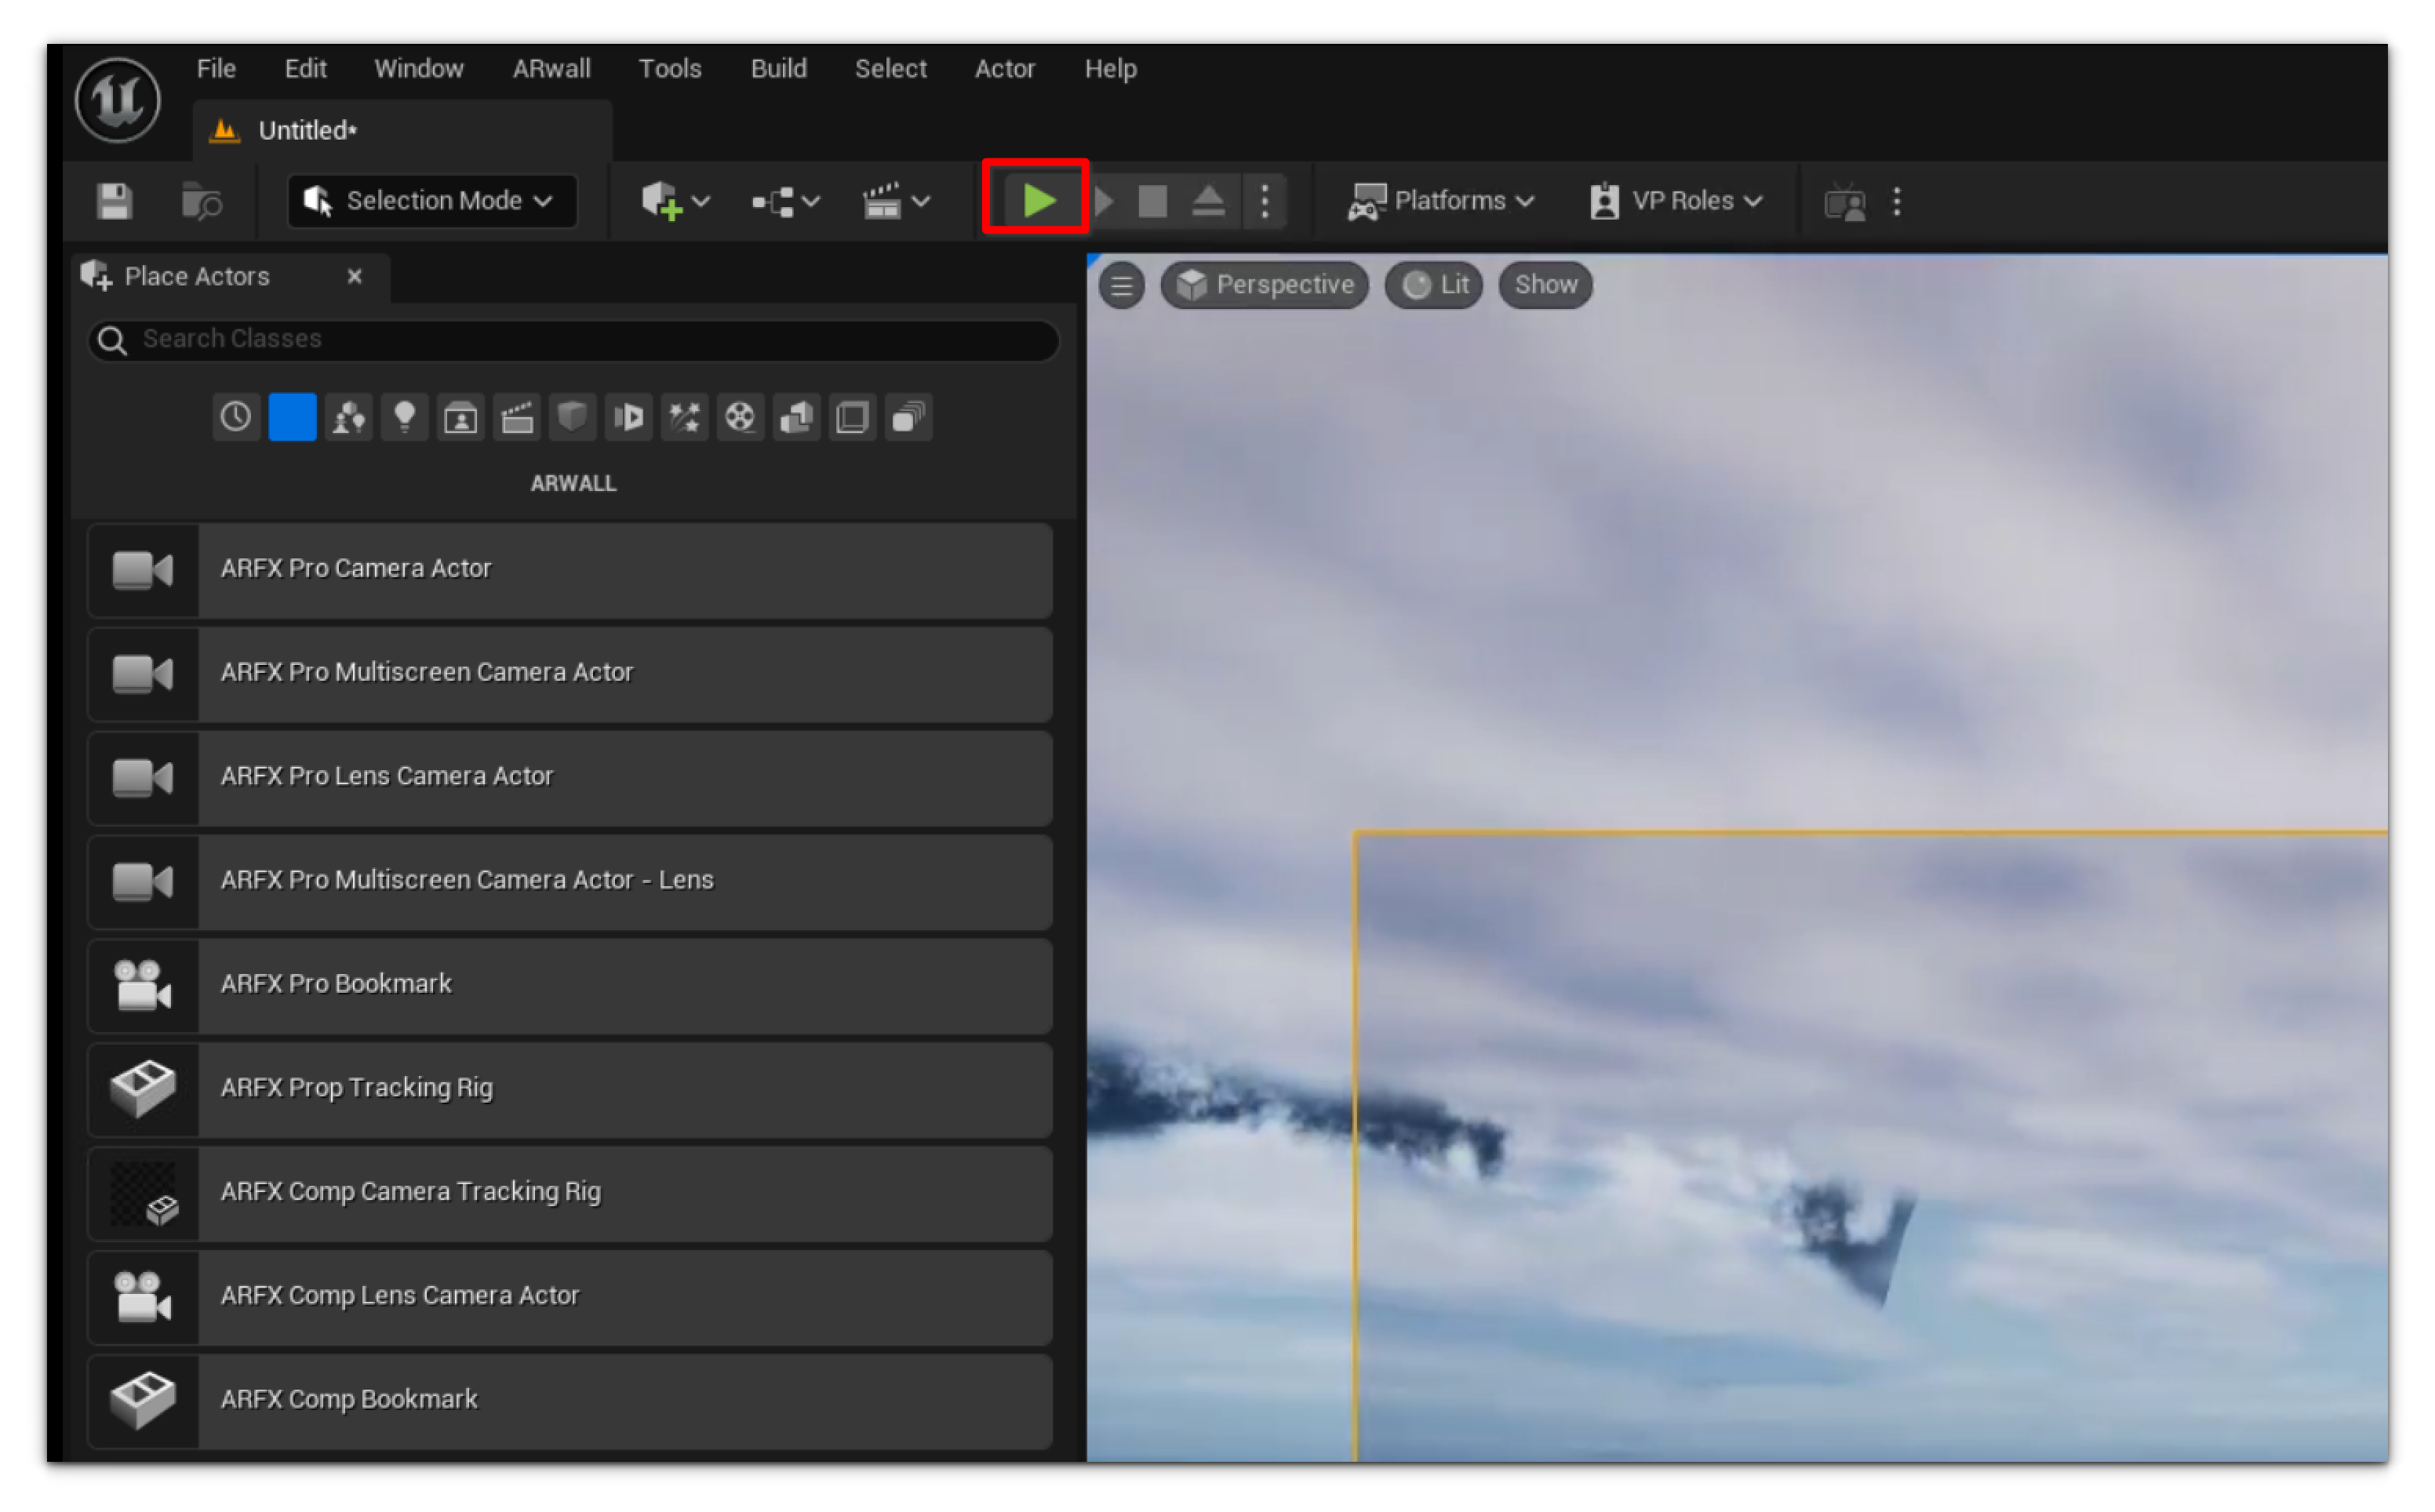
  3. Once the project opens, navigate to the ‘Place Actors’ tab. If this is not present when you open the project, it can be found in Windows > Place Actors.
  4. Select the ARwall subsection and drag and drop an ARwallCameraActor to the scene for each required level .umap.
    1. Add the ARwallCameraActor to the scene by dragging it from the Place Actors tab window (which is located on the left-hand side of the Unreal Engine GUI images below) into the viewport window. 
    2. It does not matter too much where you drop the ARwallCameraActor in the viewport window, but this will be where the scene starts when you launch the scene. Feel free to move/adjust it to your preferred starting location in your scene.image-1674157416021
      image-1674157429426
      NOTE: Make sure to delete any other existing cameras or “Player Start” objects in the scene.
  5. Navigate to the Details panel for the newly added ARwallCameraActor. If this panel is not active, please enable it by going to the Windows menu and selecting Details.
    1. Select the ARwallCameraActor within the Outliner 
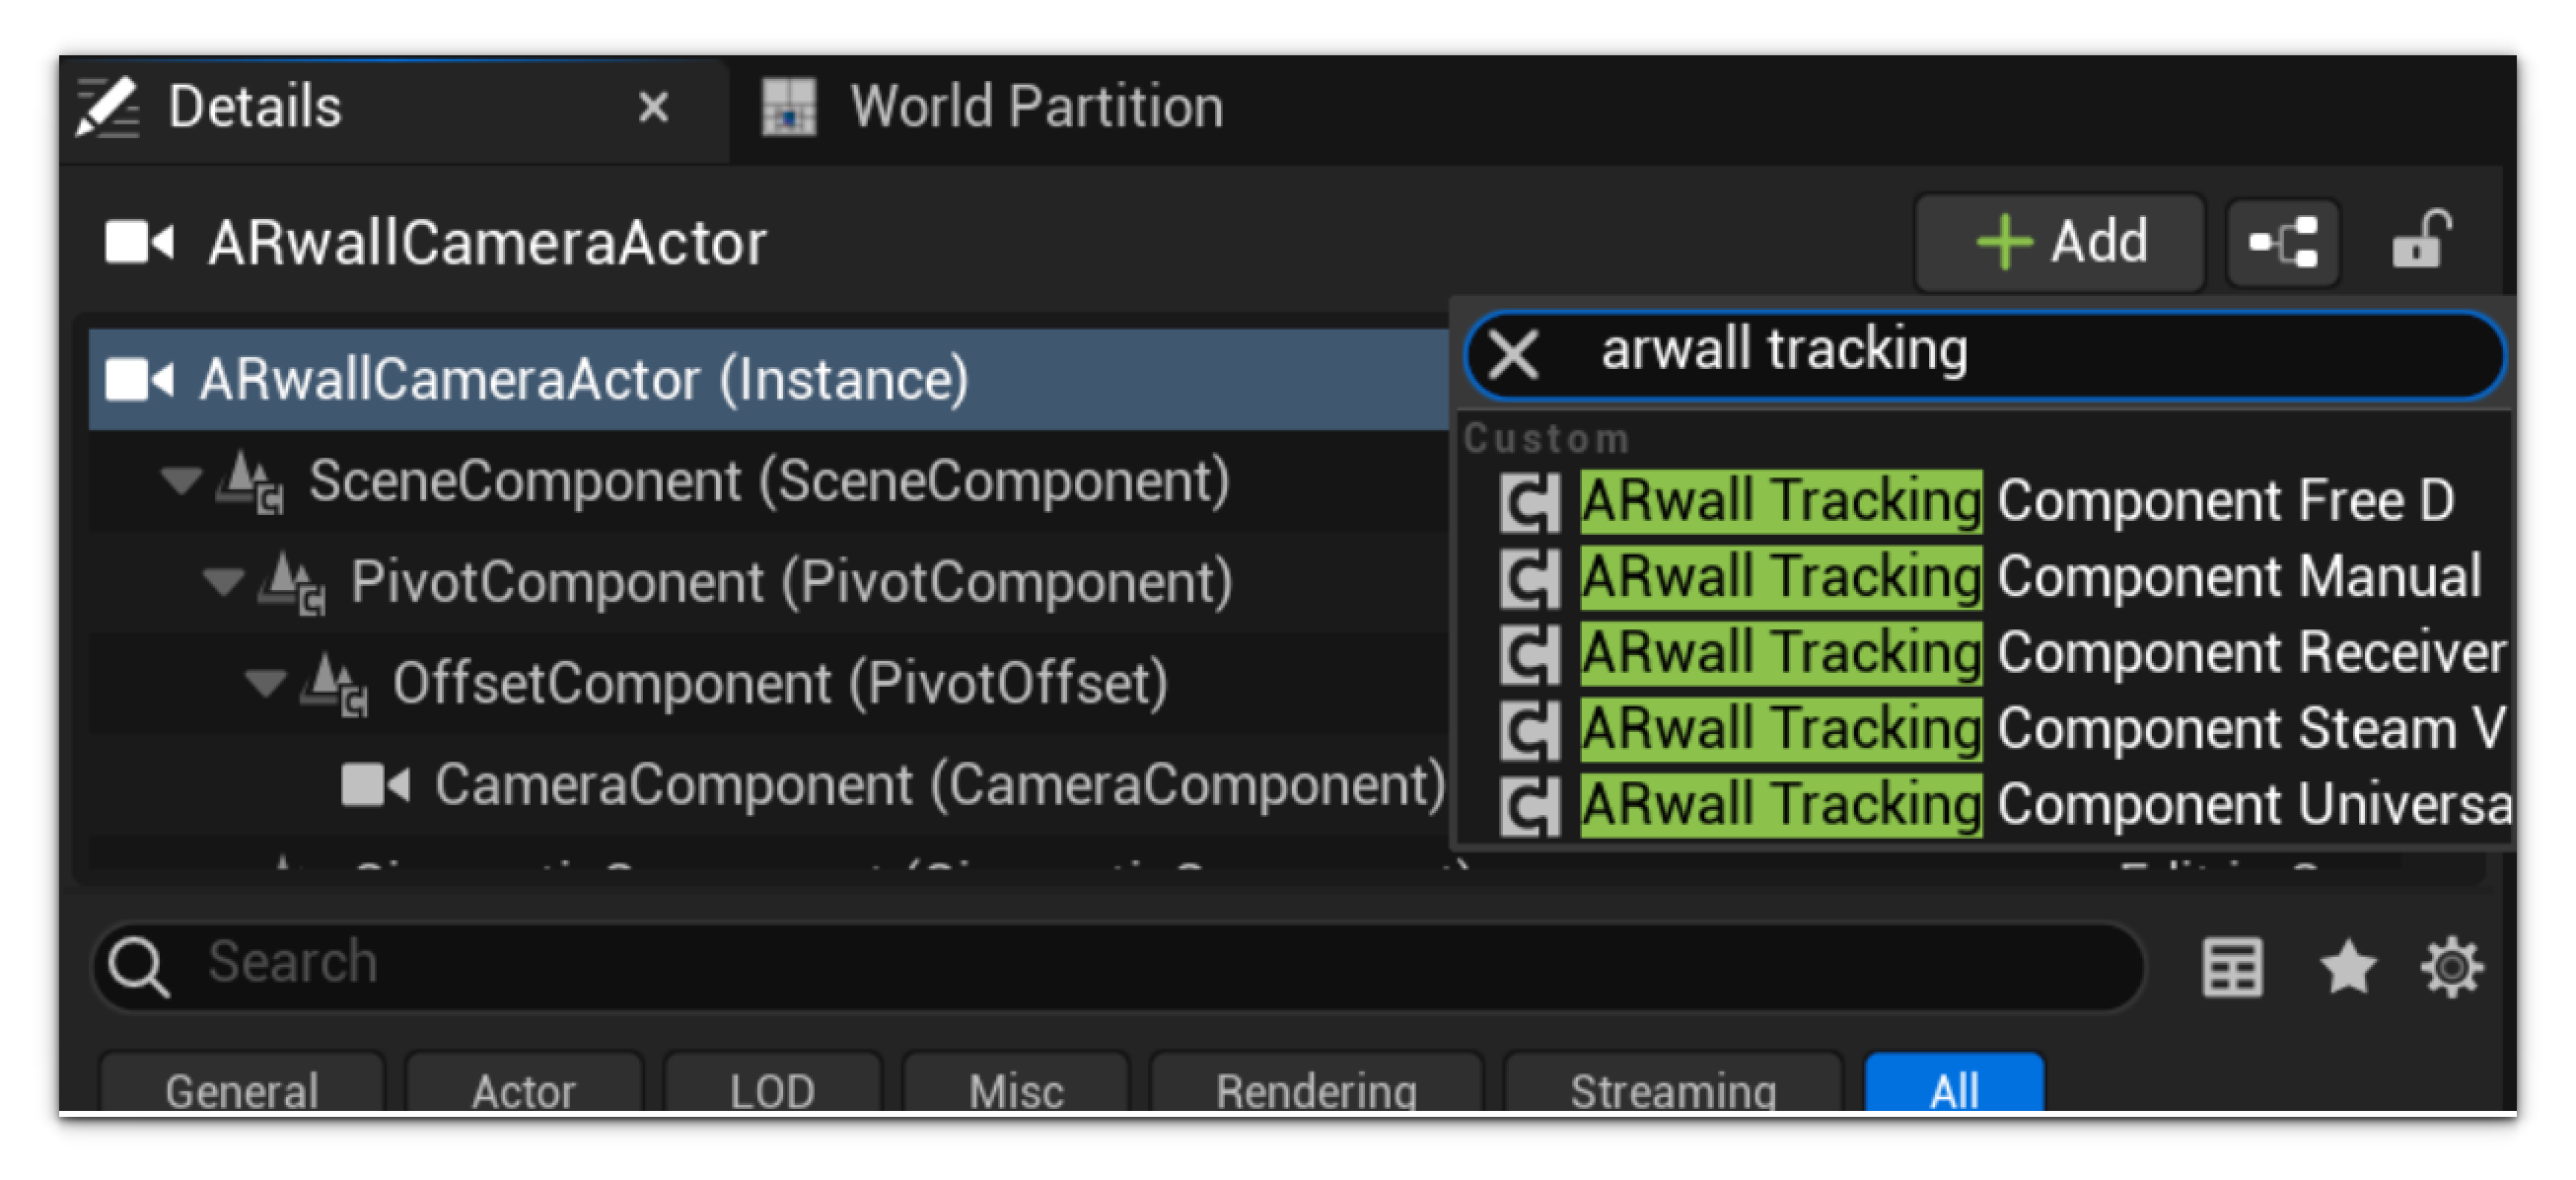
    2. Navigate to the Details panel and click the big green button ‘+Add Component’ in UE4 or the ‘+Add’ in UE5 drop down. 
    3. Type in ARwall and select the ARwallTrackingComponentSteamVR. The ARwallCameraActor object should appear in the World Outliner window.

      image-1674157452394image-1674157466230
  6. Under ARwallTrackingComponentSteamVR, assign serial numbers for the HTC Vive Trackers
    1. Entry 0: will be the Hero Vive Tracker, which is the main tracker on the camera.
    2. Calibration Serial Number: will be for the Calibration Vive Tracker

      NOTE: To find the Serial Numbers for each tracker, refer to Section 3.6 Identify and Label Vive Tracker Serial Numbers via USBDeview
      image-1674157494830image-1674157511979
      BEST PRACTICE: You can also access the ARFX Pro Plugin UI, where everything is conveniently located in the same window without having to search for them throughout Unreal Engine. Refer to Section 5.2: ARwall ARFX Pro Plugin UI for more information.
  7. Physically measure the width and height of your physical screen. Be sure to start and end from the pixel edge to pixel edge, not including the bevel frame, if any.
    1. Enter the screen width and height under Screen Width and Screen Height sections. Be sure to input them in centimeters.

      image-1674157542079image-1674157552907BEST PRACTICE: It is recommended to write down the width and height of your physical screen in centimeters on a text document and save it somewhere easy to find on your machine. This will make it easy to input these numbers again for future projects. 
  8. In the editor window, move the ARwallCameraActor to its desired location to correspond to the real world. This will be where the scene starts at launch.

    NOTE: By default, the UE4/5 units are displayed in centimeters.
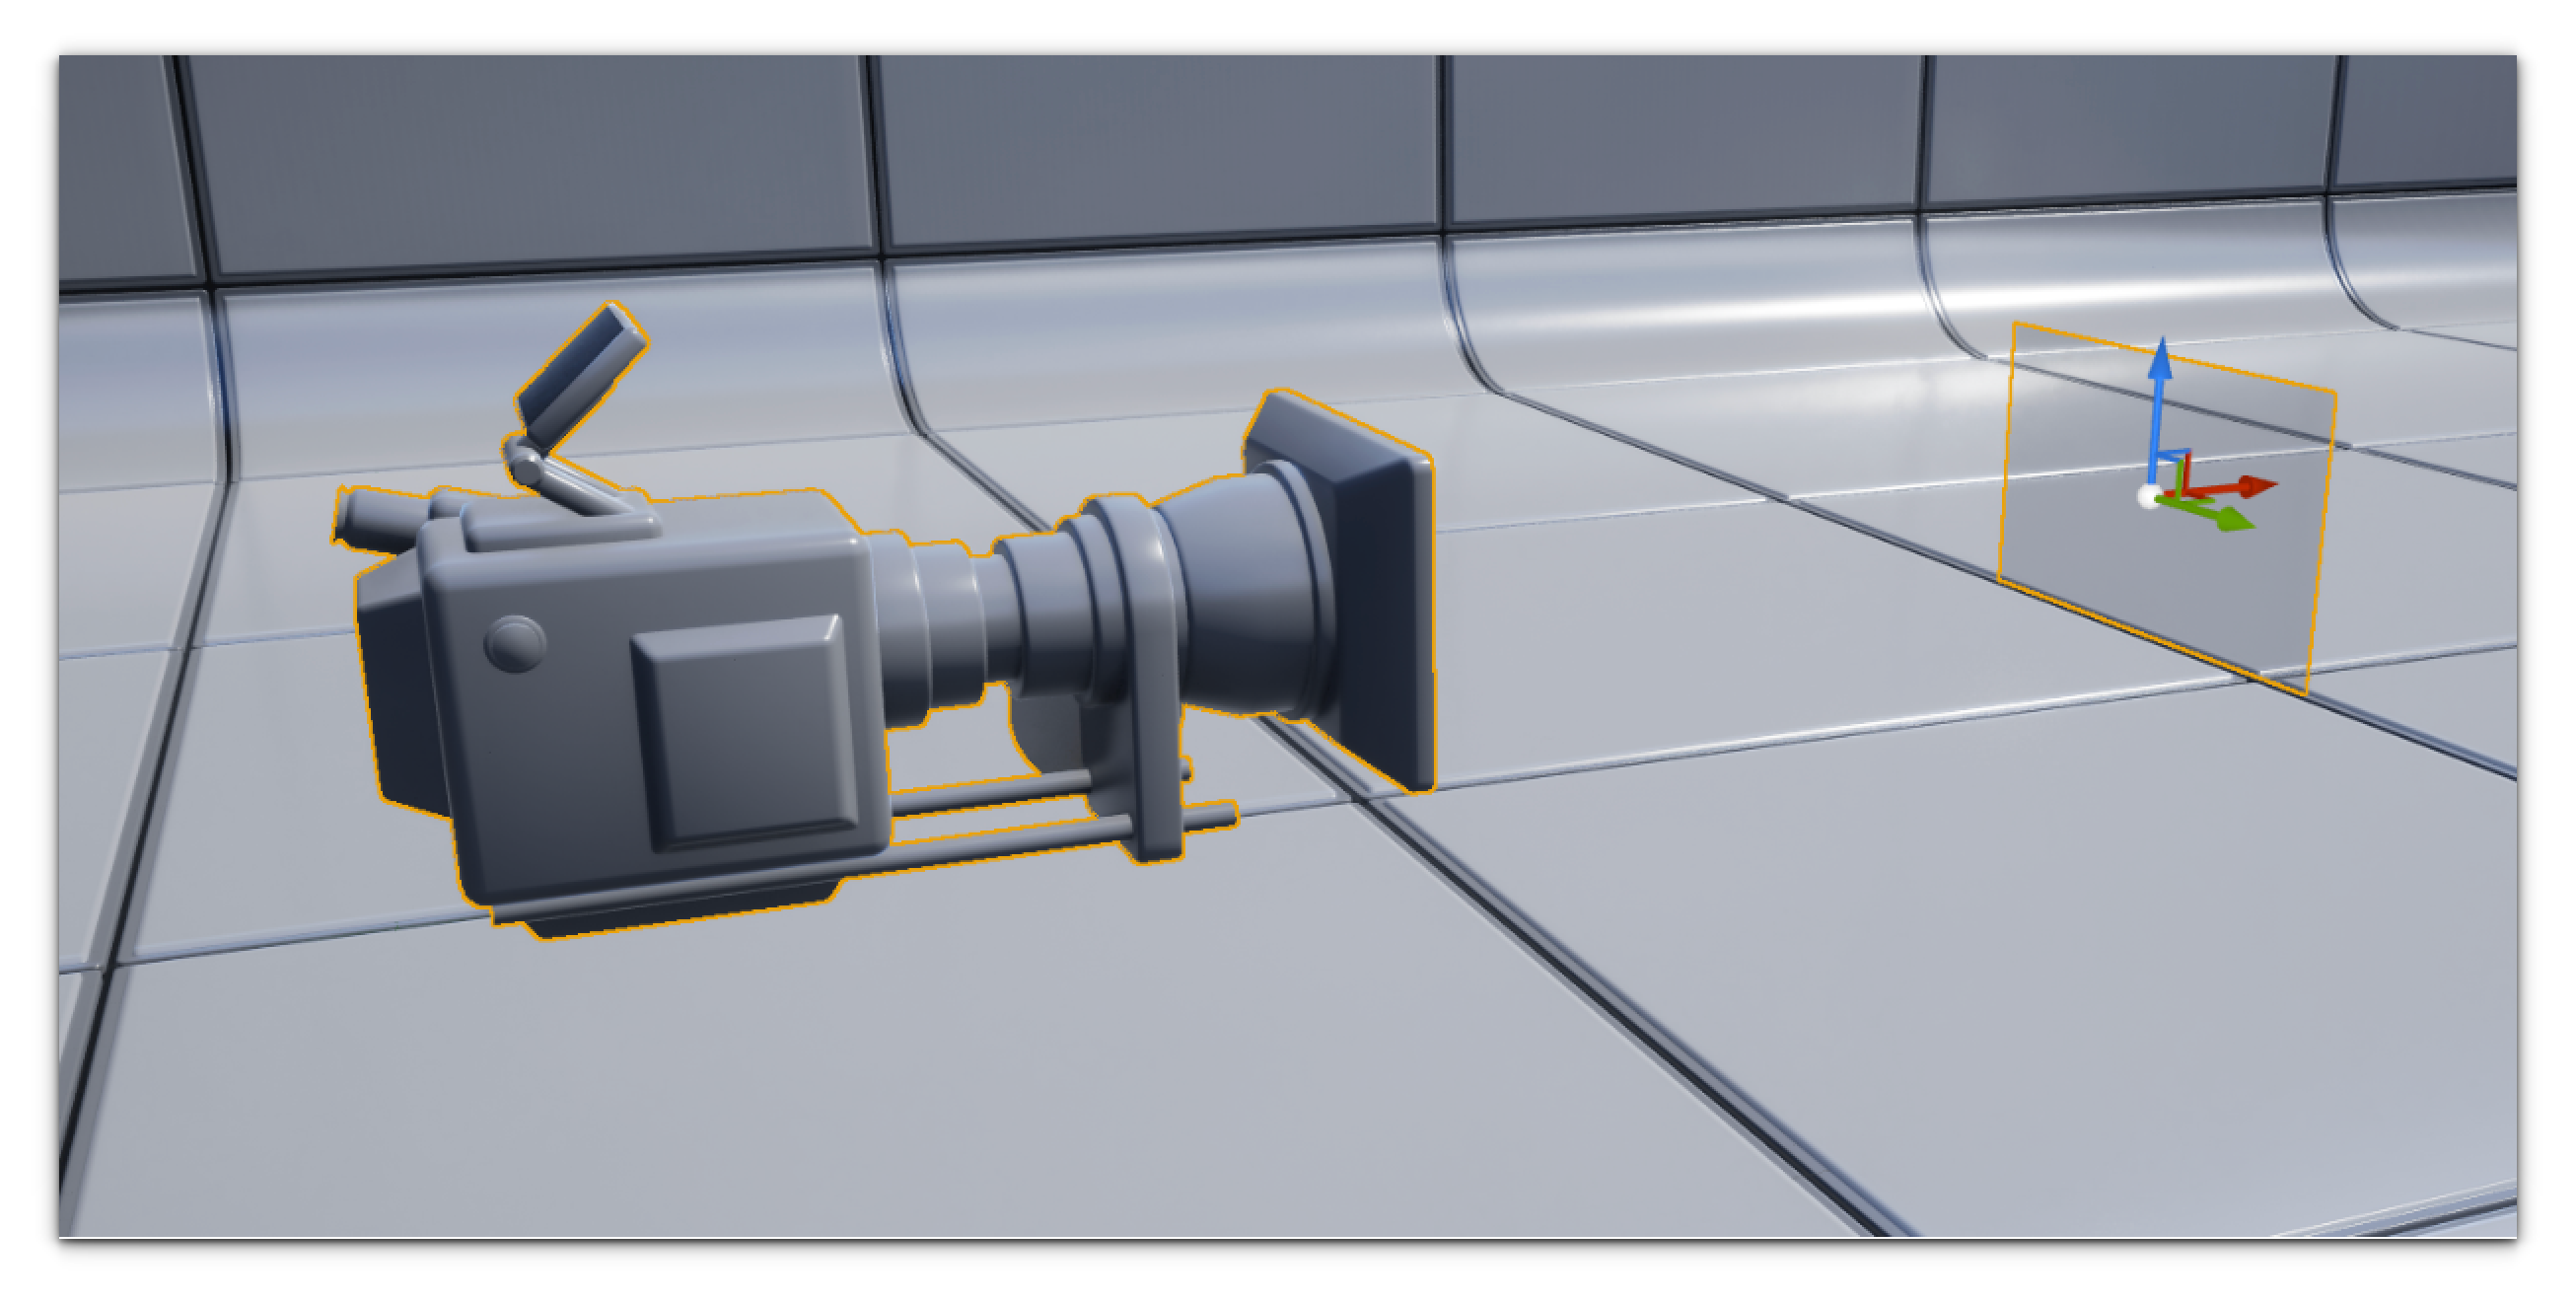
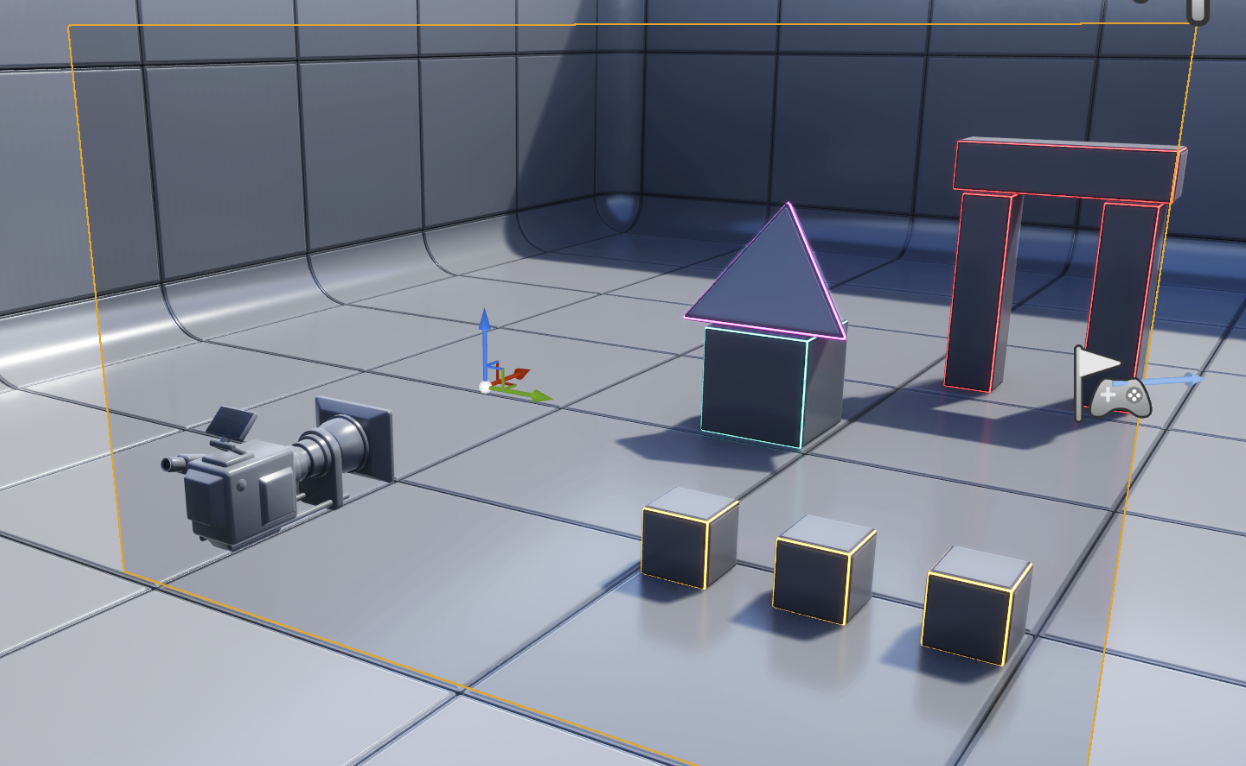
    image-1674157582547image-1674157595684BEST PRACTICE: For best experience when launching a scene, align the camera to the floor after dropping in ARwallCameraActor. This is especially important if you're trying to match the virtual scene as an extension of the physical set. Adjust the ARwallCameraActor until you see the bottom of the screen match the bottom of the virtual map (the bottom yellow line helps show if you’re on, below, or above the map floor). 
    image-1674157616527
    Changing snap size can help make micro-adjustments to align the bottom of the ARwallCameraActor to the map floor. 
    image-1674157637073NOTE: Be sure to create your scene to match world scale 1:1, or else the sizing of objects will look very off when the scene is launched with camera tracking.

  9. To launch the scene, click the Playbutton or use the hotkey Alt-P. 
    1. It is recommended to play the scene in Selected Viewport to allow manipulation of the scene, within the Unreal Engine editor, while in play mode. Before clicking Play click on the drop-down icon next to the Play button and select Selected Viewport. This will ensure that all future play sessions will open in a viewport. 
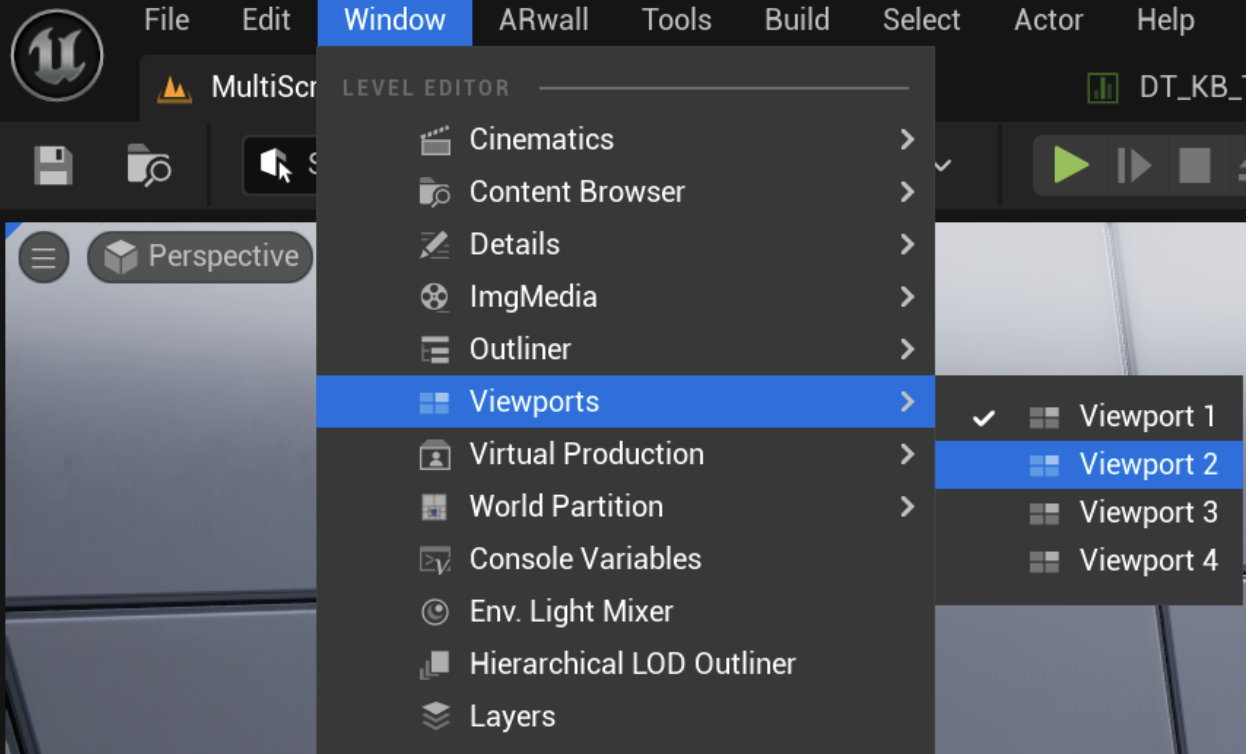
    2. If using multiple viewports, make sure to select your intended viewport before pressing Play or using hotkey Alt-P. The scene will play in the last selected viewport.

      BEST PRACTICE: It is recommended to full screen your viewport on your intended backdrop screen by pressing F11 on your keyboard when that viewport is selected. If needed, also hide the taskbar to use the entire screen with ARFX backdrop.
      image-1674157669795image-1674157681243

Section 5.2: ARwall ARFX Pro Plugin UI

You can access the ARFX Pro Plugin User Interface (UI), where everything is conveniently located in the same window without having to search for them throughout Unreal Engine. Follow the steps below to open the UI menu:

  1. Click the ARwall menu option, next to the Windows menu option in the upper left-hand corner of Unreal Engine and select ARFX.
    image-1674158604827
  2. This will open a new window where you can input all necessary information to get Virtual Production and tracking working in one place. There are three tabs to choose from: 
    1. Camera Options: This section provides the basic ARwall Camera Actor and Tracking Component options in one easy to access UI.
      image-1674158626349image-1674158637738
      1. ARwall Cameraan ARwall Camera Actor will need to be added to the map for this section to show up in this menu. 
        1. Select Camera button can help you find your ARwall Camera Actor if it has already been added, but not already shown in this panel
        2. Camera Options
          1. Disable Tracking: Disables tracking if checked on
          2. Screen Width: Enter screen width in centimeters
          3. Screen Height: Enter screen height in centimeters
          4. Near Clipping Distance: “Clips away” the virtual surface/object to unblock the virtual camera view, increase value to remove more of the object/plane, decrease value to remove less of the object/plane
        3. Camera Bookmarks: Make adjustments to bookmarks and transitions between bookmarks
          1. Disable Indexing
          2. Do Not Create Origin Bookmark
          3. F Transition Curve: Provides control of the animation between bookmarks
          4. Transition Play Rate: Adjusts speed of animation between bookmarks
      2. Tracking Component: Steam VR Tracking Component: ARwall Tracking Component SteamVR will need to be added to the ARwall Camera Actor for that section to show up in this menu.
        1. Hero Serial Number: Enter serial number for HTC Vive tracker that will be placed on the physical camera
        2. Calibration Serial Number: Enter serial number for HTC Vive tracker that will be used for calibration
        3. Samples: Number of samples taken out of 256 frames per second to calculate the velocities used in thresholds
        4. Tracking Frame Delay
        5. Velocity Threshold: For UE4, start at 0.01 or 0.02 and adjust as needed
          1. increase value by 0.01 at a time to decrease jitter on trackers
          2. decrease value by 0.01 at a time to improve slow camera tracking movements
        6. Angular Velocity Threshold: For UE4, start at 0.01 or 0.02 and adjust as needed
          1. increase value by 0.01 at a time to decrease jitter on trackers
          2. decrease value by 0.01 at a time to improve slow camera tracking movements
        7. Velocity Power Threshold: For UE5, start at 13 or 14 and adjust as needed
          1. increase value by 1 at a time to decrease jitter on trackers
          2. decrease value by 1 at a time to improve slow camera tracking movements
        8. Angular Velocity Power Threshold: For UE5, start at 13 or 14 and adjust as needed
          1. increase value by 1 at a time to decrease jitter on trackers
          2. decrease value by 1 at a time to improve slow camera tracking movements
    2. Bookmarks: This section provides the basic ARwall Bookmarks options in one easy to access UI
      1. Bookmarks: Select the bookmark to adjust from the dropdown menu and adjust in options below.
        1. Refresh
        2. Select
        3. Create: Adjust viewport to preferred virtual camera position (not in play mode) and click Create button to create a new bookmark in that position

          image-1674159295145
    3. Post Process Options: This section provides the basic Post Process Volume options in one easy to access UI. 
      1. Post Process: Post Process Volume will need to be added to the map for this section to show options. Make sure to set PPV to Enabled and Infinite Extent (Unbound). 
      2. Select the Post Process Volume to adjust from the dropdown menu and adjust in options below.

        image-1674159315737

NOTE: When re-opening an Unreal Engine project that already had the ARFX Pro Plugin UI window open, it may show as a blank/black window. Simply close out that window and relaunch the ARFX Pro Plugin UI window from the Unreal Engine menu as described in steps 1-2 above to re-open the UI. 

Section 5.3: Physical Camera and Hero Tracker Offset Setup

The Camera Offset function allows you to change the settings inside Unreal Engine 4/5 in order to match the physical distance between the physical camera sensor and the hero camera tracker. 

NOTE: This is not always necessary, but if there are perceived issues in parallax or scale when in play mode, the camera offset should be adjusted. Accurate recordings help the virtual and real environments to match. If there are no perceived issues, then these settings can be left alone. 

  1. Set up physical camera hero tracker offset to match in Unreal Engine. 
    1. Match the virtual ARwall Camera Actoroffset to match the physical camera hero tracker offset.
      1. Measure the vertical (up/down, X-axis), depth (forward/backward, Z-axis), and side to side (left/right, Y-axis) physical distance in centimeters from the physical camera sensor to the bottom/center of the physical Vive hero tracker.
        image-1674159463190BEST PRACTICE:  A physical camera’s sensor’s depth is often represented by focus puller hook. Make sure to account for the sensors depth when measuring for the x-axis offset.

      2. Follow the examples displayed in the image below to offset correctly. Left offsets negatively, right offsets positively.
        image-1674159571084
      3. Input the X, Y, and Z-axis values determined from physical measurements into ARwallCameraActor > OffsetComponent > Transform > Location’s X, Y, and Z-axes.
        image-1674159588265image-1674159599315

Section 5.4: Change ARwall Camera Settings

Changing the ARwall camera settings allows you to match the virtual camera to the physical camera as closely as possible by changing the camera, lenses, focus, and aperture. 

NOTE: While the following settings below can help match the virtual ARFX camera to the physical camera, the placement of the physical camera will also change how the virtual camera angle looks. It is a delicate dance between virtual camera and physical camera to get the right look for a shot, and it is recommended to have tech rehearsals ahead of production shoot days to pre-set virtual camera settings and bookmarks and physical camera locations on the physical set. 

To change the ARwall camera settings, do the following: 

  1. Select the ARwallCameraActor in your scene or in the World Outliner, navigate to the Current Camera Settings section in your Details panel. 
  2. Click on the box in this section to display a dropdown list of cameras or lenses that you can select from to match your equipment.

image-1674159662601

image-1674159674273

image-1674159686956

image-1674159699387

image-1674159714977

image-1674159728409

Section 5.5: Adding ARwall Bookmark Cameras

Adding an ARwall Bookmark Camera helps you bookmark a specific virtual camera angle of the scene you would like to shoot. This allows quick movement from one virtual camera angle to another, making shooting multiple angles in a scene easy and quick. 

To add ARwall Bookmark Cameras to a scene, do the following:

  1. Open the Unreal Engine 4/5 project.
  2. If using multiple maps within one project, under the Content Browser section, load the level .umap you want to add the bookmark cameras to.
  3. Add the bookmark camera to the scene by dragging it from the Place Actors window under the ARwall tab shown in the next image, which is located on the left-hand side of the Unreal Engine GUI.
  4. Drag the ARwall Bookmark Camera to the desired location in editor window.

image-1674160237980image-1674160259661

NOTE: You can also create a bookmark with the “backspace” hotkey on the keyboard while in Play mode. This will create a bookmark wherever the virtual camera is currently placed.

BEST PRACTICE:  If you're trying to match the virtual scene bookmark as an extension of the physical set, do the following: 

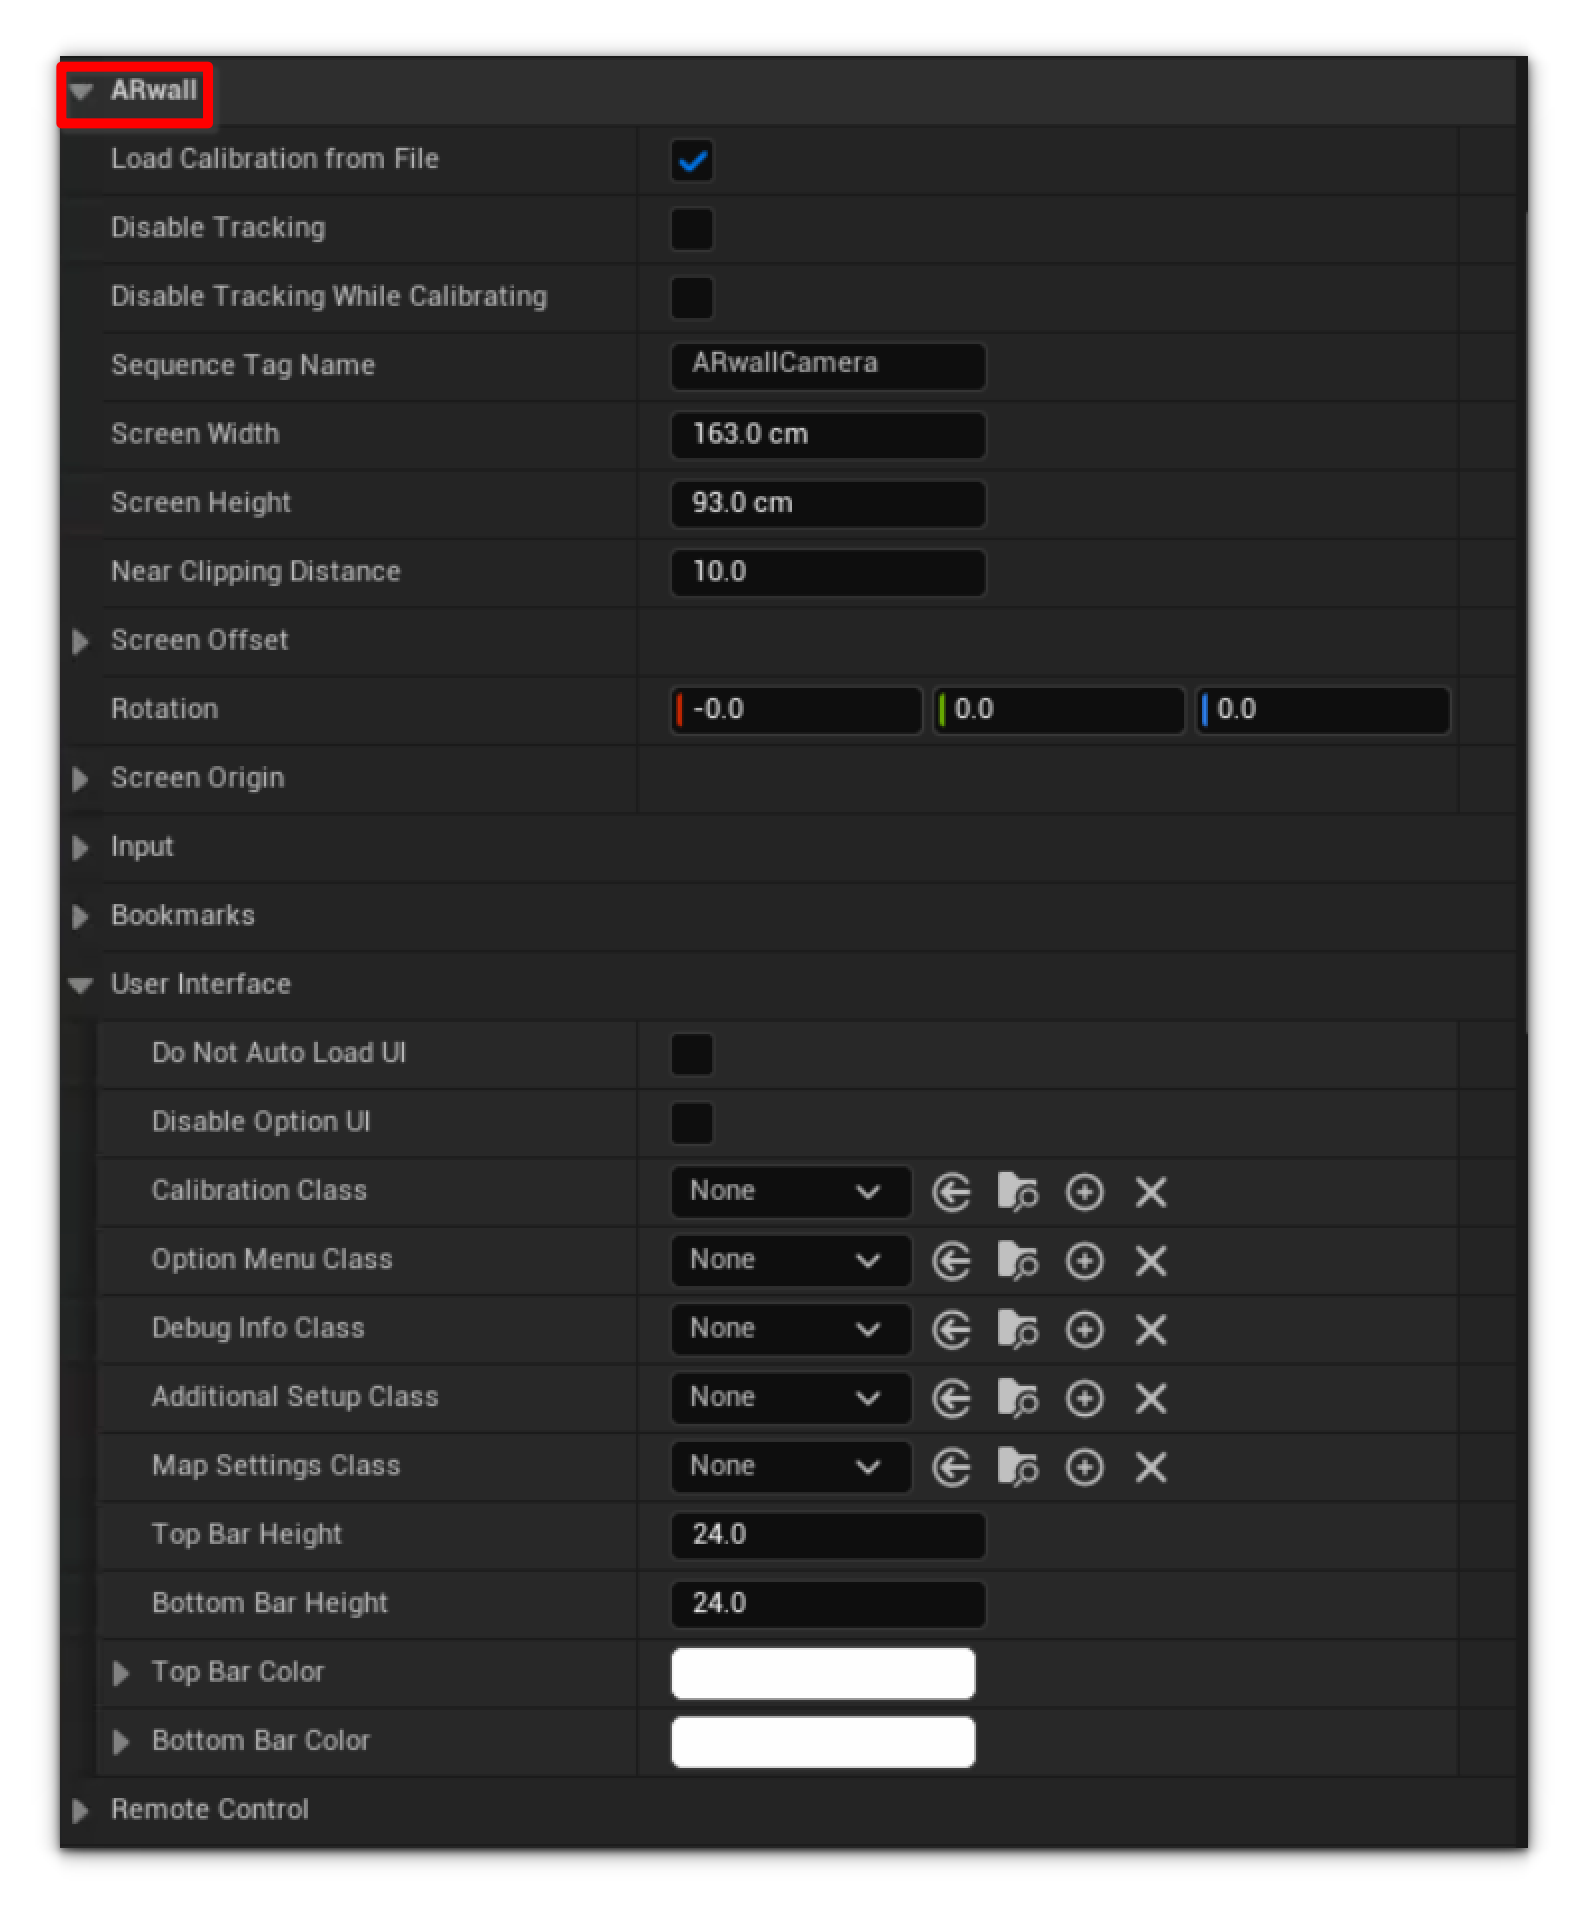
While the ARwallBookmark camera is selected, navigate to Details > ARwall and check the "Draw Screen" checkbox to show the screen size for all future created ARwall Bookmarks. 

image-1674160285961

If left checked on as default, this can create a cluttered map to work in, so use with caution. Adjust the Bookmark Screen until you see the bottom of the screen match the bottom of the virtual map (the bottom yellow line helps show if you’re on, below, or above the map floor). 

BEST PRACTICE:  Snapping the virtual camera to a surface can perfect your virtual camera location before creating a bookmark. While in play mode, you can snap your camera to different surfaces by pressing "T" on the keyboard or pressing down "Left stick" on your Xbox controller to toggle on/off Snap Mode. Once enabled, use the arrow keys on the keyboard or the D-PAD arrows on the Xbox controller in the direction you want to snap to. Be sure to disable Snap Mode once finished by pressing "T" or "Left stick" again.

Section 5.6: Changing ARwall Bookmarks Order

To change bookmarked camera order, do the following:

  1. Open the Unreal Engine 4/5 project
  2. If using multiple maps, under the Content Browser section, load the level .umap you want to adjust the bookmarked camera order for.
  3. Once the map is loaded, go to the (World) Outliner and type ARwall into the search bar as shown below.
    image-1674160482183image-1674160493045
  4. You will see a list of ARwallBookmarkCameras located in the scene.
  5. Click on ARwallCameraActor.
  6. Under the Details section, go to the second scroll bar and scroll down until you see ARwall Bookmarks as shown below.
    image-1674160529447image-1674160543673
  7. Click to check the Disable Indexing box. This stops ARwallCameraActor from assigning bookmarked camera order based on which camera is loaded first.
  8. Click on the ARwallBookmarkCamera that you want as the second bookmarked camera in the chain.
  9. Under the Details section, scroll down until you see ARwall/ARwall Toolset. Click the triangle next to Bookmark to open the drop-down list as shown below.
    image-1674160574328image-1674160586999
  10. Go to Bookmark Index and change the index number to 1. This is the second camera in the chain. ARwallCameraActor is the first in the chain and will have an index number 0.
    image-1674160608671image-1674160620420
  11. Repeat Steps 8 – 10 to set up the next bookmarked camera in the chain by setting the third camera with Bookmark Index number 2 and so on.

    NOTE: These changes will only apply to the current map and will not be applied to other maps in the project. 

  12. Once the Bookmark Index numbers have been set, click save and you can run the scene normally.

    BEST PRACTICE: It is best to check the bookmarked camera in editor viewport before changing the Bookmark Index number. This will make sure you have the bookmarked camera that you want in the correct order.
     
    NOTE: To revert the bookmark settings back to default, just change the Bookmark Index number for each ARwallBookmarkCamera back to -1. Next, go to ARwallCameraActor and make sure the Disable Indexing box is unchecked.

Was this article helpful?