ARwall ARFX Launcher
- 07 Aug 2025
- 5 Minutes to read
- Contributors


- Print
- DarkLight
ARwall ARFX Launcher
- Updated on 07 Aug 2025
- 5 Minutes to read
- Contributors
- Print
- DarkLight
Article summary
Did you find this summary helpful?
Thank you for your feedback!
Section 4: ARwall ARFX Launcher
This section describes how to install, set up, and run the ARwall ARFX Launcher. These instructions assume that the computer and tracking hardware have already been set up from Section 2: General Computer Set Up and Section 3: HTC Vive Motion Tracking Hardware Set Up.
Section 4.1: Installing the Launcher Software
To install ARwall ARFX Launcher, do the following:
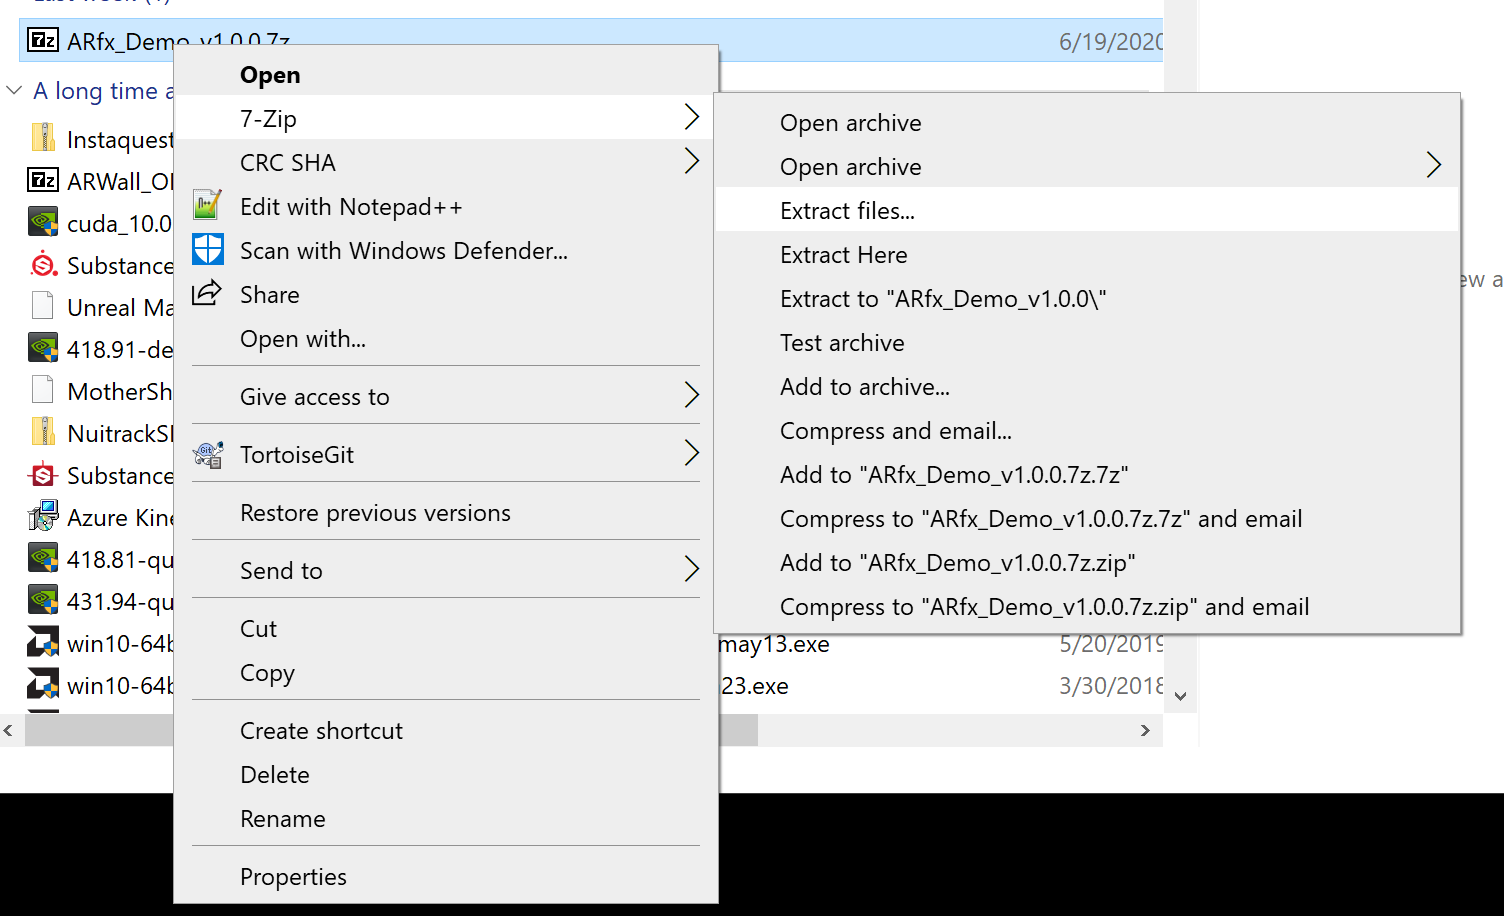
- Extract the Launcher file (ie. ARfx_Demo_v1.0.0.7z or StarterPack_08-14-2022.7z) using 7-Zip by right clicking the file and selecting 7-Zip > Extract Files....
- NOTE: If your machine does not have 7-Zip, please download and install it from here: https://www.7-zip.org/
- Choose where you want to extract to, then Click "OK"
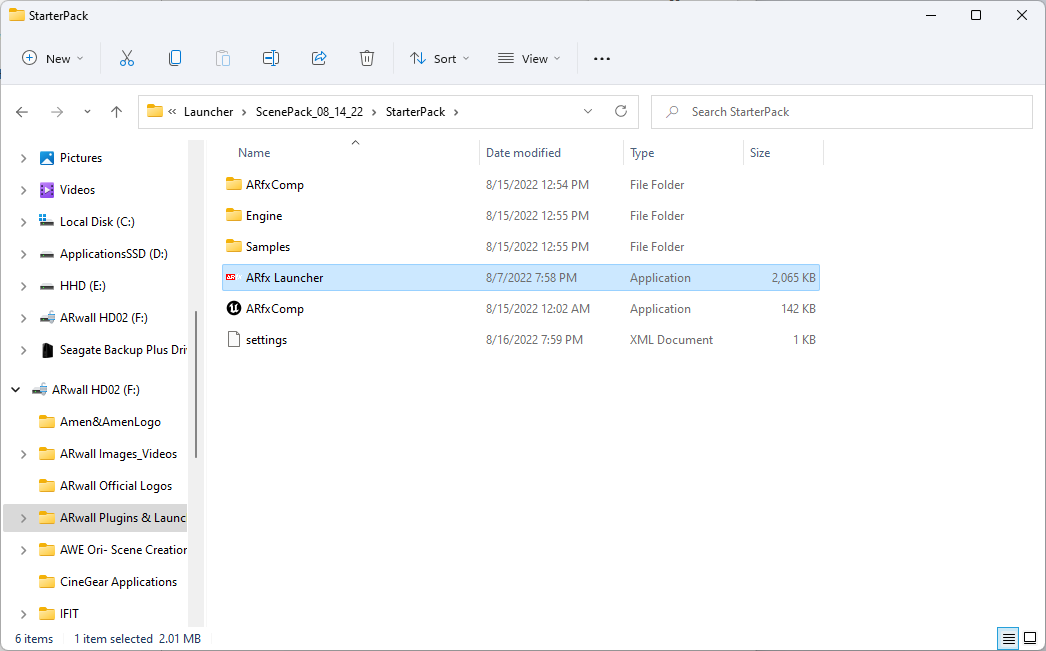
- Once extracted, locate your StarterPack folder, open it, and locate ARfx_Launcher.exe. This will be the file to open the launcher.
NOTE: Please allow enough time for the file to completely extract, as it can be large.
Section 4.2: Setting up the ARFX Launcher
To set up ARwall ARFX Launcher, do the following:
- Locate ARfx_Launcher.exeand double click it to run the launcher.
- ARFX Launcher User Interface
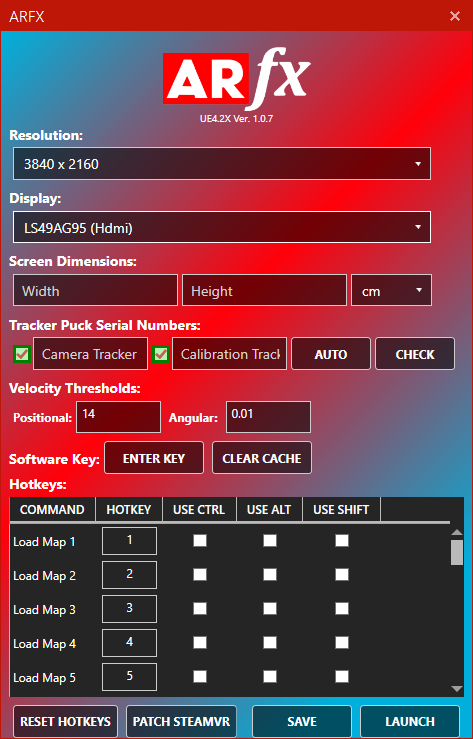
- ARFX Launcher User Interface
- The Launcher screen will open, select and input the appropriate information for your system:
- Resolution: Resolutions supported by your monitor as reported by Windows.
- Choose the intended resolution you would like to run ARFX on (usually highest resolution available is recommended)
- Display: List all monitors connected to this machine. Each is given by Windows.
- Select the display you want to run ARFX on
- If the launcher does not load on display you selected, please refer to Section 7.5: ARFX Launcher loading on wrong display for troubleshooting.
- Screen Dimensions:
- Width: Physically measured width of the screen. Please be sure to measure it!
- Height: Physically measured height of the screen. Please be sure to measure it!
- cm or inch: Units in which your screen measurements were made in. Highly important, please double check this!
- Measure the width and height of the screen (within the bevel) you will be running ARFX on (can be in centimeters or inches) and input in the relevant boxes
- Tracker Puck Serial Numbers: This should automatically detect the serial numbers of the HTC Vive Trackers that are currently connected to the computer.
- Camera Tracker: USB ID of the Vive Puck used for the hero camera.
- Calibration Tracker: USB ID of the Vive Puck used for calibration.
- AUTO: This will try to automatically obtain any Vive Pucks connected (or once connected) to the system and assign them to the Camera and Calibration IDs. Please ensure your devices are connected and on before pressing this.
- CHECK: This will check if the devices with the provided IDs are connected.
- Click AUTO or CHECK to populate or confirm that two Tracker serial numbers are recognized.
- If the tracker is paired and seen by SteamVR, the serial number should show up.
- If the tracker is paired and physically wired, the box next to that tracker should also show as a green checkmark.
- NOTE: If there is only one tracker available, please make sure the same serial number shows up for both Camera Tracker and Calibration Tracker boxes to use the same tracker for both tracking and calibrating.
- NOTE: If the calibration and hero trackers are swapped when ARFX is launched, the serial numbers can be swapped within the menu system while in play mode or on the Launcher screen or the physical trackers can be physically swapped.
- Velocity Thresholds:
- Positional: Velocity threshold before updating position (in cm/sec).
- Angular: Velocity threshold before updating angle (in degrees/sec).
- It is recommended to set both Positional and Angular to 0.01.
- BEST PRACTICE: If tracking is jerky for a slow-moving hero camera shot, lower the Positional and Angular values down by 0.01 or 0.001 increments at a time until the tracking is smooth. If the hero tracker is sitting still but there is perceived jitter on the ARFX background, increase the Positional and Angular values up by 0.01 or 0.001 increments until the jitter no longer shows.
- Software Key:
- ENTER KEY: Enter your key/Activation Code to access the software.
- Click ENTER KEY and this screen will open.
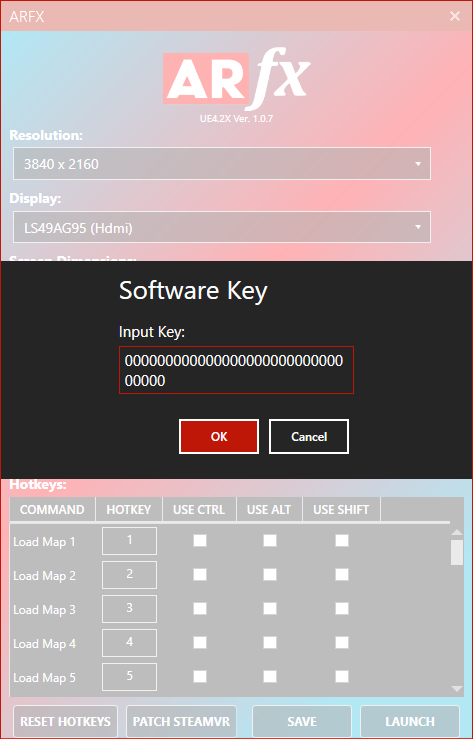
- Copy and paste your Activation Code and click OK.
- Click ENTER KEY and this screen will open.
- CLEAR CACHE: Forcefully clears your login cache.
- If you accidently put in the wrong Activation Code, click CLEAR CACHE and try again.
- NOTE: Please reach out to your ARwall representative or email support@arwall.co to acquire an activation code if you don’t already have one.
- ENTER KEY: Enter your key/Activation Code to access the software.
- Hotkeys: Take note of existing hotkeys and change any if needed. Clicking the USE CTRL, USE ALT, and USE SHIFT for a hotkey option means that the designated button will need to be held down when pressing the hotkey to activate the command.
- NOTE: If the “HOME” key is difficult to access on the keyboard, it’s recommended to change the “Calibrate Screen” option to the letter “C” or any other key that’s not being used by another hotkey option.
- RESET HOTKEYS: Click this button if you would like to reset hotkeys to their default settings
- PATCH STEAMVR: Click this button once when you first launch the launcher or when you notice SteamVR has an error message saying it cannot find the headset/HMD. This should bypass SteamVR’s requirement to have a headset attached to the system to run SteamVR.
- SAVE: Click this button to save any settings you changed in the launcher screen
- LAUNCH: Click this button when all settings have been finalized to launch the ARFX Scene
- Resolution: Resolutions supported by your monitor as reported by Windows.
- If this is the first time running the ARFX Launcher on your machine, make sure to click PATCH STEAMVR button at least once so that SteamVR is set up properly to run with ARFX
- Once all settings have been finalized, click SAVE to save settings and then click LAUNCH to start the ARFX Demo/Scene
- If this is the first time running the ARFX Launcher or the cache was cleared for the software key, this screen may open:
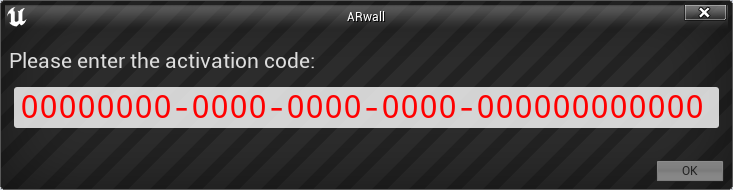
- Copy and paste your Activation Code and click OK.
- You should see the ARFX Screen open along with a browser window with a login prompt.


- BEST PRACTICE: If the ARFX Screen opens above the browser window and you can’t see the browser window, please use ALT-TAB on the keyboard to select the browser window to display on top.
- On the Microsoft Login Screen, log in using your chosen email/password account.
- If this is the first time using an ARwall product, please create a new account by clicking Sign up now or if you have an existing Microsoft account, please use the Microsoft Accountbutton to login.
- After your first successful login, be sure to use the same email login and password for all future logins.
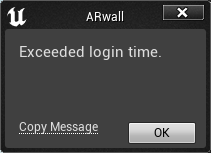
- NOTE: You will have 90 seconds to login before the pop-up below appears and the Launcher closes. If the ARFX screen loads on top of the browser login window, please use ALT+TAB buttons to choose the browser window and complete login before using the ARFX screen before the 90 second window closes.
- If this is the first time using an ARwall product, please create a new account by clicking Sign up now or if you have an existing Microsoft account, please use the Microsoft Accountbutton to login.
- After login has been approved you will see this window.

- Click back to your ARFX Screen, proceed with calibration as defined in Section 5.1: XR Sync Calibration.
Was this article helpful?