- Print
- DarkLight
ARFX Pro Plugin Quick Start Guide
Congratulations on your new purchase of the ARFX Pro Plugin! The ARwall team is here to help you achieve your filmmaking dreams with easy-to-use virtual production tools. These are the same tools we have used on many of our own projects like The Muppets Haunted Mansion, Nightflyers, and many more!
ARFX Pro Plugin Installation Requirements
A basic understanding of Unreal Engine is required to navigate and use the ARFX Pro Plugin. However, there is no need for coding or Blueprint knowledge. The virtual production setup has been streamlined with easy-to-use User Interfaces and Options Menus. This guide provides step-by-step guidance with detailed images to walk you through the setup. At ARwall, we prioritize making our tools accessible and straightforward to use!
Hardware Requirements
If ARwall did not provide a pre-configured computer, you will need the following hardware to set up the ARFX Pro Plugin:
Minimum Hardware (1080P to 1440P)
CPU: AMD 5700X | Intel Core i5-12400F
GPU: Nvidia GeForce RTX 3080 Super
RAM: 16GB DDR4
Storage: Projects running on an SSD
Recommended (4K and Beyond Resolution)
CPU: AMD 7800X3D | Intel Core i9 14900KS
GPU: Nvidia GeForce RTX 4090
RAM: 32GB DDR5
Storage: Both OS and projects running on M.2 SSDs
Tracking Hardware
HTC Vive 2.0/3.0
Base Stations: 2 HTC Vive 2.0/3.0 (recommended 3-4 base stations for larger play areas, up to 10 base stations supported)
Trackers: 1-2 HTC Vive 2.0/3.0 trackers, with USB 3.0 extension cables that connect from the machine to the center of the screen (for calibration) and the camera play area
Screen: Any screen (computer monitor, projector, TV, or LED wall), 32 inches or larger, connected to your machine
Software Requirements
Unreal Engine Installation
Install Unreal Engine 5.3 or 5.4. You can find the Unreal Engine Installation Instructions here
Create a free account if you don’t have one.
Steam and SteamVR Installation
Install Steam. Please refer to the Steam Installation Guide here
Create a free Steam account for your team if needed.Install SteamVR:
Search for SteamVR within Steam or use this link.
SteamVR will help you identify and troubleshoot connected Vive Pro devices.
Please refer to Section 3.5 SteamVR Software Set Up below for more instructions on Steam, SteamVR, and USBDeview setup instructions.
USBDeview Installation
USBDeview is often installed with SteamVR at
C:\Program Files (x86)\SteamVR\tools\USBDeview\win32\USBDeview.exe.
If not, download and install it separately from here.
USBDeview helps you find the HTC Vive serial numbers.
7-Zip Installation
Install 7-Zip:
Download and install from here.
.NET Runtime Installation
If running ARFX Pro Plugin versions UE 5.3, UE 5.4, or later, please install .NET 8 Desktop Runtime
Find and Download.NET8 Runtime Desktop here. Alternatively, you can also use this direct Link (this link can change due to updates)
If running ARFX Pro Plugin versions prior to UE 5.1 version 62 or UE 5.2 version 66, please install .NET6 Runtime:
Select Run Desktop apps and install the x64 version.
Prerequisites
Please note that a basic knowledge of Unreal Engine is needed to navigate the game engine to run the ARFX Pro Plugin. However, no coding or blueprint knowledge is needed. Setting up the virtual production part has been simplified and consolidated into easy-to-use User Interfaces and Options Menus. Our User Manual demonstrates how to use our plugin in detail, including many photos and images to help walk through the process. ARwall strives to make our tools easy to set up and use!
If ARwall did not build and issue you a computer, for a basic set up using ARFX Pro Plugin, please note that you’ll need the following hardware:
Tracking Hardware Requirements
- HTC Vive 2.0 or 3.0
- 2 HTC Vive 2.0 or 3.0 Base Stations
- If using in a larger play area, it is recommended to add a third or fourth base station to extend the play area for the trackers. The full system can support up to 10 base stations at a time.
- 1-2 HTC Vive 2.0 or 3.0 Trackers
- With USB 3.0 extension cables that are long enough to connect the trackers from the machine/server to the center of the screen (1 calibration tracker puck) and wherever the camera will be in the play area (1 hero tracker puck)
- If only using one tracker make sure to have a USB extension cable that is long enough to reach both the center of the screen and wherever the camera will be in the play area
- 2 HTC Vive 2.0 or 3.0 Base Stations
- Any type of screen (can be a computer monitor, projection, TV, or LED wall), 32 inches + recommended, that is connected to your machine/server
Videos
- Login Tutorial Video walkthrough
- ARFX Pro Plugin UI walkthrough
- 5 ARFX Pro Tips.
- ARFX Comp Pro UI & Setup (for green screen)
- ARFX Options Menu walkthrough
- HTC Vive Lighthouse set up
- The last 15 seconds of this video is probably the most useful for you, where we demonstrate how to position the lighthouse to see the intended play area for the tracker.
- HTC Vive Base Station Channel Set up
- If using more than 2 base stations, be sure to change each base station to be on its own unique channel.
Product Setup
Please refer to the ARFX Pro Plugin Manual for a thorough setup.
- Notable sections to set up for the ARFX Pro Plugin are:
Installing the ARFX Pro Plugin
This section describes how to install the ARwall ARFX Pro Plugin and add new maps to an existing Unreal Engine 4/5 Project.
Section 4.1: Installing the ARwall ARFX Pro Plugin
This section explains the process of installing the ARwall ARFX plugin to an existing Unreal Engine 4/5 project.
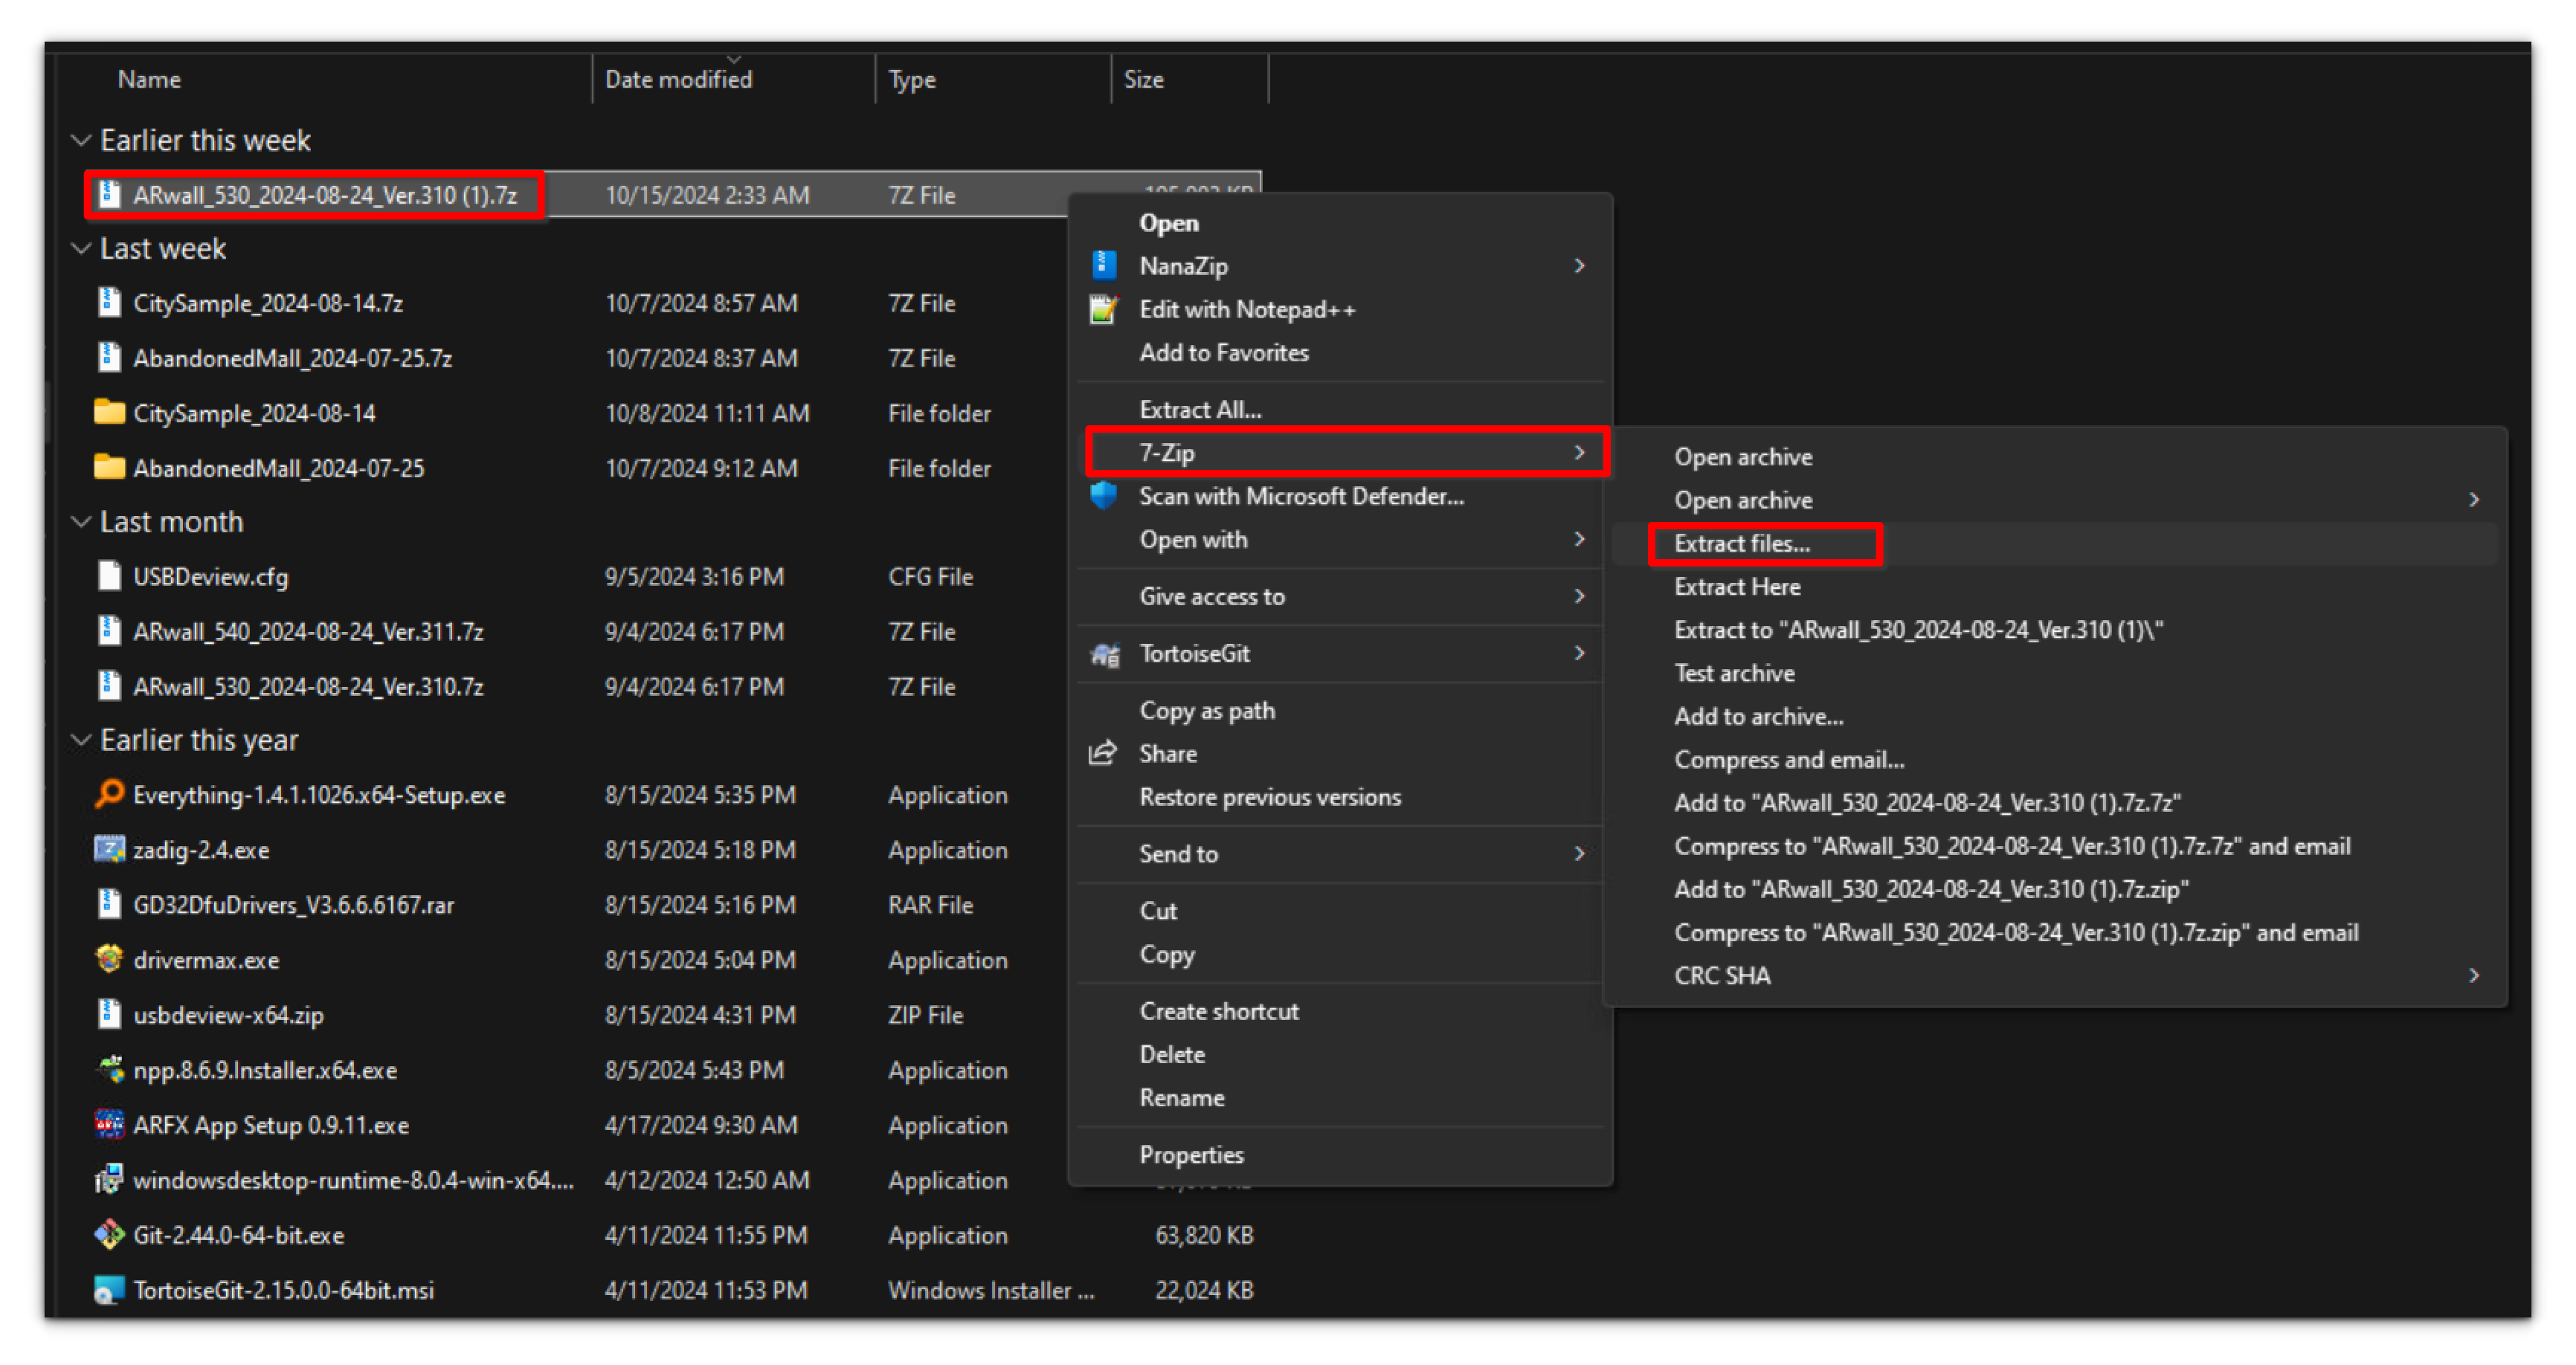
- Extract the ARwall Plugin file (ie. ARwall_427_NL_2022-10-26.7z, ARwall_503_NL_2022-10-26.7z, etc.) using 7-Zip by right-clicking the file and selecting 7-Zip > Extract Files....
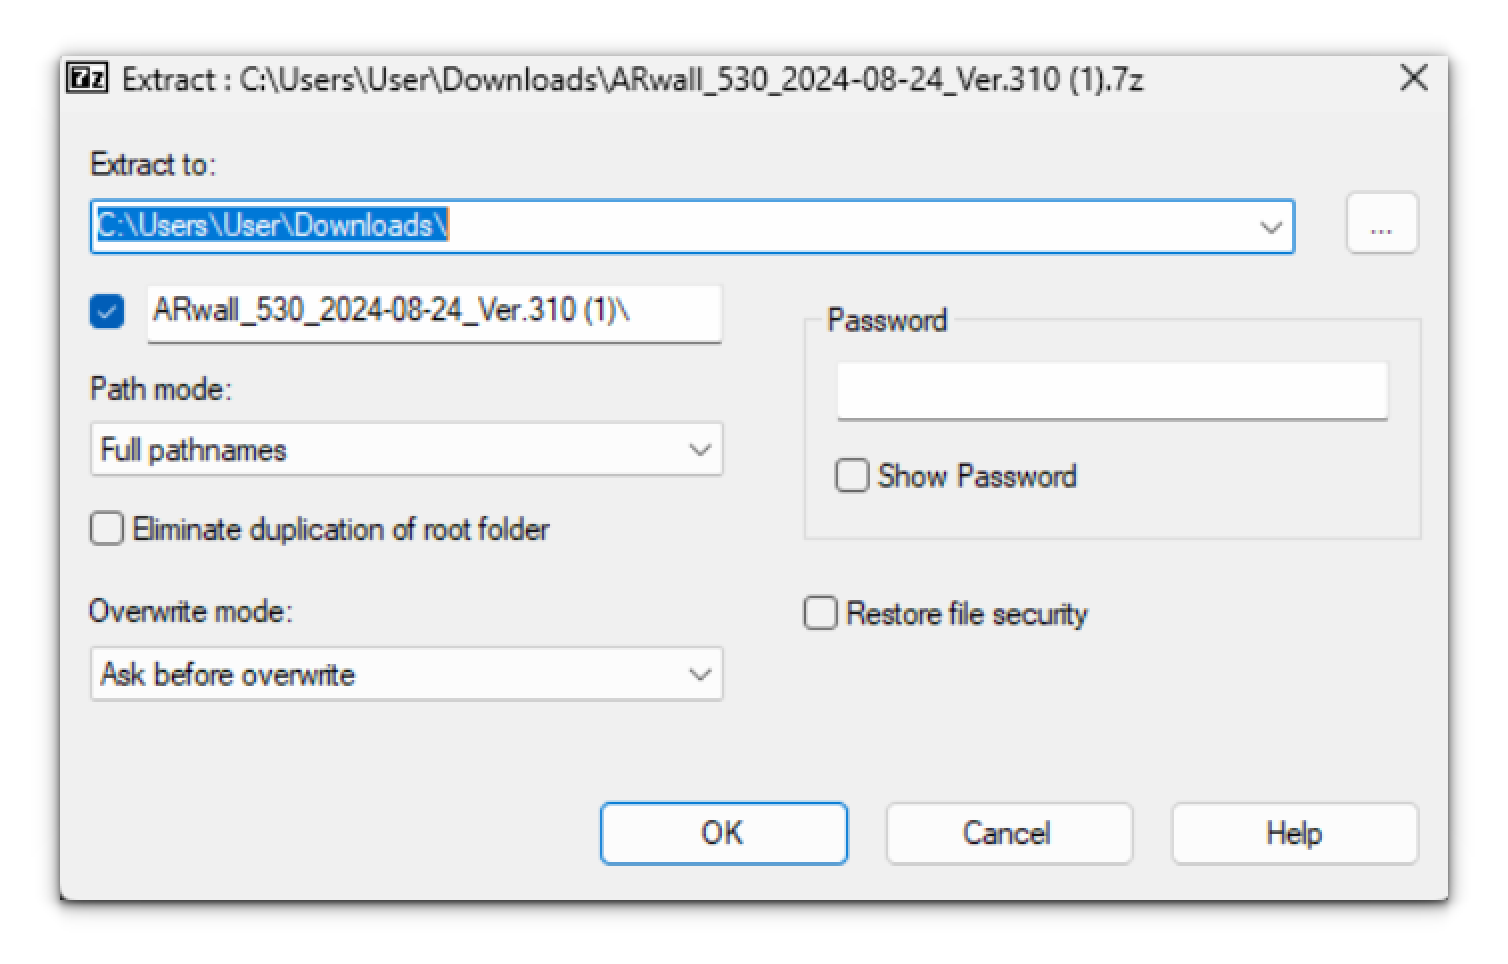
2. Choose where you want to extract to, then Click "OK".
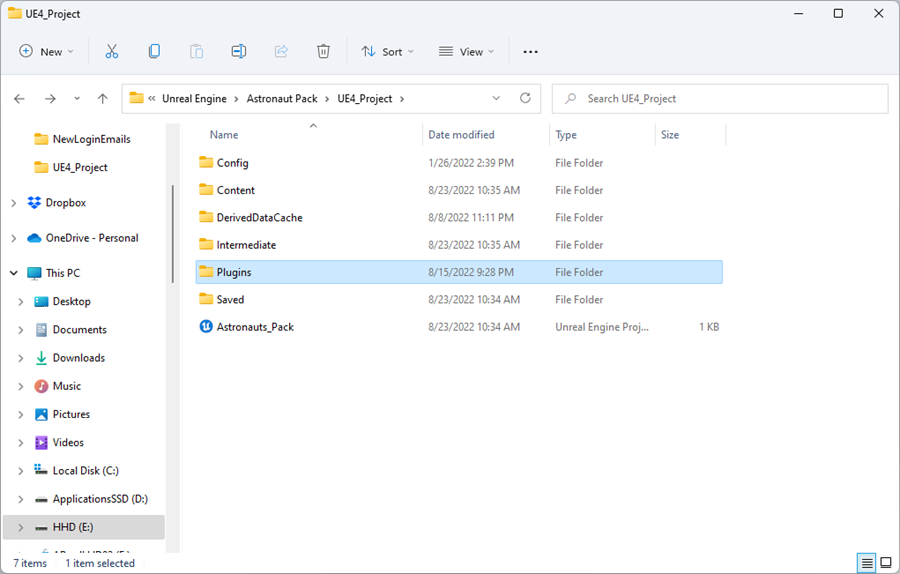
3. Once extracted, locate your extracted folder, open it, and locate the ARwall folder. This will be the ARFX Plugin folder.
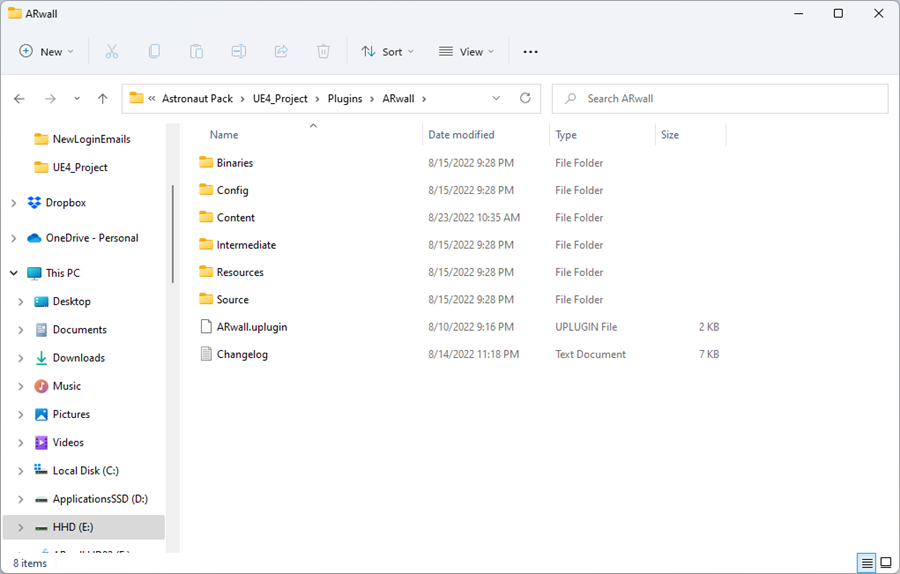
4. Copy the ARwall Plugin folder into an existing Unreal Engine 4/5 project’s Plugins folder.
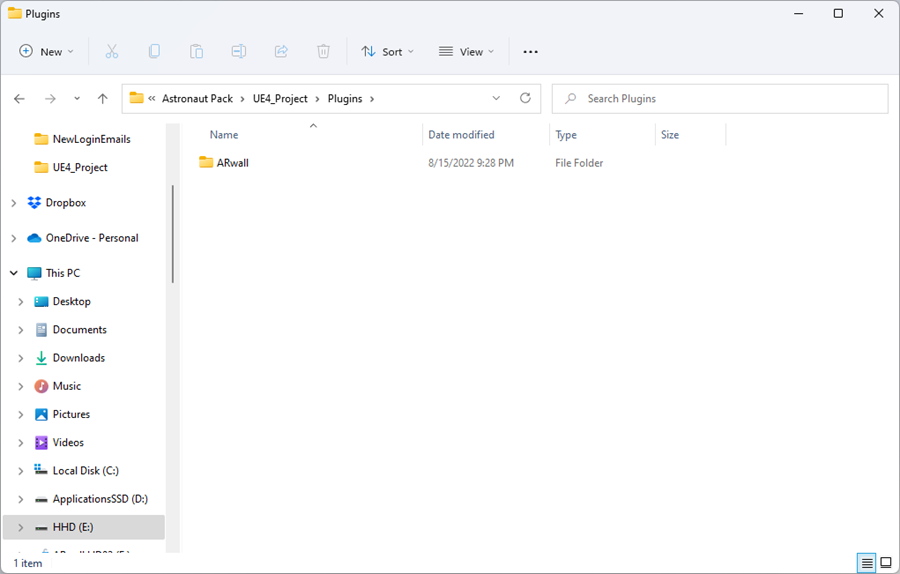
This is how the ARwall folder should look like inside the ARwall Plugins folder.
Open the Unreal Engine 5 project containing the ARwall plugin.
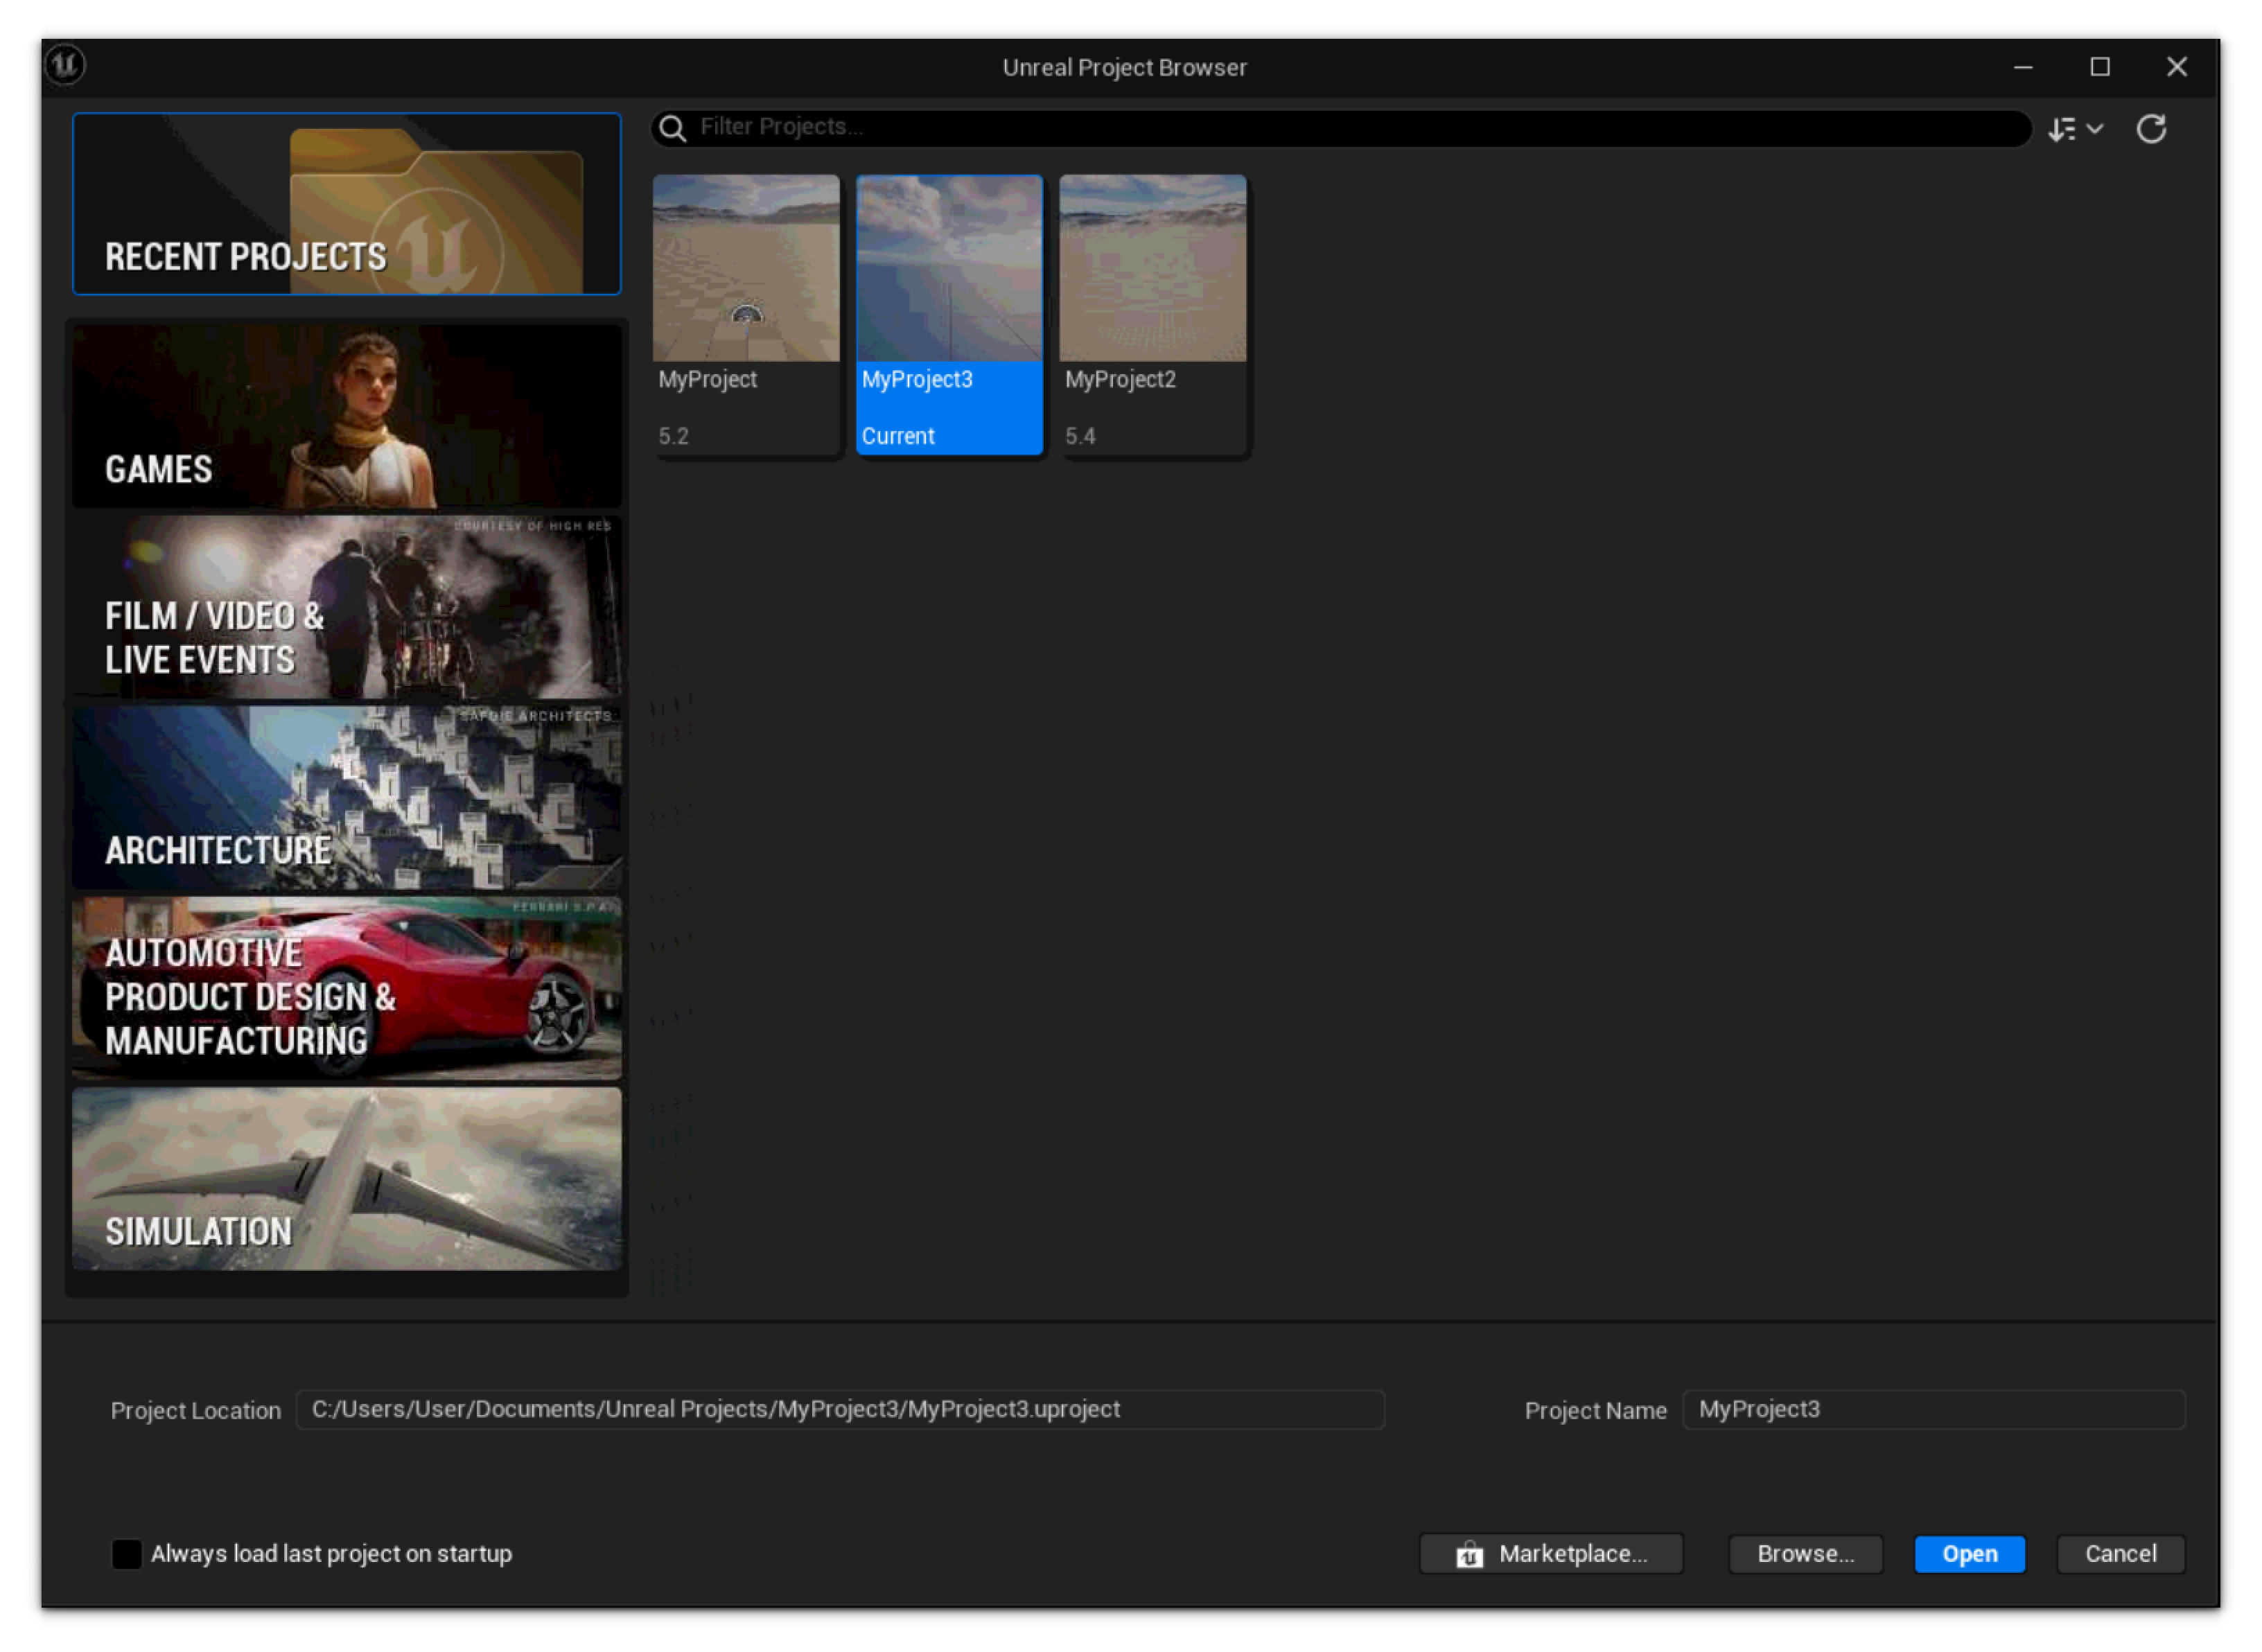
Make sure that the Unreal Engine 5 project is set to open correctly as a 5.3 or 5.4 project file. Otherwise, there will be an error when opening the project.
- Once you launch the project file and it reaches 75%, you will be greeted with two pop-up windows. One will prompt you to enter your Activation Code provided by ARwall and the other will open a browser window requesting you to login.
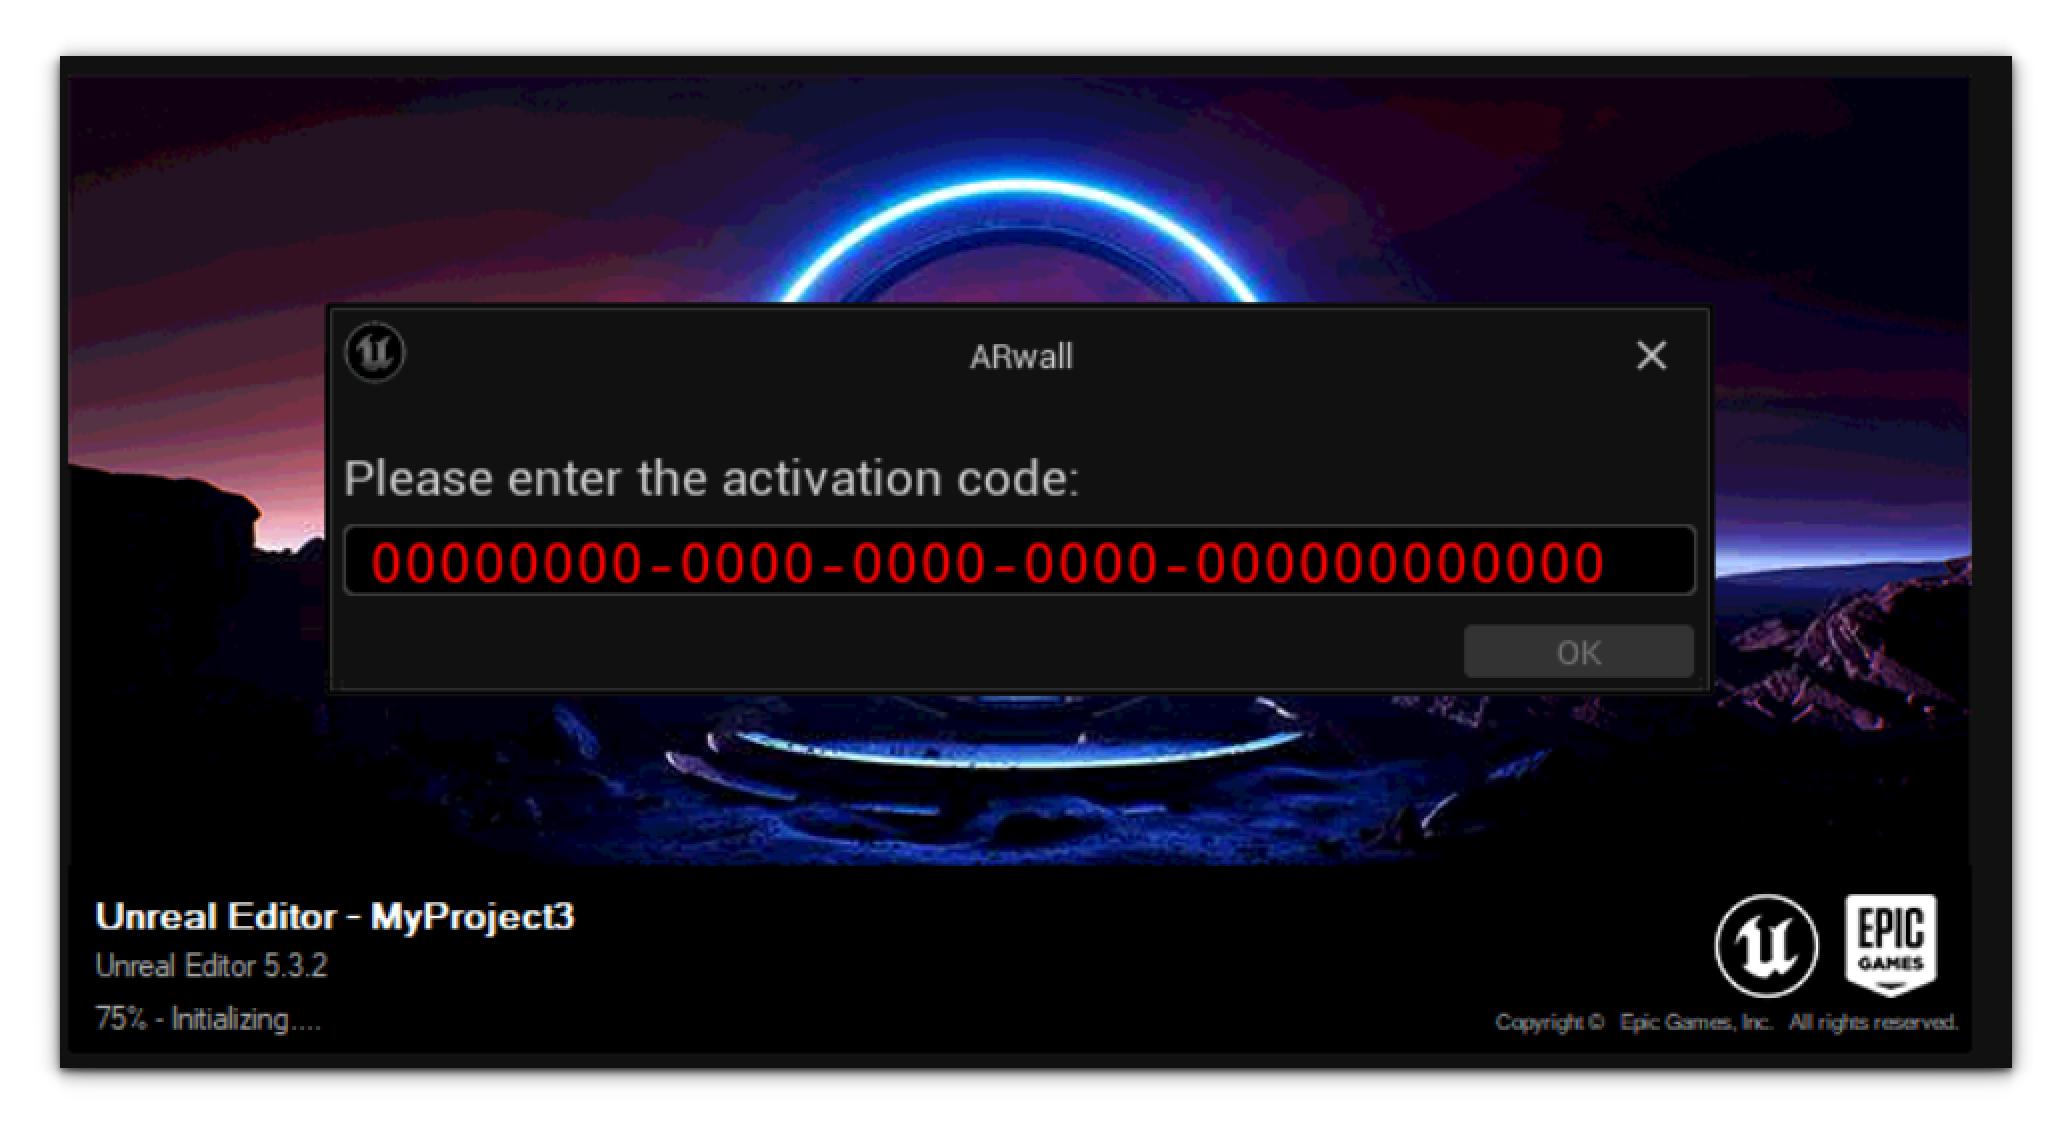 ImportantIf this is your first time using the ARwall plugin this pop-up might be hidden under the Unreal Engine interface or the login screen. Please use ALT-TAB(hold down the ALT button and tap TAB button to cycle through to the correct window) to select the Activation Code and Login screens if they are hidden behind other windows.
 - Once you have entered your Activation Code, click OK. Navigate to the ARwall Login screen.
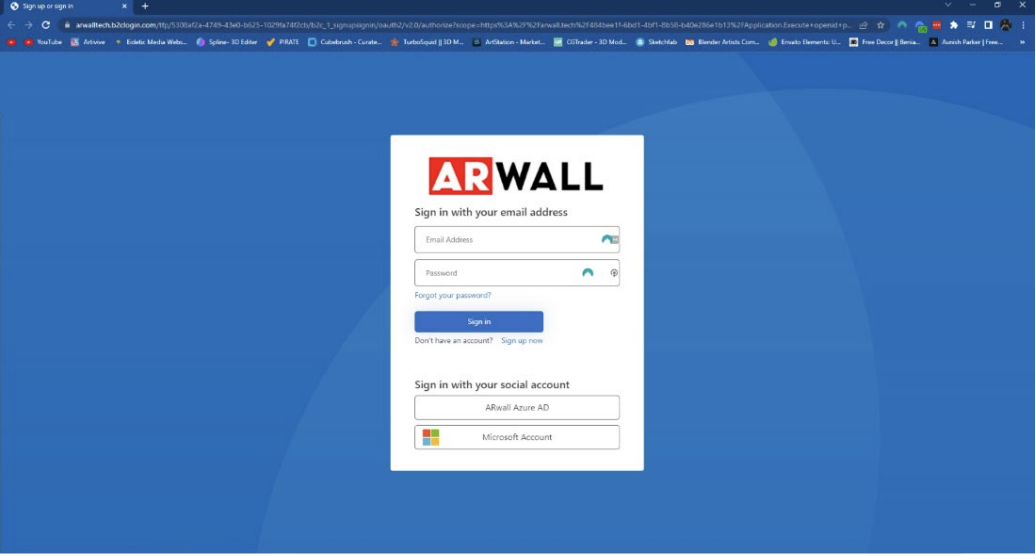
3. Please log in using your existing login email and password.
- If this is your first time logging in, click “Sign up now” to create a new email/password account. Be sure to use this same account for all future logins.
- If your email is a Microsoft-related account, please use the “Microsoft Account” button to log in.
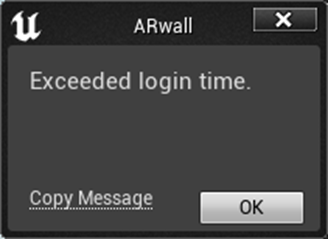
- You will have 90 seconds to enter your login information, otherwise, this will appear and ARFX will close. If this happens, click OK and launch the project file again.
2. Once you have successfully logged in, navigate to the Plugins window located at the top left section under the Edit tab.
- If the ARwall plugin is not enabled, ensure the corresponding checkbox is checked and the ARwall plugin should now be activated. Before restarting Unreal we need to check a few more Plugins for the ARwall Plugin to work properly.
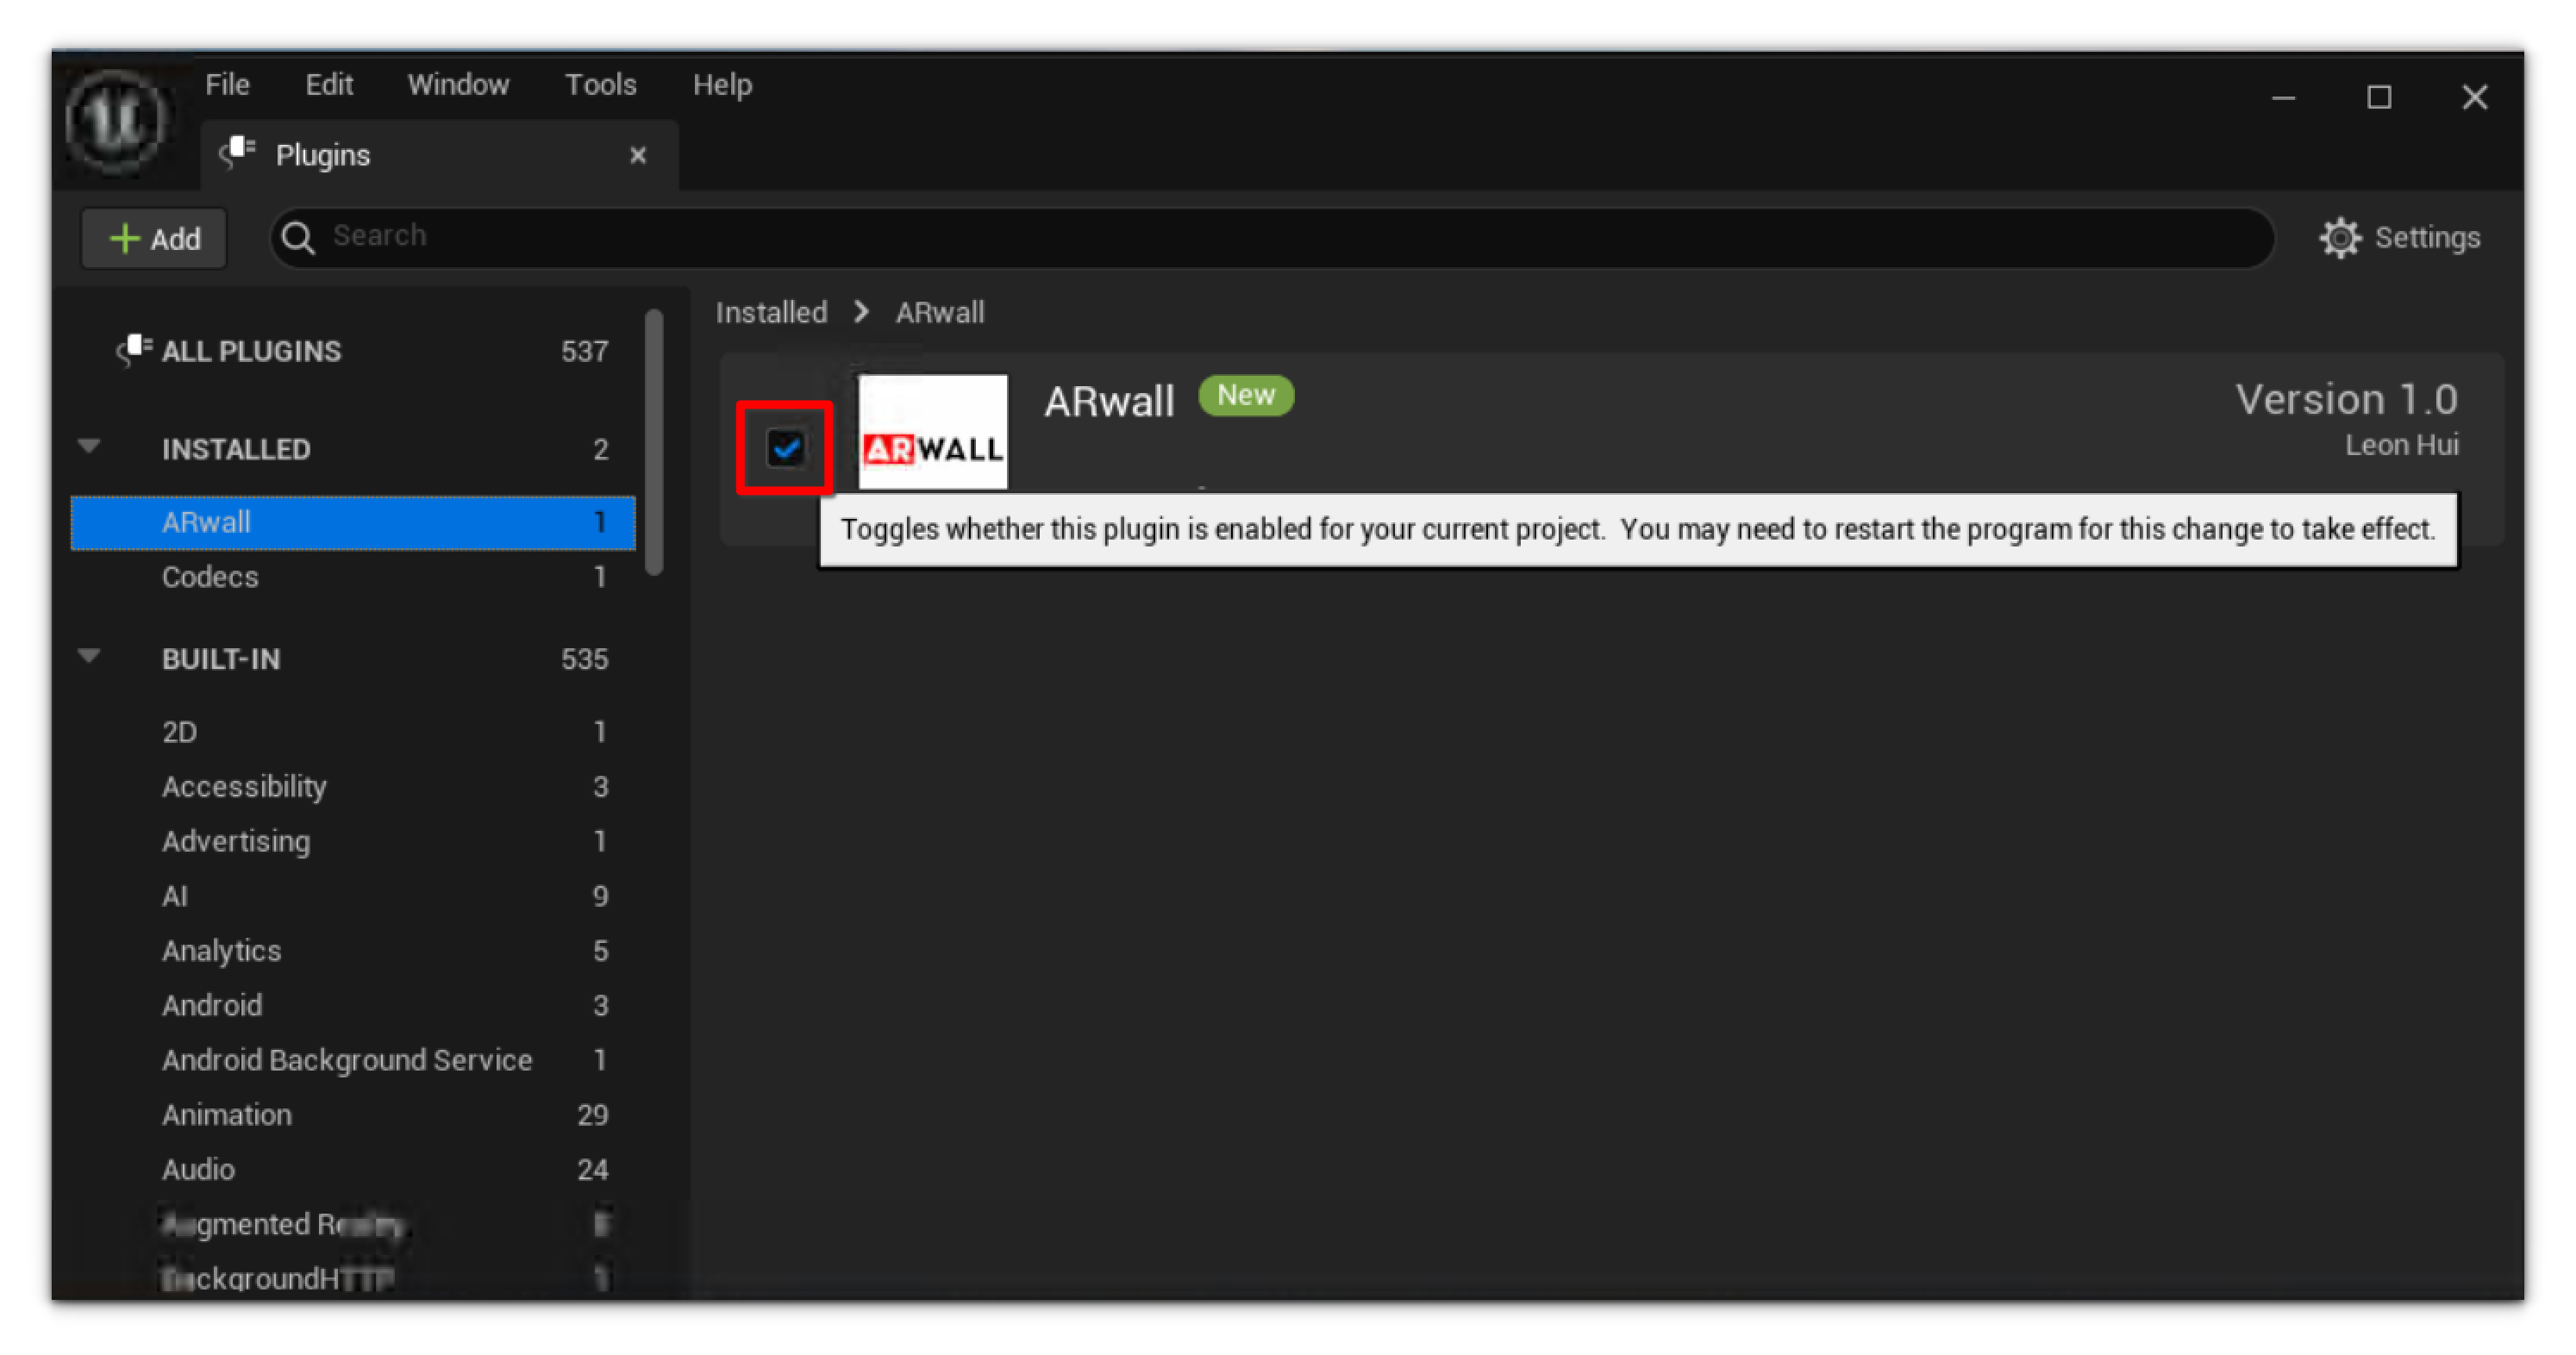
- Start by searching for the nDisplay plugin and disable it if enabled.

Then search for the SteamVR plugin and disable it, if enabled. Now you may proceed with restarting Unreal Engine.

If starting up the Unreal Engine project shows any errors, navigate to project’s “Config” folder.
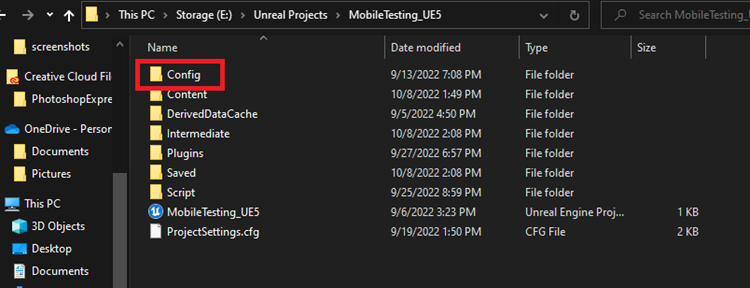
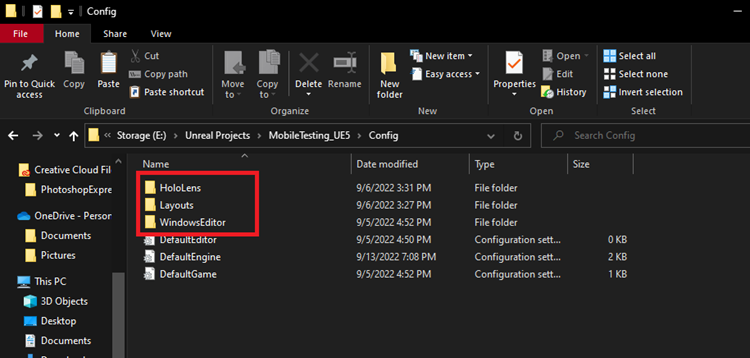
Delete any subfolders under the "Config" folder and proceed to launch the project file again.
Refer to the User Manual for the next steps on how to use the ARFX Pro Plugin software, calibrate, and more!
It is highly recommended to review the full manual as it provides an in-depth overview of your new toolkit and all its functionality. Included in the manual are many photos, images, and detailed instructions on the following and more!
- Bookmarks
- ARFX Options Menu
- ARFX Calibration Screen
- ARFX Virtual Screen
- ARFX Camera Actor
- ARFX Camera Components
Troubleshooting
If you run into any issues, please review FAQs and Troubleshotting Section of the User Manual which outlines many of the common issues when getting started in Virtual Production. Feel free to reach out to us at support@arwall.co if you have any questions or issues. Please include:
- A detailed explanation of the issue you are having
- Steps you were taking before the issue arose
- Steps you have already taken
- Photos/video of the issue if applicable


