ARFX Comp Pro Quickstart Guide
- 07 Aug 2025
- 9 Minutes to read
- Contributors


- Print
- DarkLight
ARFX Comp Pro Quickstart Guide
- Updated on 07 Aug 2025
- 9 Minutes to read
- Contributors
- Print
- DarkLight
Article summary
Did you find this summary helpful?
Thank you for your feedback!
Welcome to the ARFX Composite section! In this portion of the Knowledge Base you’ll find information regarding the various tools and actors we’ve made for general virtual production environments that does not specifically use the ARFX warp effect. The topics and techniques found here were ARwall’s attempt at filling in the gaps in virtual production that the Unreal Engine particularly lacked and thus is more of a set of quality-of-life tools that we hope you will find a use for.
Some features in this section are outdated and have not been touched since being first implemented. Therefore, until these features are refined and verified, this portion of the Knowledge Base will be incomplete."Installation Requirements
A basic understanding of Unreal Engine is required to navigate and use the ARFX Pro Plugin. However, there is no need for coding or Blueprint knowledge. The virtual production setup has been streamlined with easy-to-use User Interfaces and Options Menus. This guide provides step-by-step guidance with detailed images to walk you through the setup. At ARwall, we prioritize making our tools accessible and straightforward to use!
Section 2.1 Hardware Requirements
If ARwall did not provide a pre-configured computer, you will need the following hardware to set up the ARFX Pro Plugin:
Minimum Hardware (1080P to 1440P)
CPU: AMD 5700X | Intel Core i5-12400F
GPU: Nvidia GeForce RTX 3080 Super
RAM: 16GB DDR4
Storage: Projects running on an SSD
Recommended (4K and Beyond Resolution)
CPU: AMD 7800X3D | Intel Core i9 14900KS
GPU: Nvidia GeForce RTX 4090
RAM: 32GB DDR5
Storage: Both OS and projects running on M.2 SSDs
Tracking Hardware
HTC Vive 2.0/3.0
Base Stations: 2 HTC Vive 2.0/3.0 (recommended 3-4 base stations for larger play areas, up to 10 base stations supported)
Trackers: 1-2 HTC Vive 2.0/3.0 trackers, with USB 3.0 extension cables that connect from the machine to the center of the screen (for calibration) and the camera play area
Screen: Any screen (computer monitor, projector, TV, or LED wall), 32 inches or larger, connected to your machine
Section 2.2 Software Requirements
Unreal Engine Installation
Install Unreal Engine 5.3 or 5.4. You can find the Unreal Engine Installation Instructions here
Create a free account if you don’t have one.
Steam and SteamVR Installation
Install Steam. Please refer to the Steam Installation Guide here
Create a free Steam account for your team if needed.Install SteamVR:
Search for SteamVR within Steam or use this link.
SteamVR will help you identify and troubleshoot connected Vive Pro devices.
Please refer to Section 3.5 SteamVR Software Set Up below for more instructions on Steam, SteamVR, and USBDeview setup instructions.
USBDeview Installation
USBDeview is often installed with SteamVR at
C:\Program Files (x86)\SteamVR\tools\USBDeview\win32\USBDeview.exe.
If not, download and install it separately from here.
USBDeview helps you find the HTC Vive serial numbers.
7-Zip Installation
Install 7-Zip:
Download and install from here.
.NET Runtime Installation
If running ARFX Pro Plugin versions UE 5.3, UE 5.4, or later, please install .NET 8 Desktop Runtime
Find and Download.NET8 Runtime Desktop here. Alternatively, you can also use this direct Link (this link can change due to updates)
If running ARFX Pro Plugin versions prior to UE 5.1 version 62 or UE 5.2 version 66, please install .NET6 Runtime:
Select Run Desktop apps and install the x64 version.
Section 3: General Computer Set Up
This section describes how to set up your computer for use with the ARwall ARFX Pro Plugin.
Section 3.1 Computer and Hardware Requirements
Before you get started, ensure that you have the hardware components listed in Table 1 below for the most optimal performance for the ARwall ARFX Pro Plugin.
Table 1: Main Components and Accessories
Main Component | Accessories |
Windows PC machine with recommended Nvidia GeForce RTX 2080 graphics card or better (minimum GTX 1080) |
|
Vive Pro Tracking Hardware (see Section 5: HTC Vive Motion Tracking Hardware Set Up for further information) |
|
Optional Peripherals |
|
License |
|
Section 3.2 Boot Up Computer
If you are using your own computer
To boot up the computer, do the following:
Plug in all accessories, including:
- Mouse
- Keyboard
- Monitor/Screen/Projector/LED wall
- USB Hub
- Any additional cables
Please refer to Section 2.1, Hardware Requirements, for more details on hardware requirements.
- Turn on the computer
Section 3.3 Password Protection
ARwall should have provided you with an Activation Code to access the ARFX Pro Plugin. We will discuss where to enter this activation code in section Section 4.1: Installing ARwall ARFX Pro Plugin. This product is for a SINGLE seat license on a single machine. If you would like to purchase additional seats, move to another machine, or misplace your activation code, please get in touch with your ARwall representative or email support@arwall.co, and we will provide it to you.
Important
According to the Terms of Sale, it is the responsibility of the purchaser to secure all ARwall IP to the best of their ability. This includes, but is not limited to, keeping your passwords secure, system password protection, and physical security locks when appropriate.
Section 3.4 Prerequisite Software Installation
Please refer to Section 2.2 Software Requirements for detailed instructions on the required software installations and instructions on how to install them.
Important
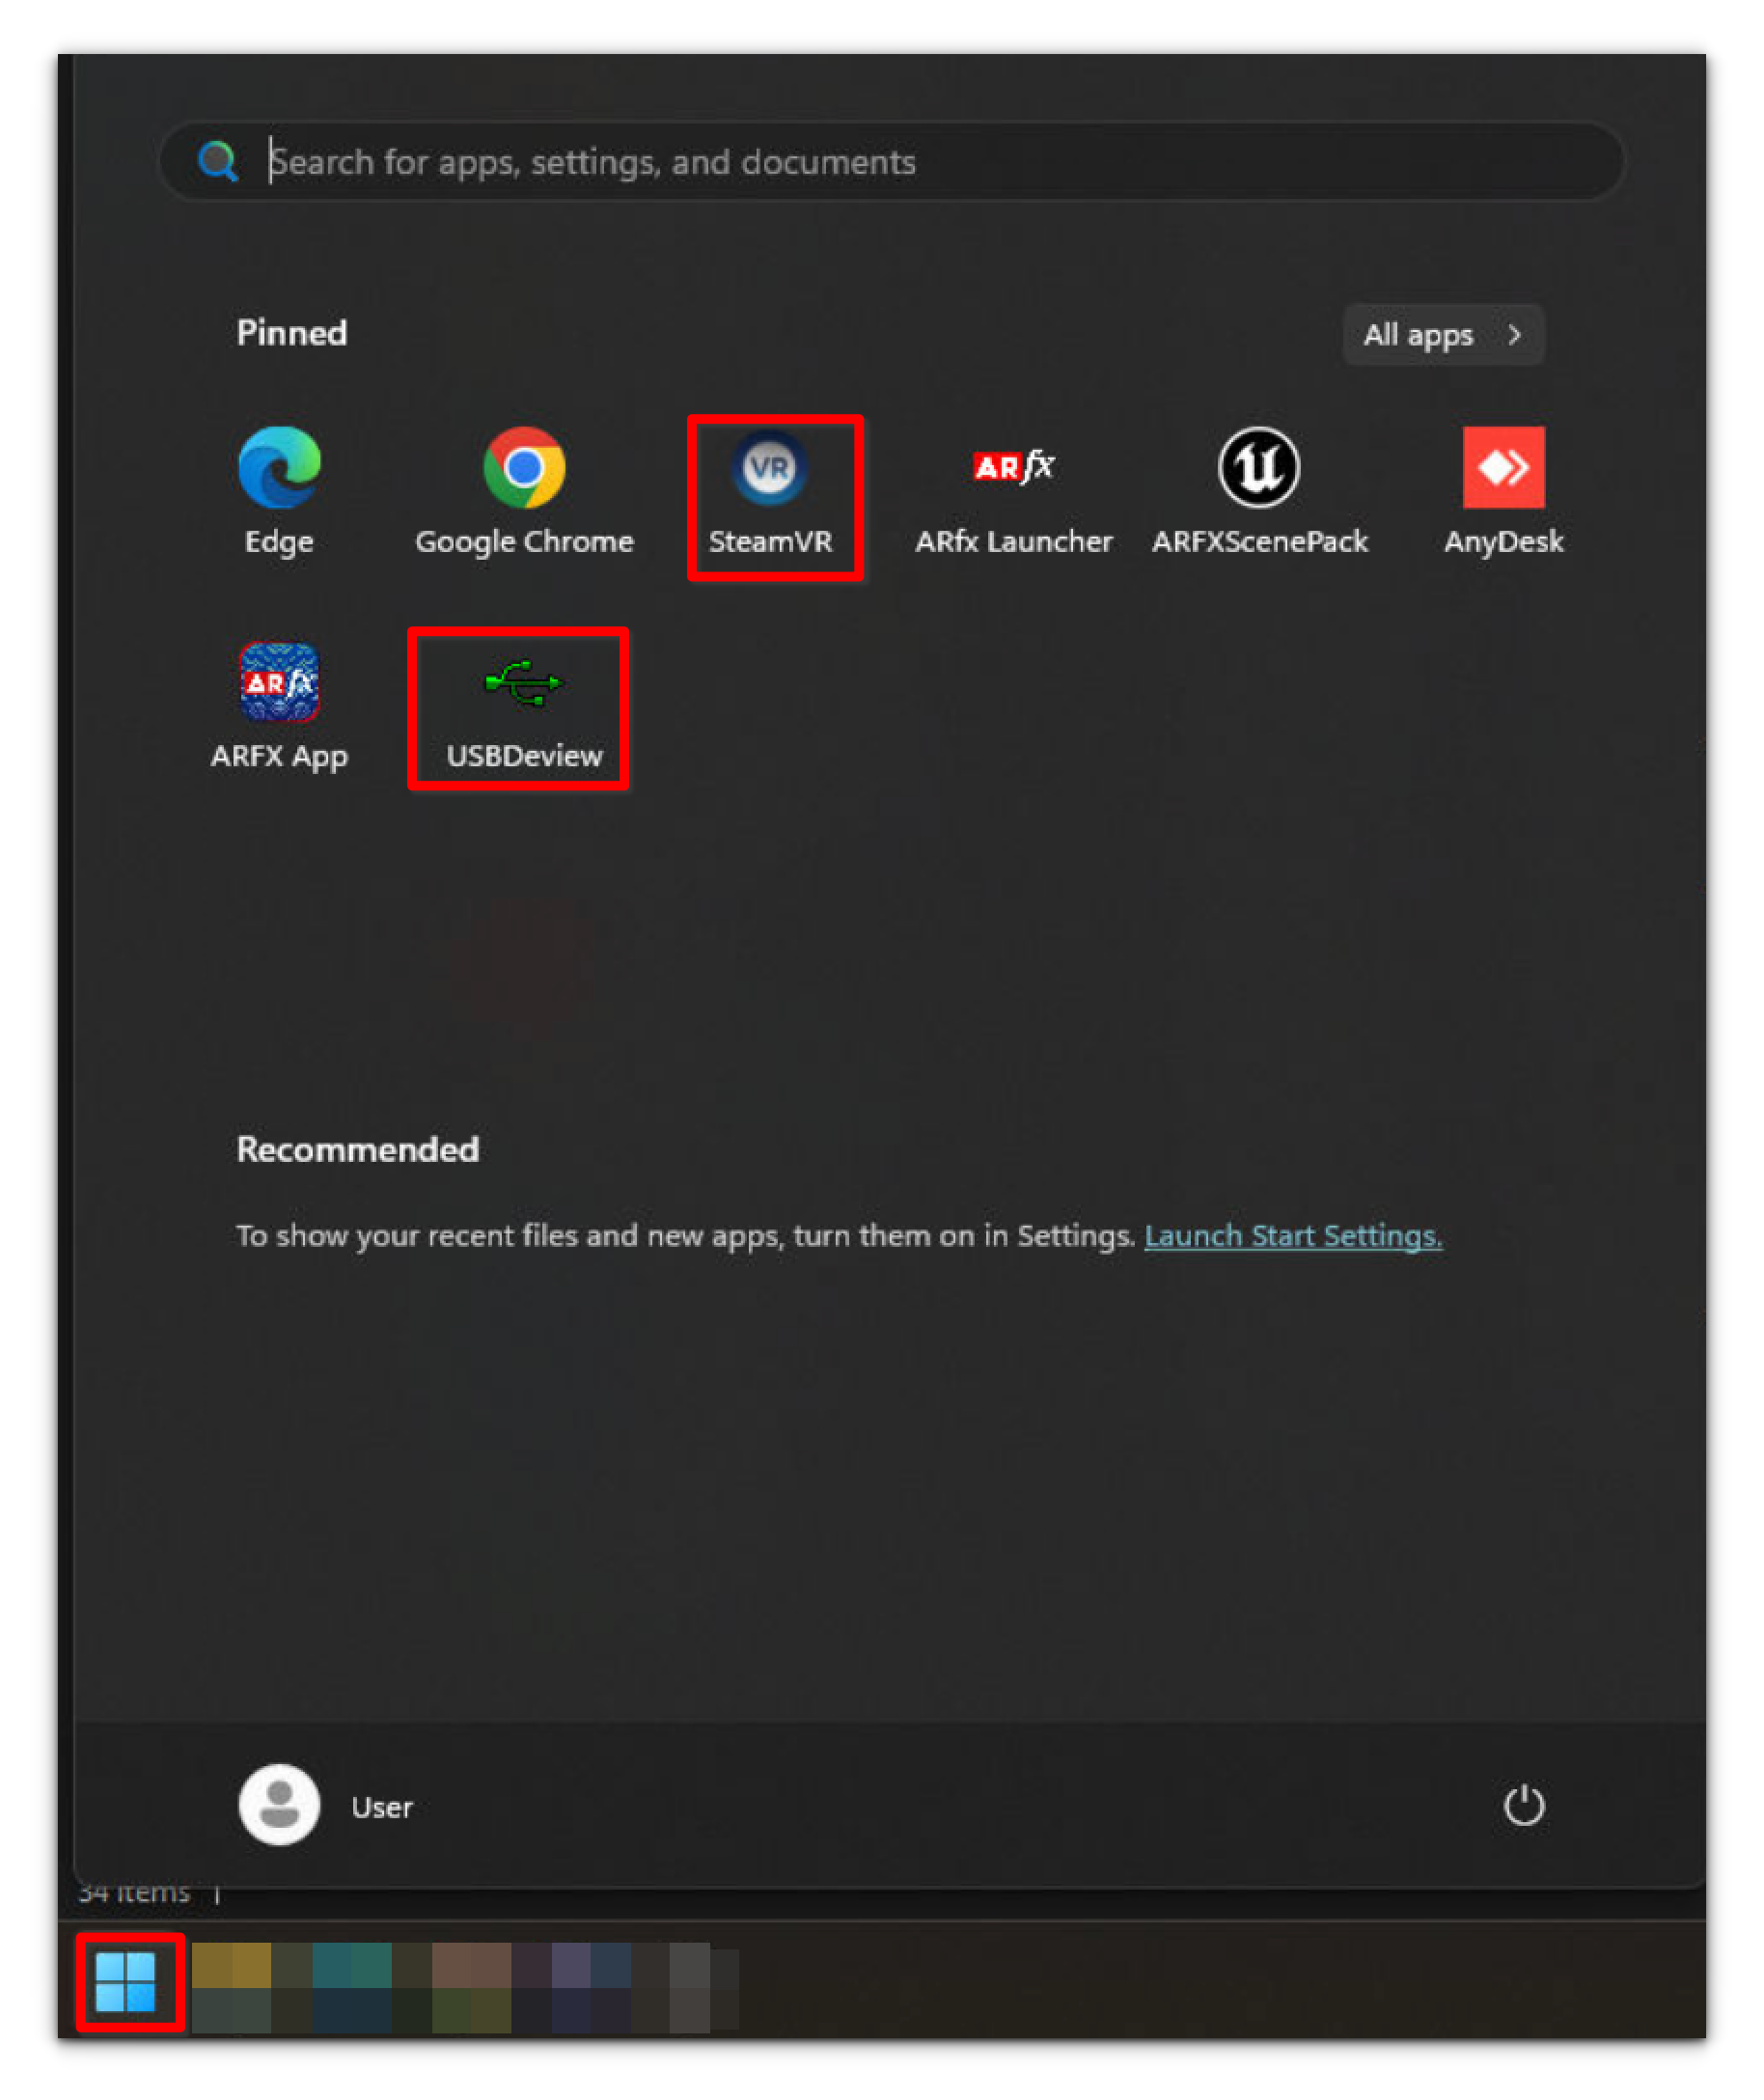
It is recommended to pin SteamVR and USB Deview to the Windows Start Menu for ease of opening the software when needed later. To do so, right click on the EXE file and select “Pin to Start.”

Alternatively, you can add SteamVR by clicking the Windows button, searching for “SteamVR” in the Microsoft Search bar, and selecting “Pin to Start.” Once both applications are pinned, they will be easily accessible from the Start menu when you press the Windows icon.
Section 3.5 SteamVR Software Set Up
After starting up SteamVR, if it asks you to plugin in your VR headset or HMD and does not let you see the attached Vive Trackers or Base Stations without a headset attached, do the following:
- Navigate to the drive that SteamVR is installed in on Windows and locate the default.vrsettings file. It is usually located on the C Drive at C:\Program Files (x86)\SteamVR\resources\settings\default.vrsettings or C:\Program Files (x86)\Steam\config\default.vrsettings
- Open the default.vrsettings file with Notepad or equivalent software.
- Locate the line “requireHMD”: true
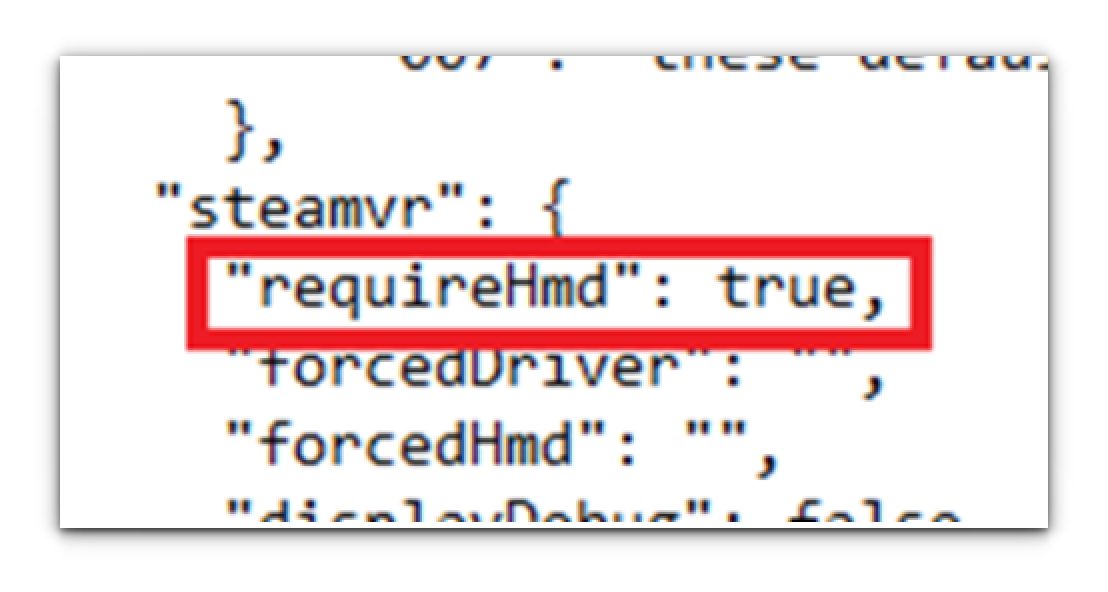
4. Change the word “true” to “false”, and make sure the comma after the word is still present.

5. Save the file and close.
Important
If SteamVR updates, these steps may need to be repeated as SteamVR may ask for the VR headset/HMD again.
Installing the ARFX Pro Plugin
This section describes how to install the ARwall ARFX Pro Plugin and add new maps to an existing Unreal Engine 4/5 Project.
Section 4.1: Installing the ARwall ARFX Pro Plugin
This section explains the process of installing the ARwall ARFX plugin to an existing Unreal Engine 4/5 project.
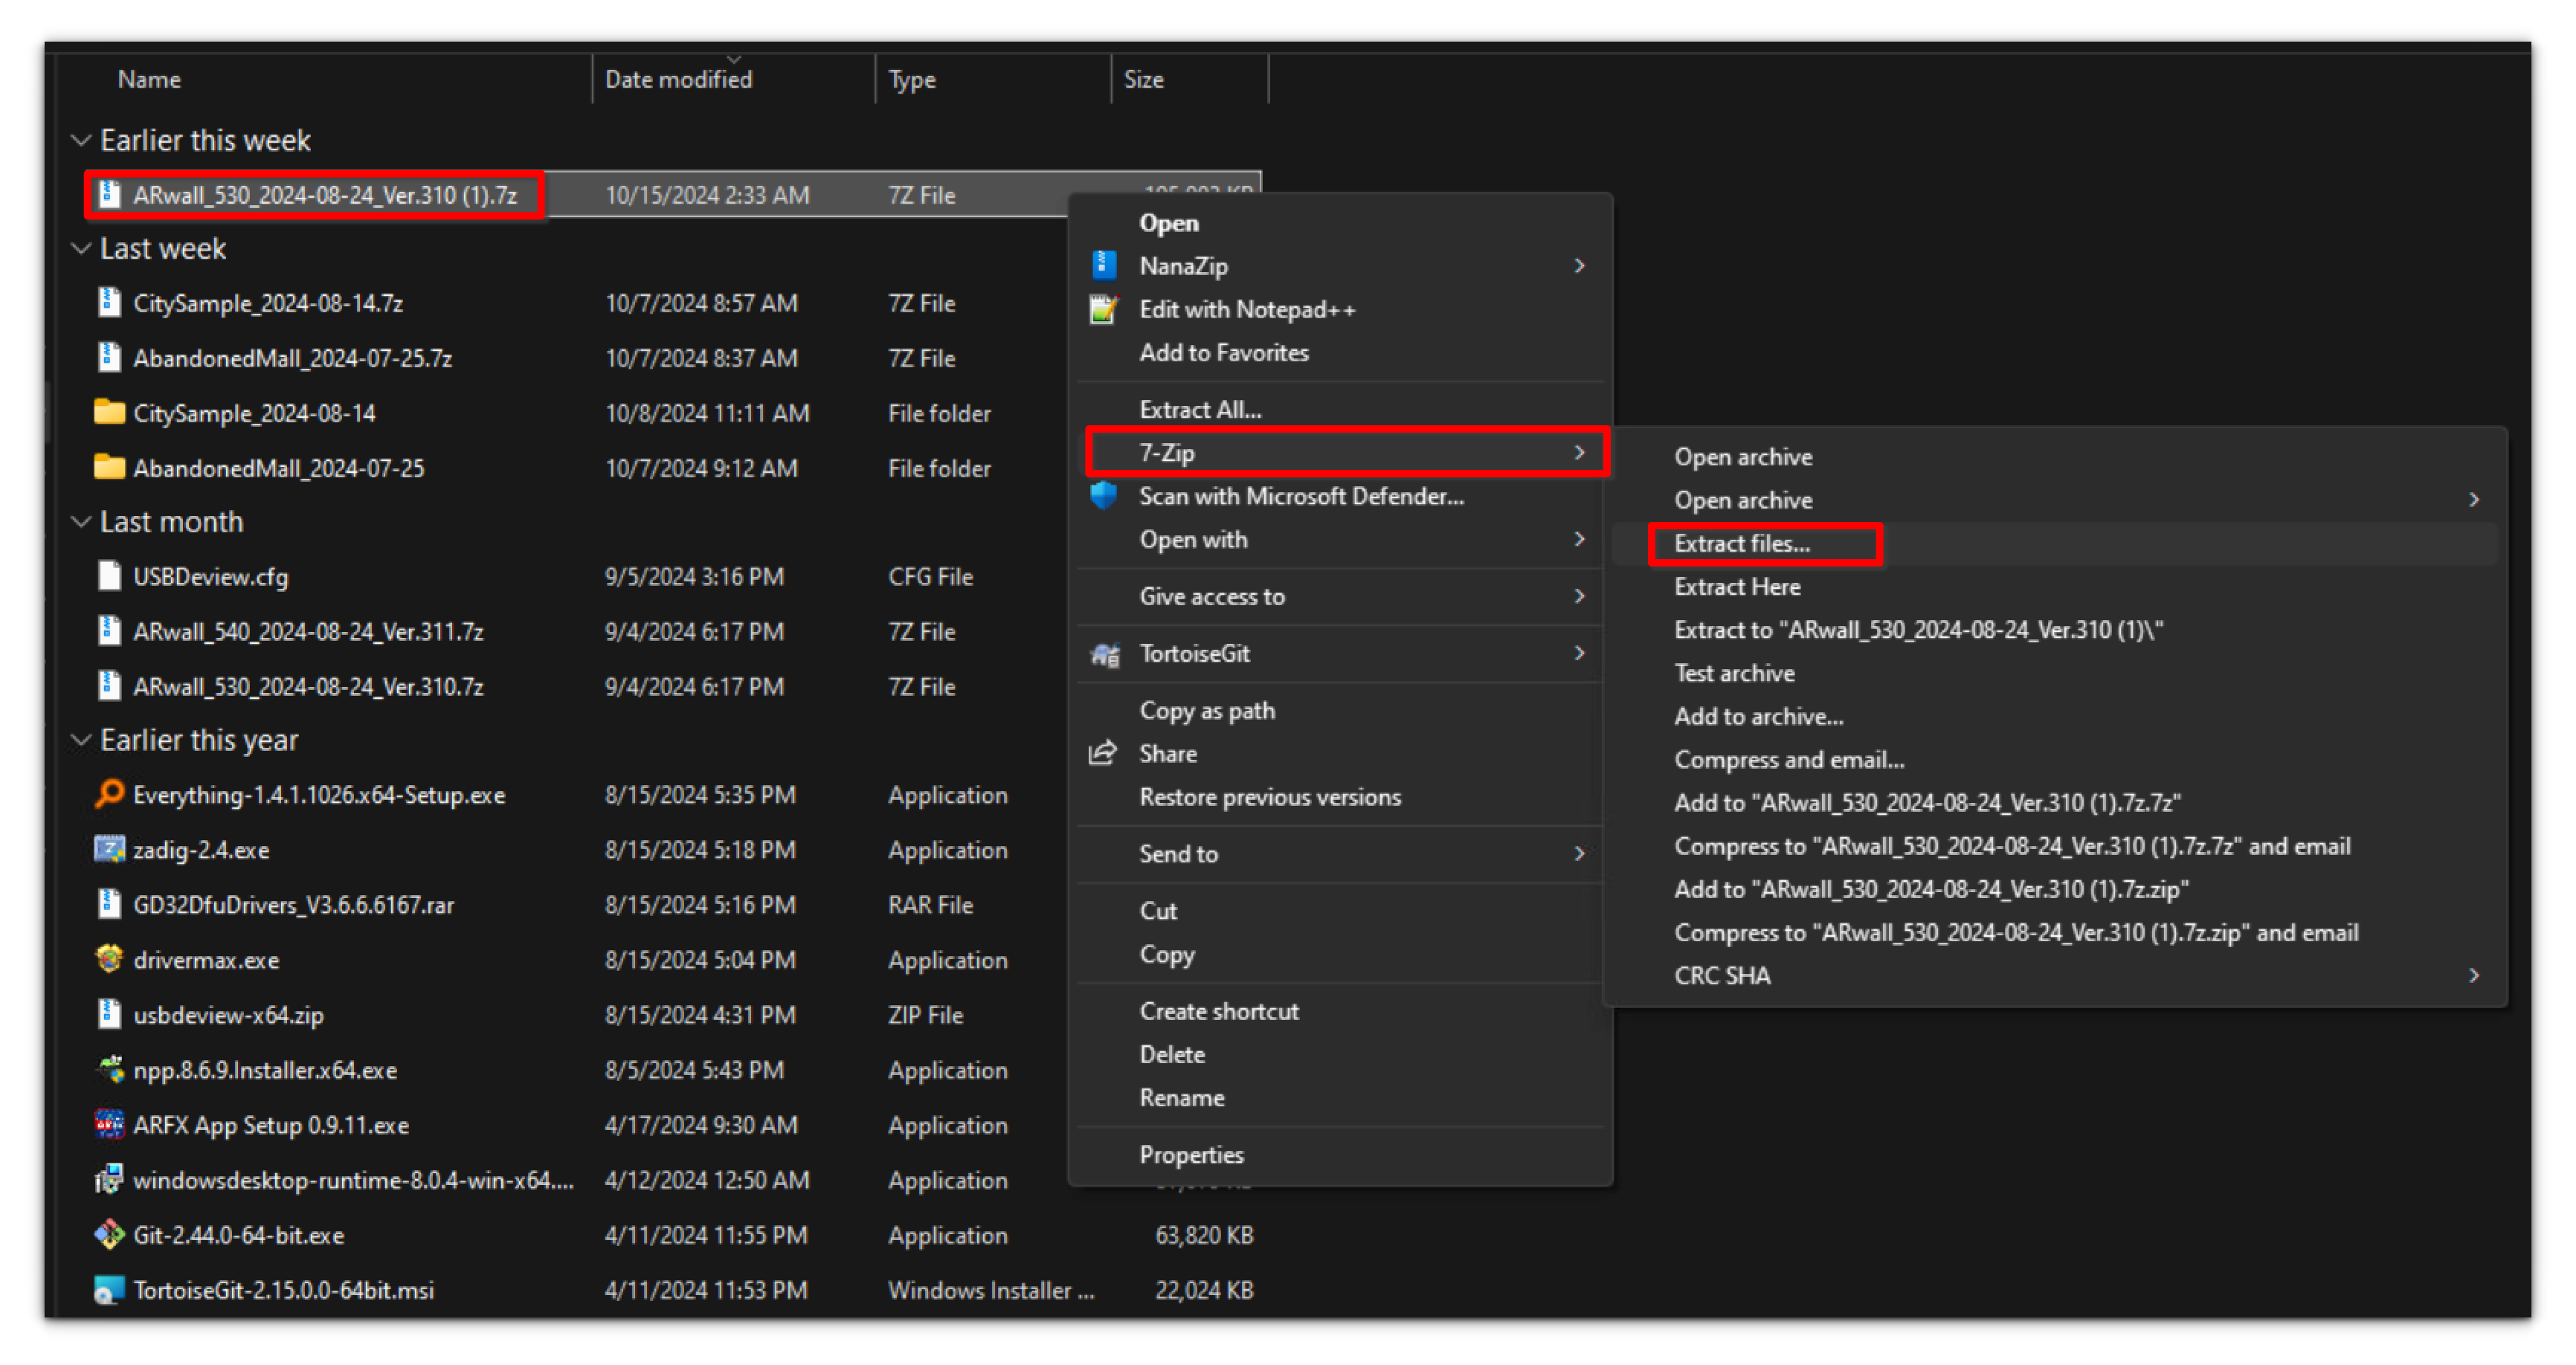
- Extract the ARwall Plugin file (ie. ARwall_427_NL_2022-10-26.7z, ARwall_503_NL_2022-10-26.7z, etc.) using 7-Zip by right-clicking the file and selecting 7-Zip > Extract Files....
Important
If your machine does not have 7-Zip, please download it and install it from here.
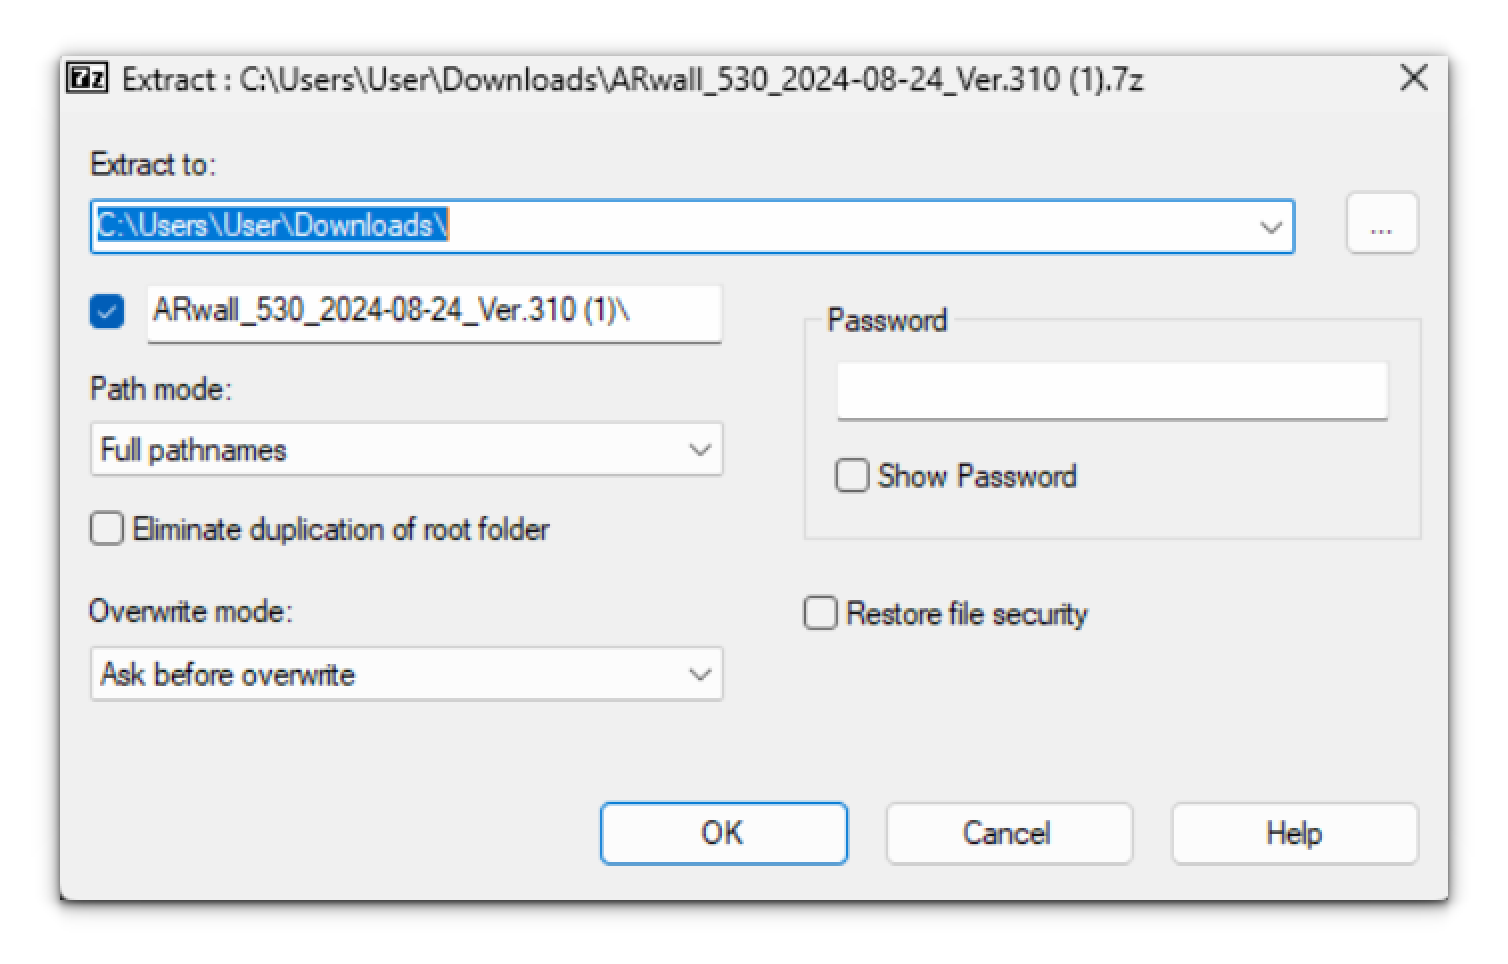
2. Choose where you want to extract to, then Click "OK"
3. Once extracted, locate your extracted folder, open it, and locate the ARwall folder. This will be the ARFX Plugin folder.
4. Copy the ARwall Plugin folder into an existing Unreal Engine 4/5 project’s Plugins folder.
Best Practice
Be sure to use the Unreal Engine 5.3 plugin with an Unreal Engine 5.3 project file and use the Unreal Engine 5.4 plugin with an Unreal Engine 5.4 project file. Using the wrong plugin version will prevent you from starting up the project. It is recommended to organize your plugins with an exterior folder clearly identifying the version of the plugin to copy into Plugins folders. Be sure not to change the name of the actual Plugin folder of “ARwall” or else it will not work properly within Unreal Engine.
Important
If your project does not have a Plugins folder yet, please make one.
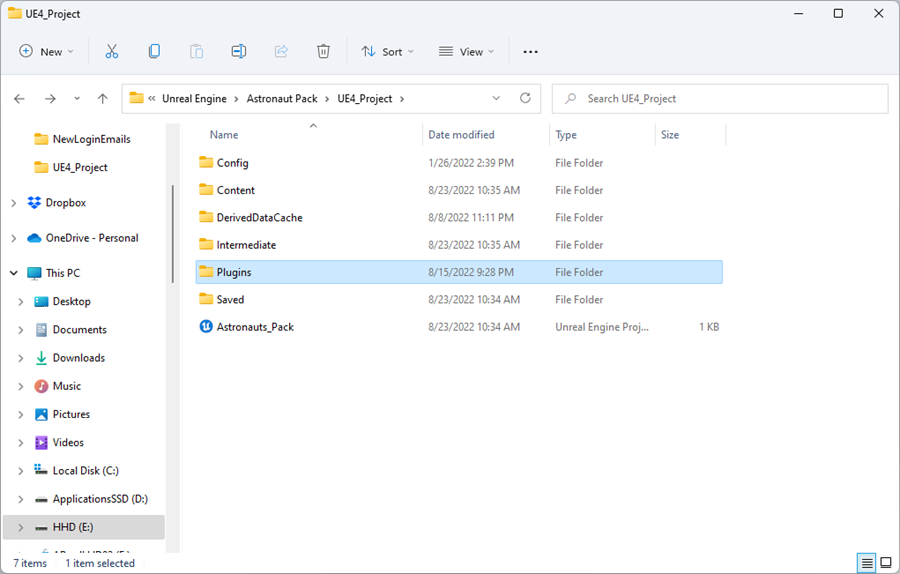
Important
How it should look inside the Unreal Engine 5 Project Plugins folder after copying the plugin there.
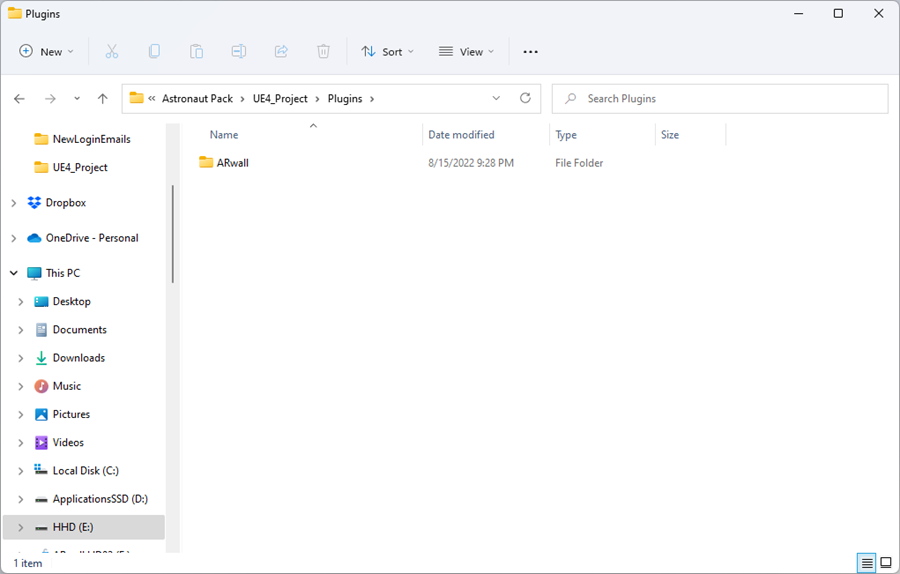
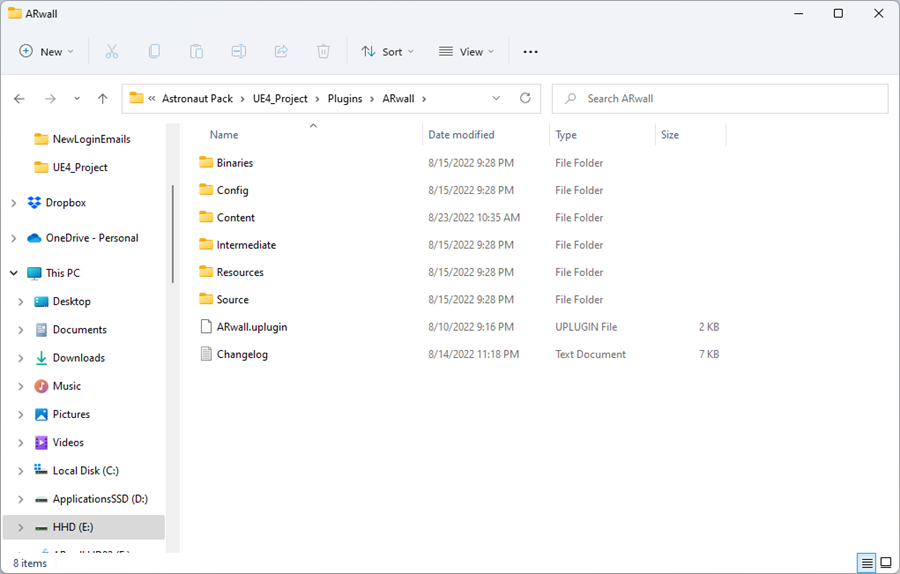
This is how the ARwall folder should look like inside the ARwall Plugins folder.
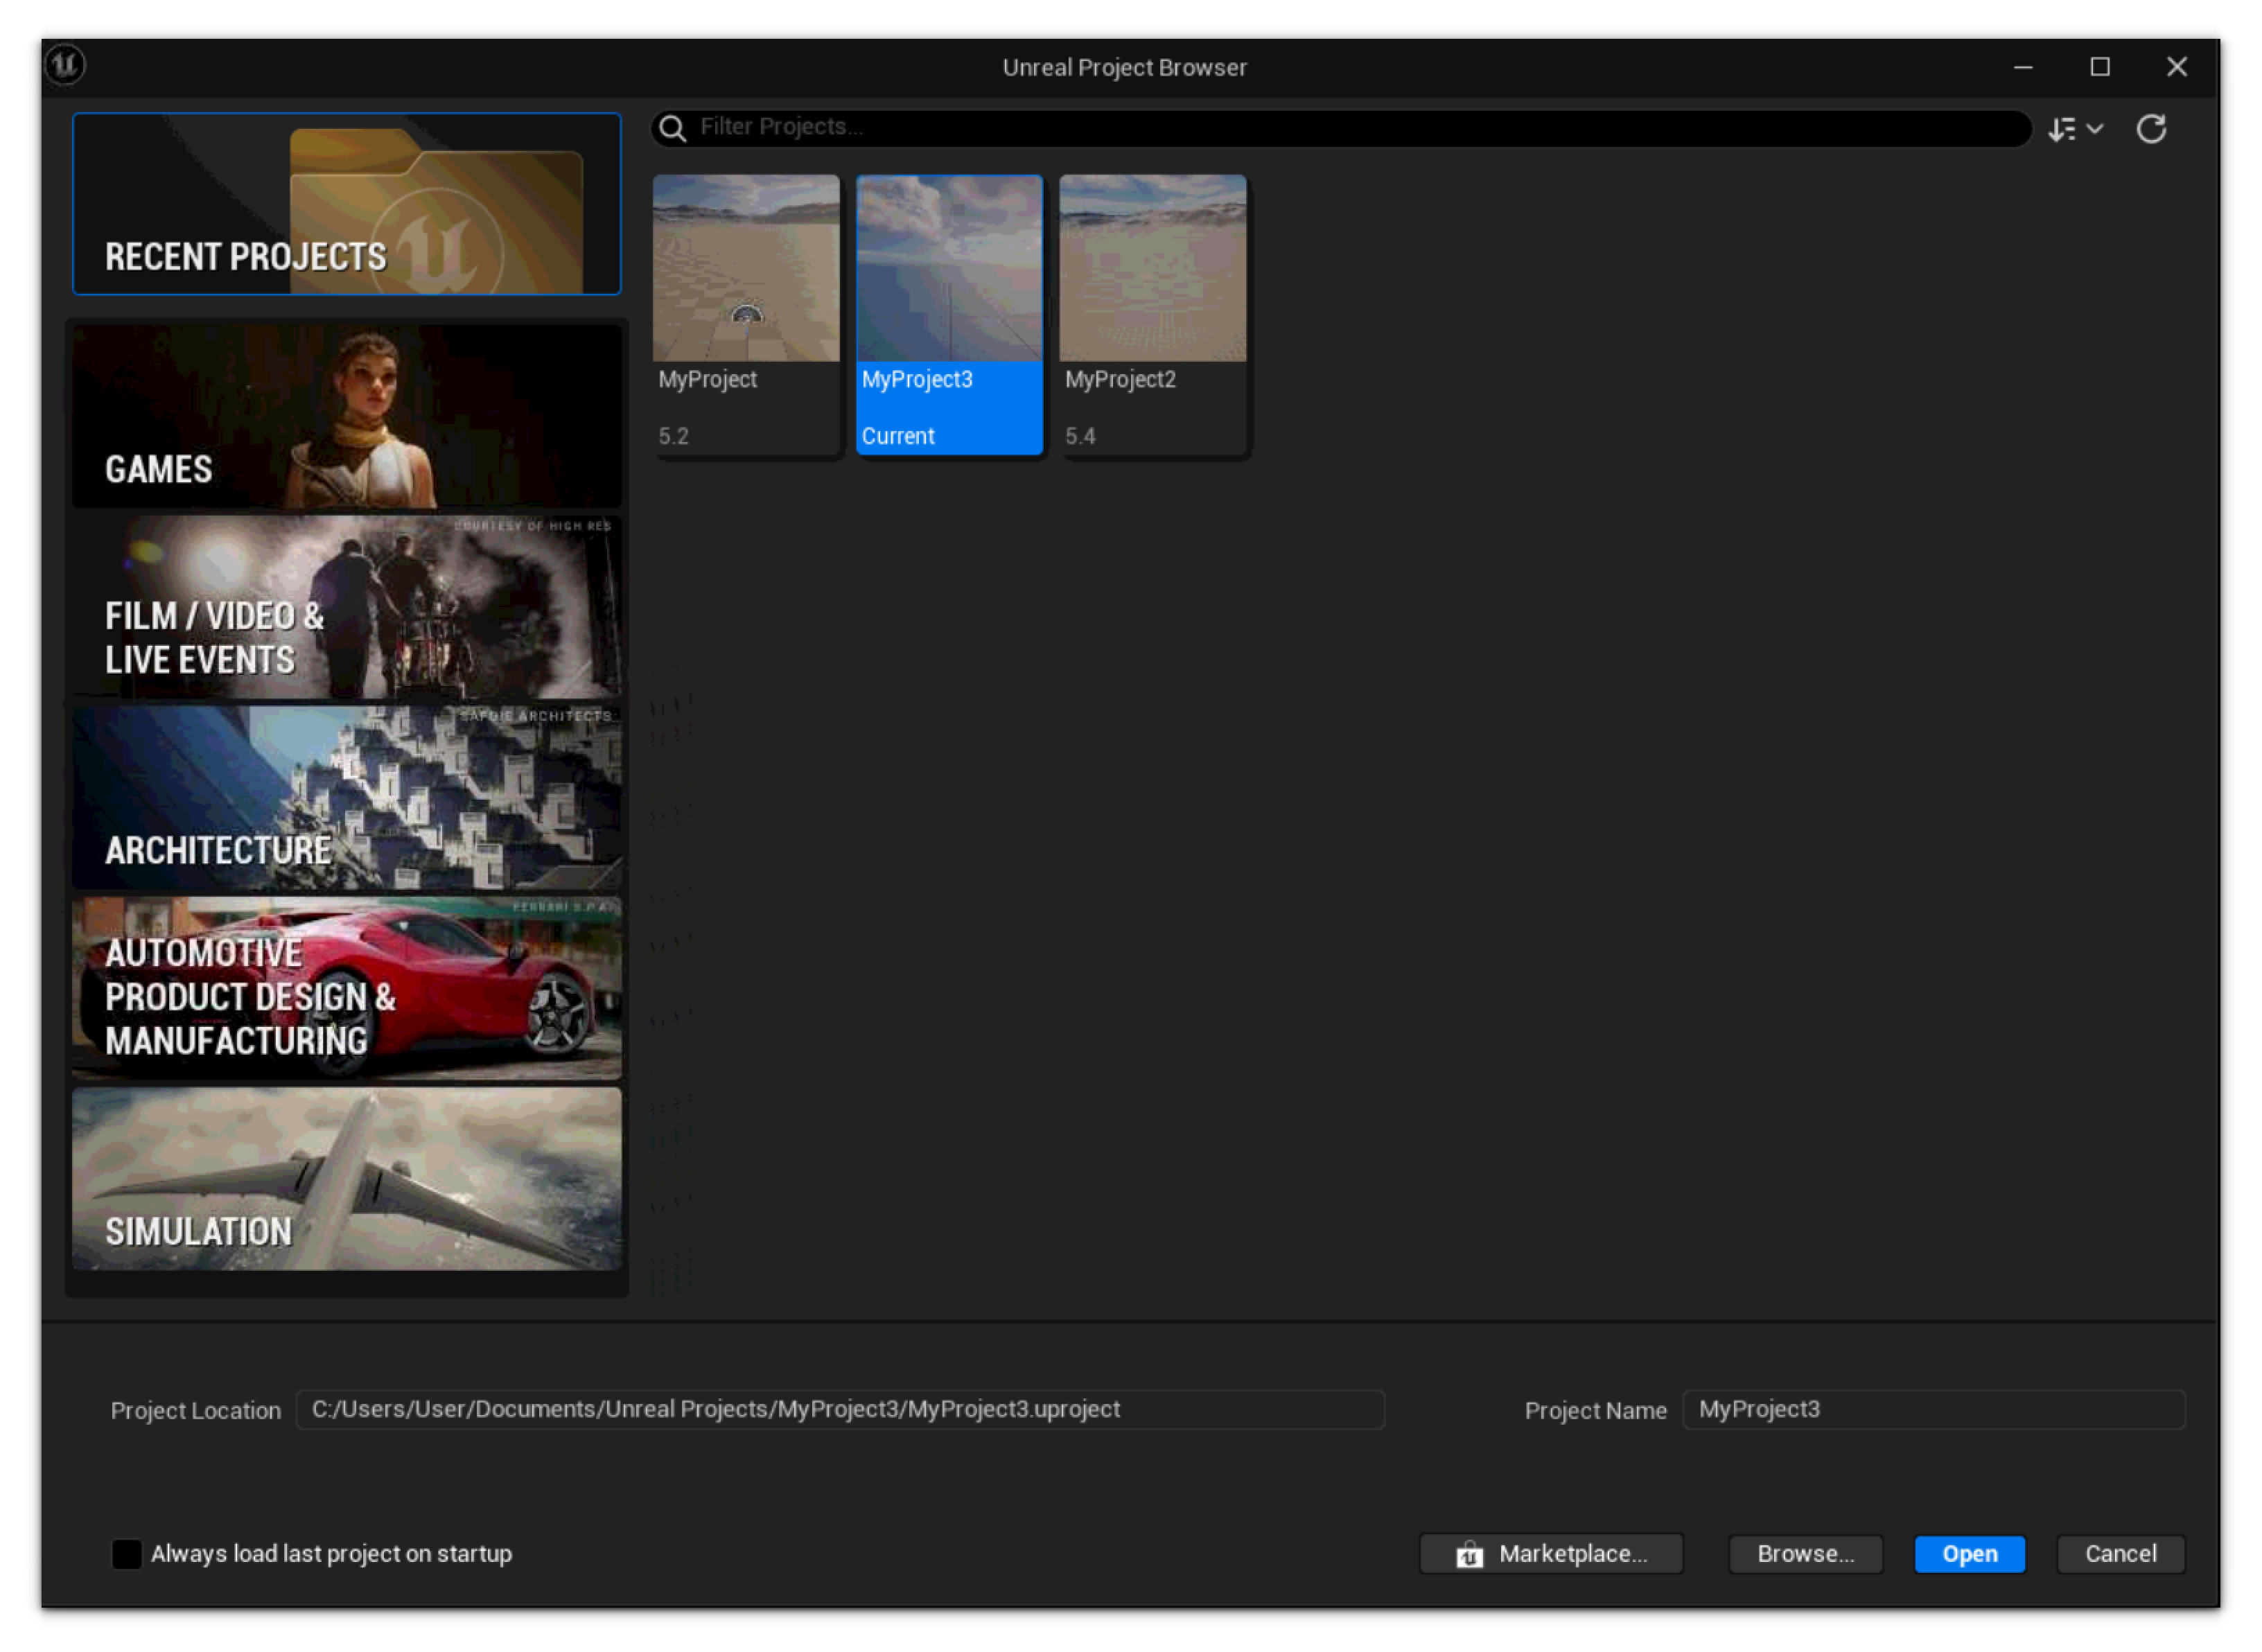
Make sure that the Unreal Engine 5 project is set to open correctly as a 5.3 or 5.4 project file. Otherwise, there will be an error when opening the project.
- Once you launch the project file and it reaches 75%, you will be greeted with two pop-up windows. One will prompt you to enter your Activation Code provided by ARwall and the other will open a browser window requesting you to login.
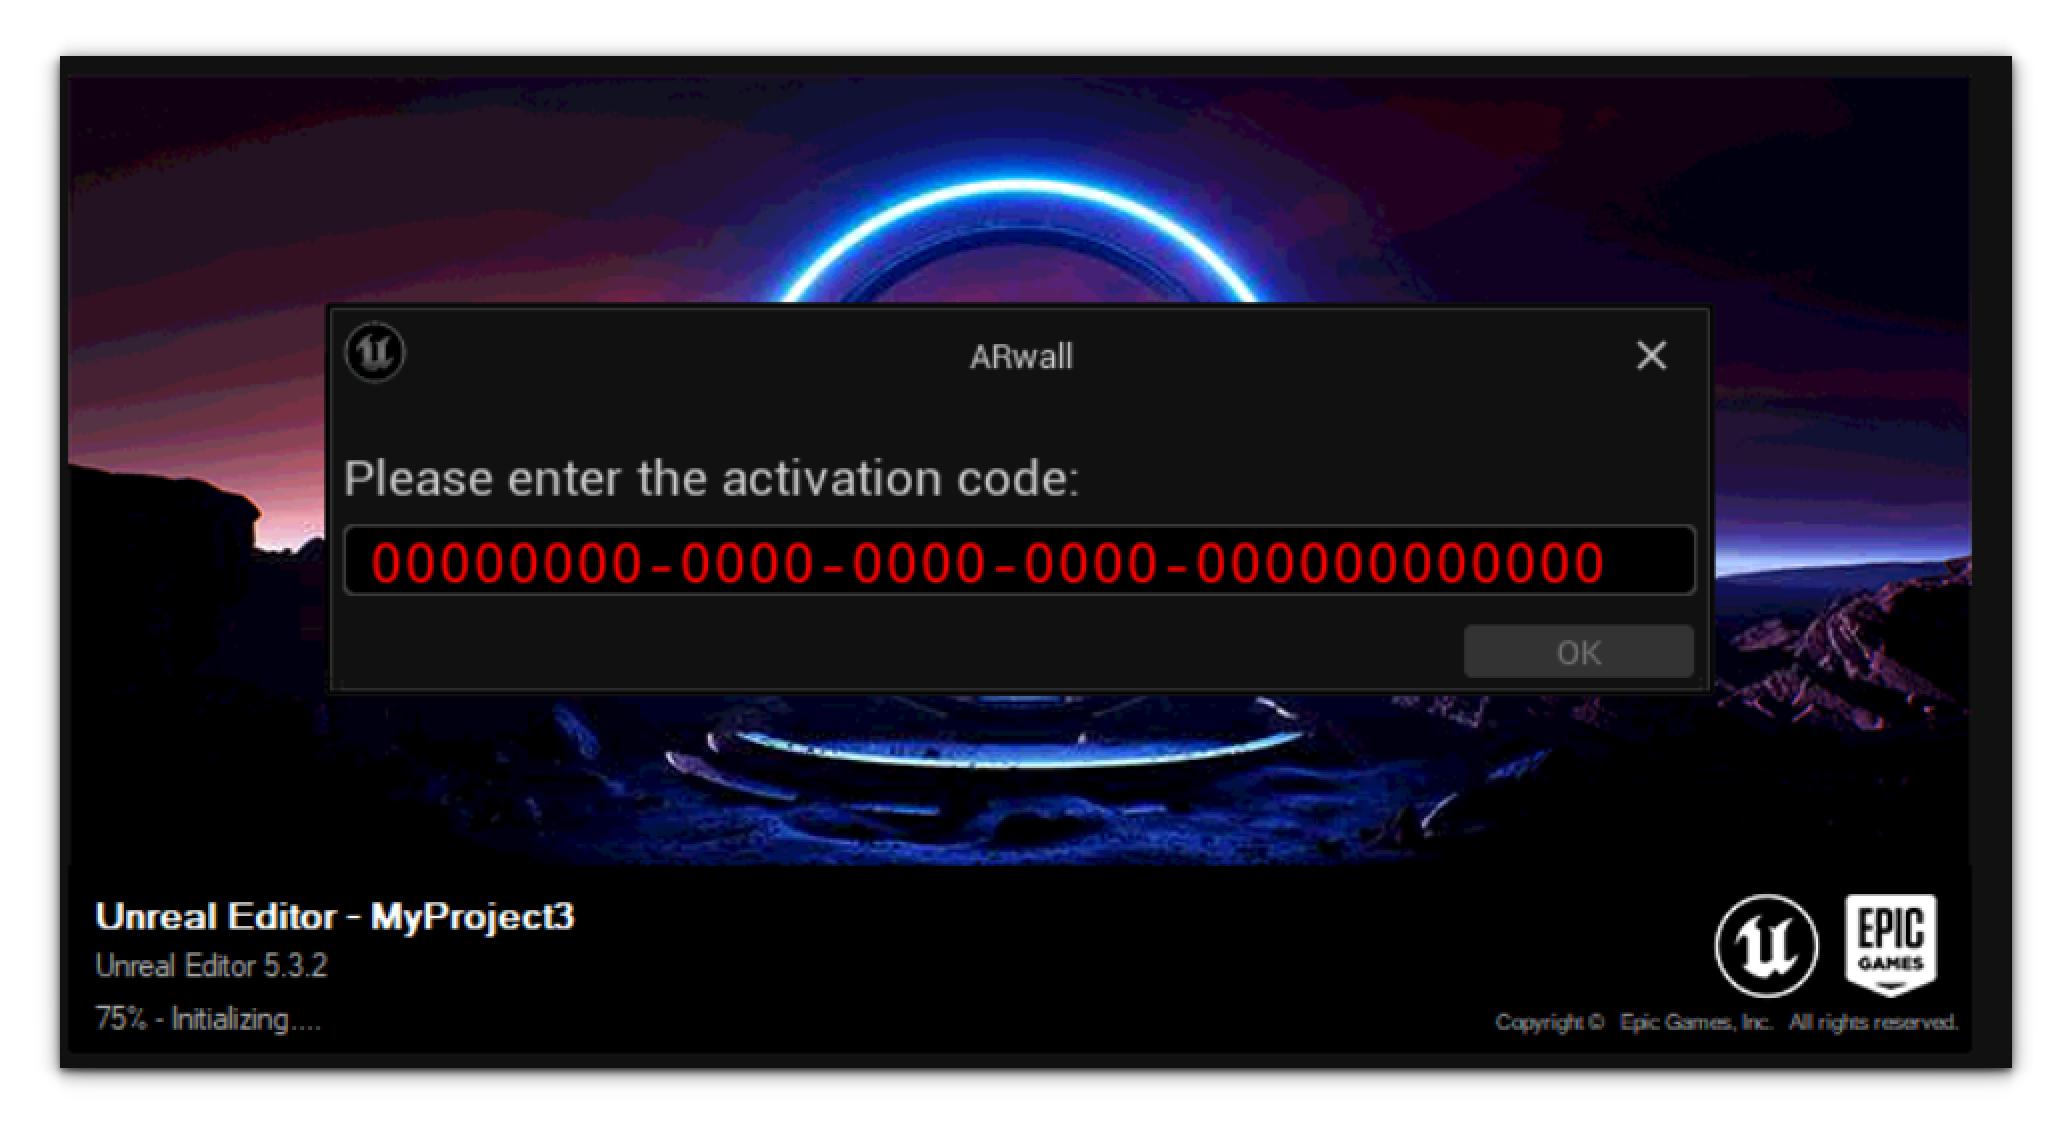 ImportantIf this is your first time using the ARwall Plugin this pop-up might be hidden under the Unreal Engine interface or the login screen. Please use ALT-TAB (hold down ALT button and tap TAB button to cycle through to the correct window) to select the Activation Code and Login screens if they are hidden behind other windows.
 - Once you have entered your Activation Code, click OK. Navigate to the ARwall Login screen.
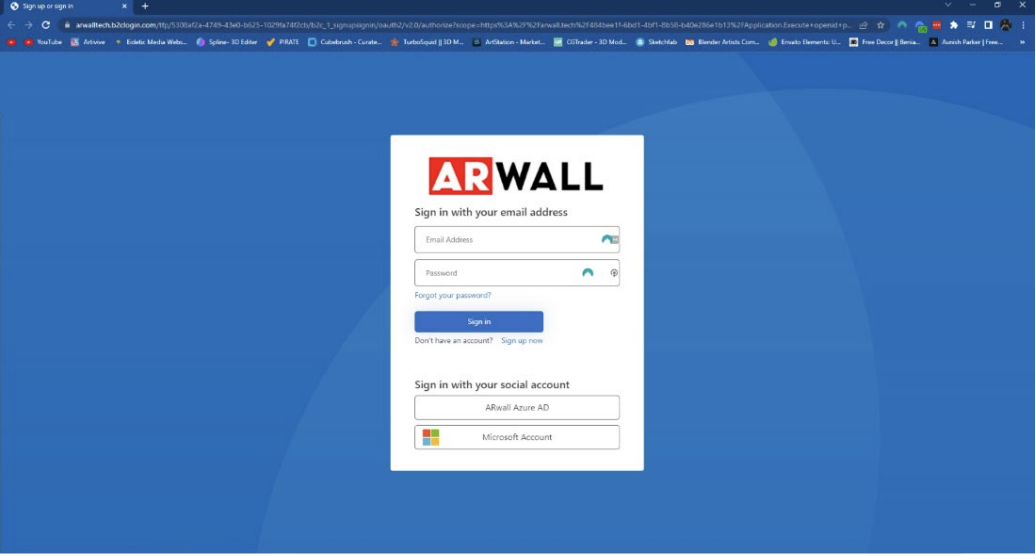
- Please log in using your existing login email and password.
- If this is your first time logging in, click “Sign up now” to create a new email/password account. Be sure to use this same account for all future logins.
- If your email is a Microsoft-related account, please use the “Microsoft Account” button to log in.
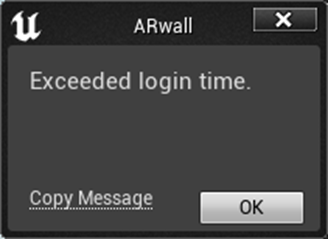
- You will have 90 seconds to enter your login information, otherwise, this will appear and ARFX will close. If this happens, click OK and launch the project file again.
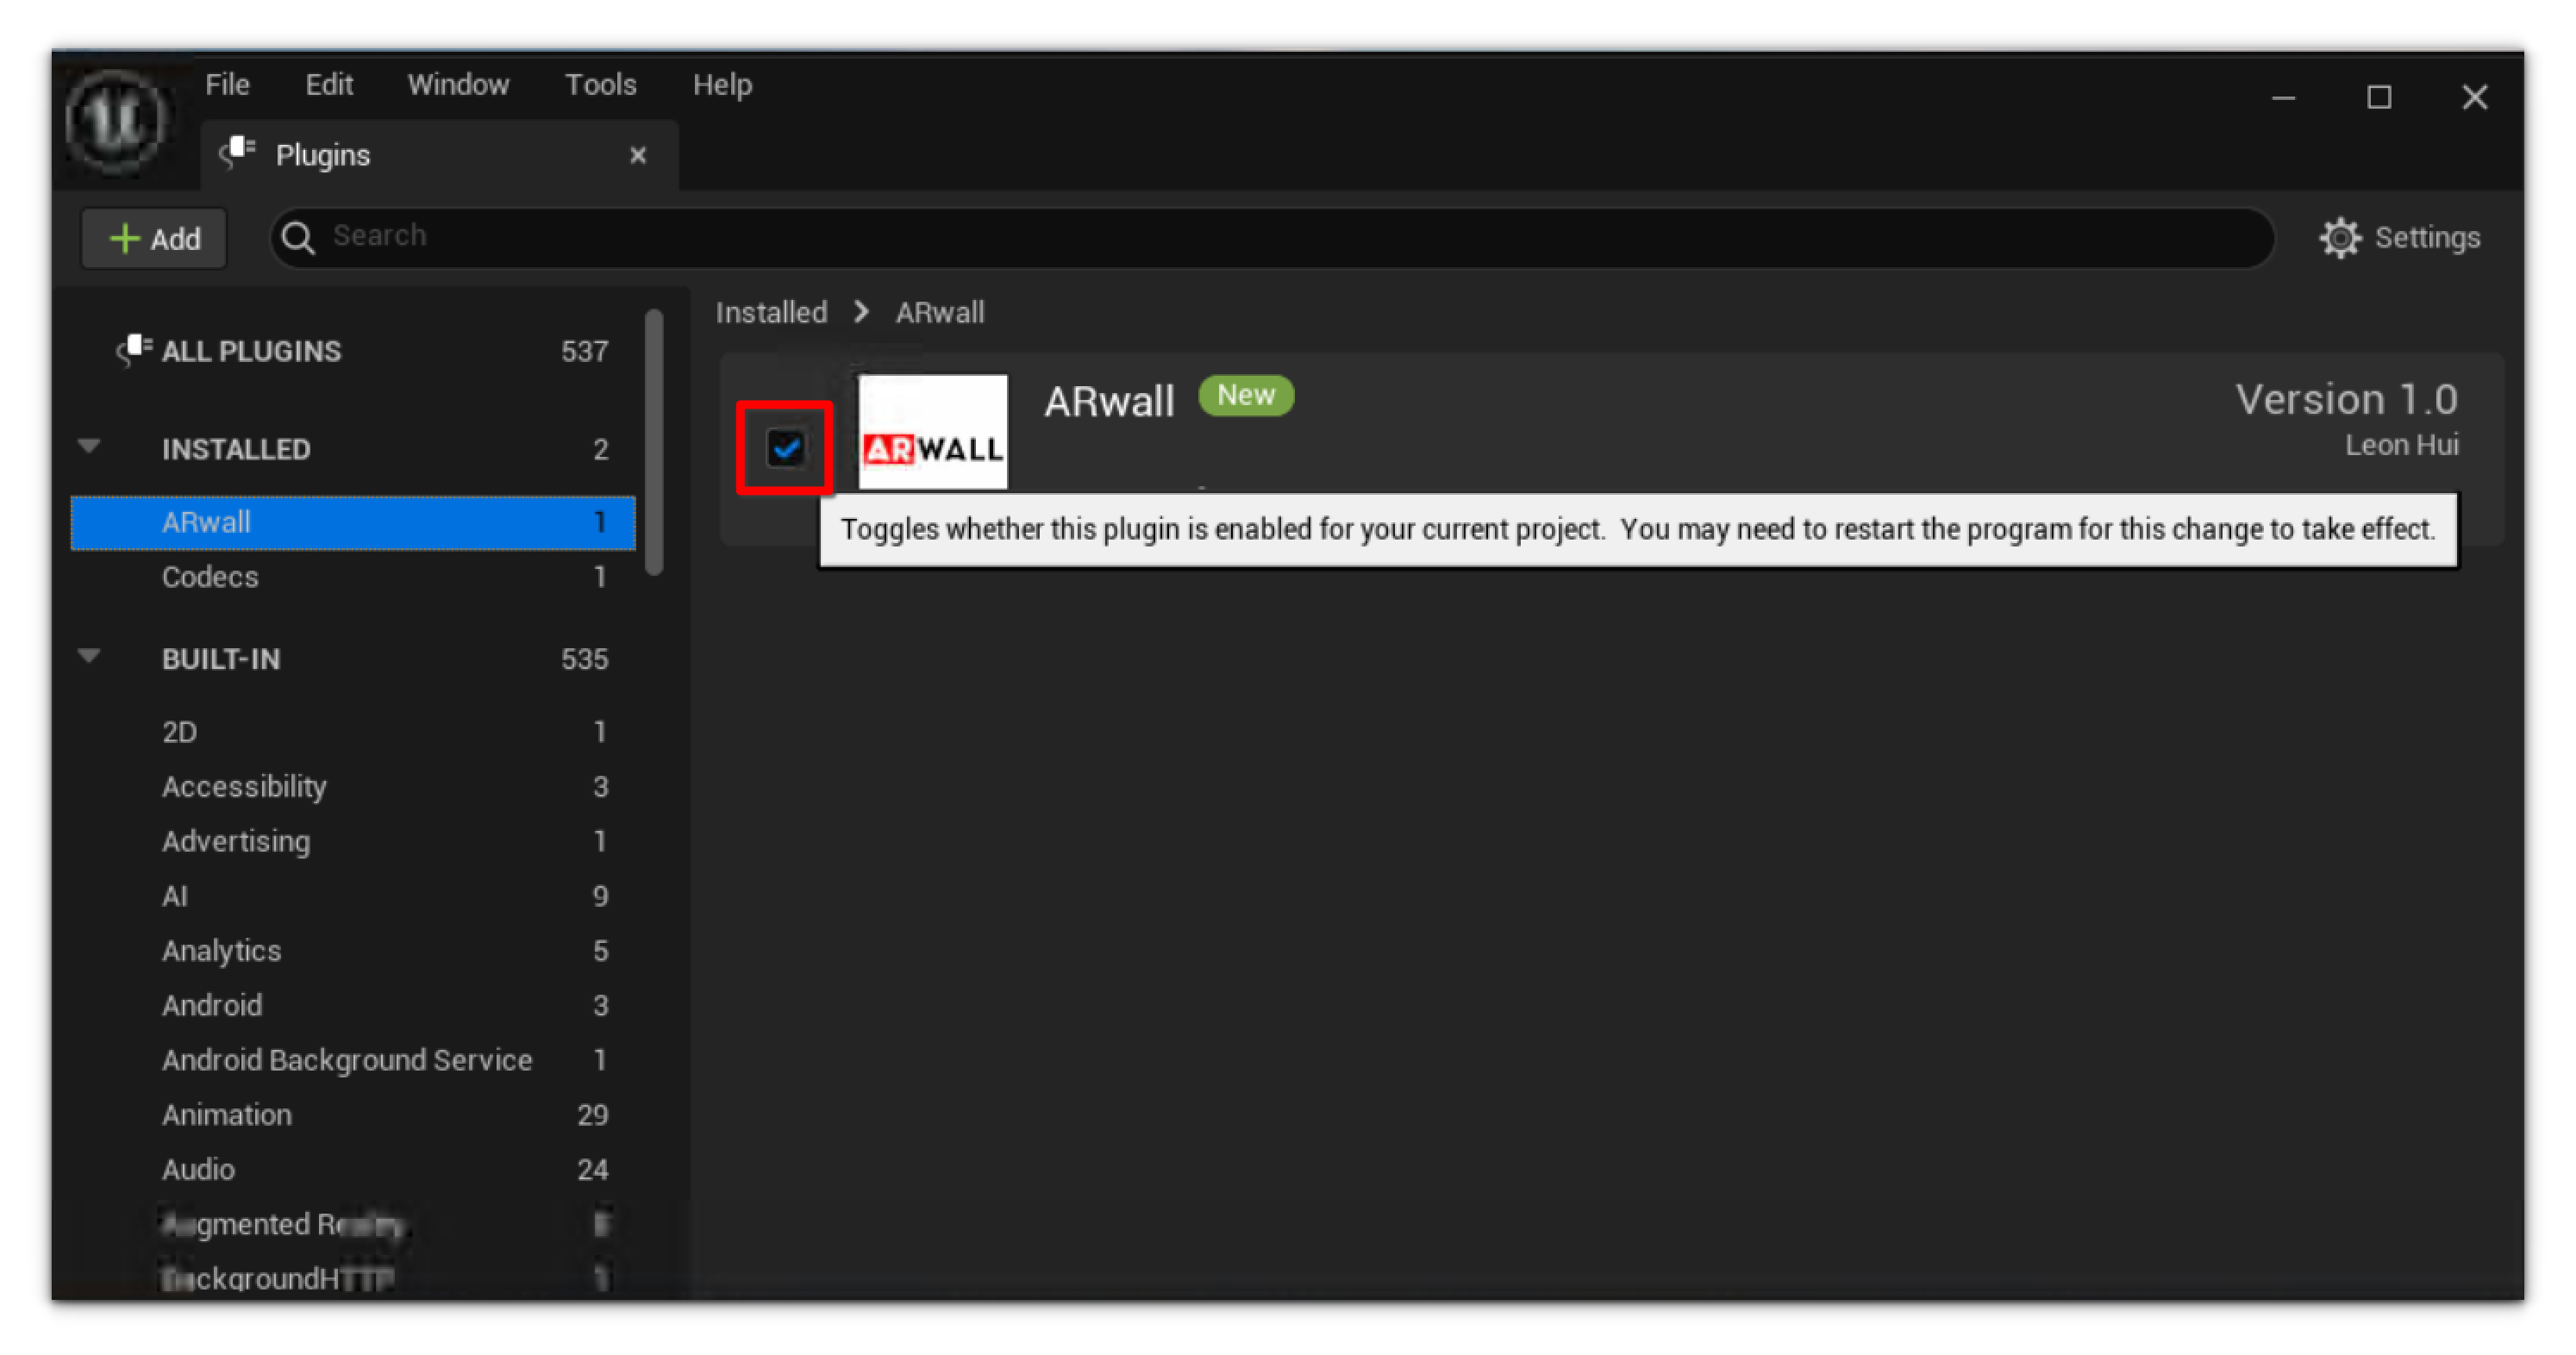
- Once you have successfully logged in, navigate to the Plugins window located at the top left section under the Edit tab.

- If the ARwall plugin is not enabled, ensure the corresponding checkbox is checked and the ARwall plugin should now be activated. Before restarting Unreal we need to check a few more Plugins for the ARwall Plugin to work properly.
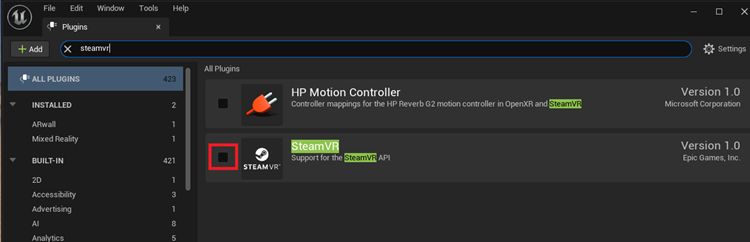
- Start by searching for the nDisplay plugin and disable it if enabled.

Then search for the SteamVR plugin and disable it, if enabled. Now you may proceed with restarting Unreal Engine.
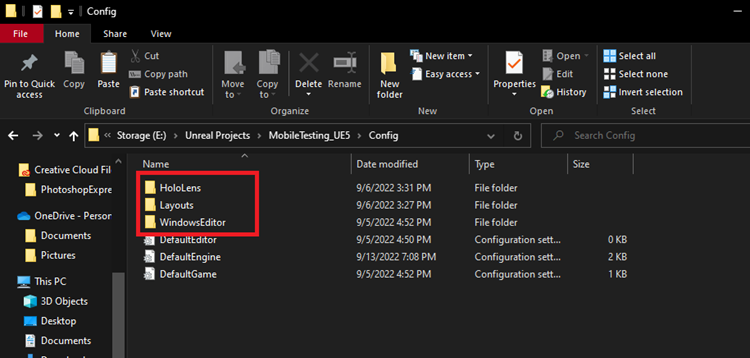
If starting up the Unreal Engine project shows any errors, navigate to project’s “Config” folder.
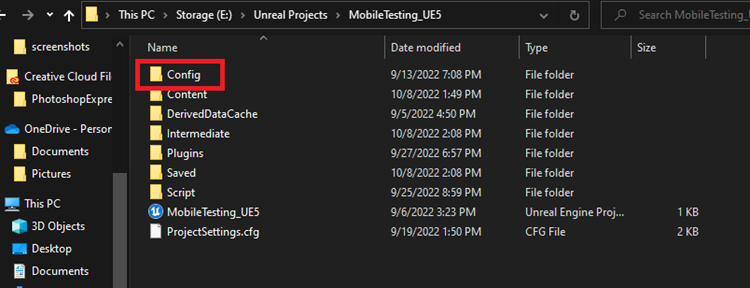
Delete any subfolders under the "Config" folder and proceed to launch the project file again.
Media Input/Output, Composure, and Take Recorder Set Up
Was this article helpful?